Bored of the same ol’ same ol’? If you’re looking for some fun baking bread ideas for the Year of the Cow/Ox, then you have arrived at the right page!
To usher in the lunar new year, how about applying a little twist to your usual bread making to impress your visiting relatives. It makes the perfect conversation topic diversion. Instead of the usual “when are you getting married?” or “did you gain weight?”; now hopefully they will be inquiring “how did you make this bread?” instead!
Using the trusty Tangzhong method, the core and taste of the bread will of course remain the same – so yes, you can expect soft, fluffy, delicious milk bread which you can read more about here. In this post, we are focusing more on the aesthetics that catches the eye.
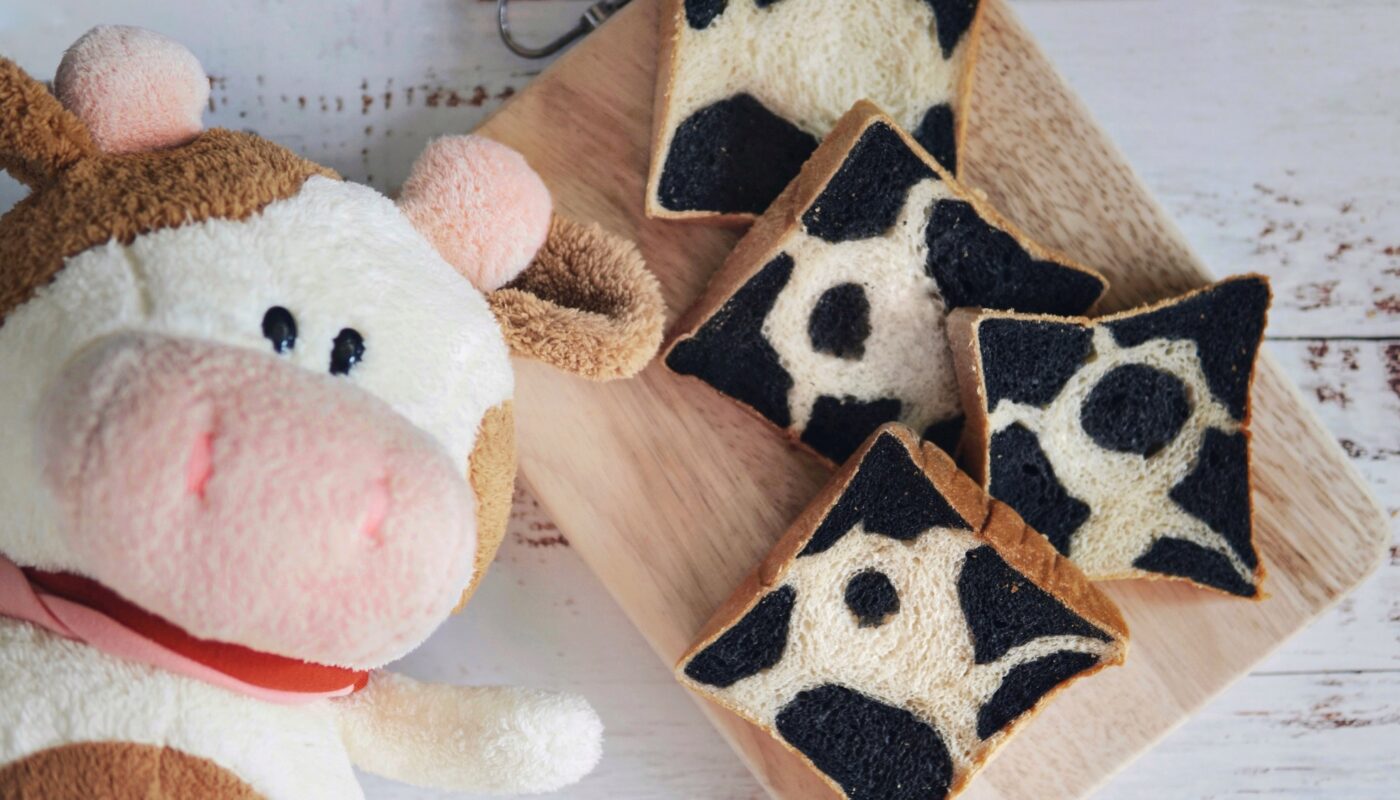
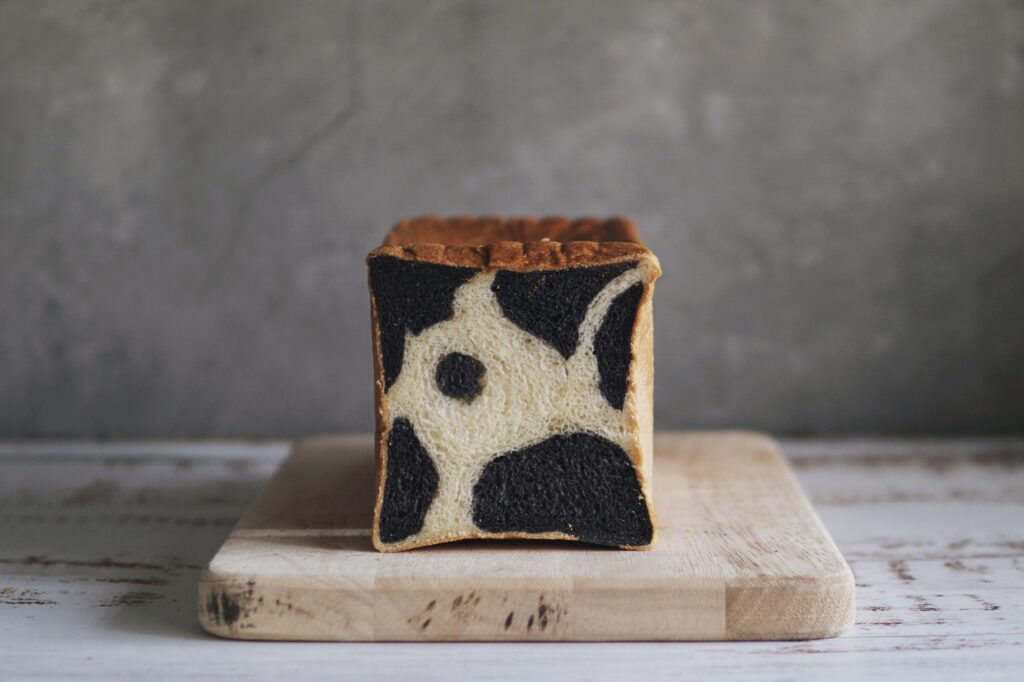
What I love about this kind of dough layering is that it adds a lot of fun to mundane bread making. You can make all sorts of patterns, mix colors, and you will probably never get an identical loaf. As 2021 Lunar New Year is the year of the cow, I thought it would be fun to mix some black and white in random patches to resemble one.
Using the same ingredients, you can design your bread any way you fancy!
If you think about it, just the zodiac calendar alone has lots of cute animals to draw inspiration from. I am making a mental note to self to take on one every lunar new year as a mini project. Next year I will probably retain the charcoal, swap the white parts for some orange and I will have a bread for the year of the tiger. The following year, maybe some adorable rabbit looking buns. And the year after that (dragon), errr… I will probably just give that a pass.
This Lunar New Year, instead of the classic “new year, new me” chant, how about “new year, new bread”? After all, it is one mantra that can be attained in a jiffy. 😉
Step-by-step Video Guide
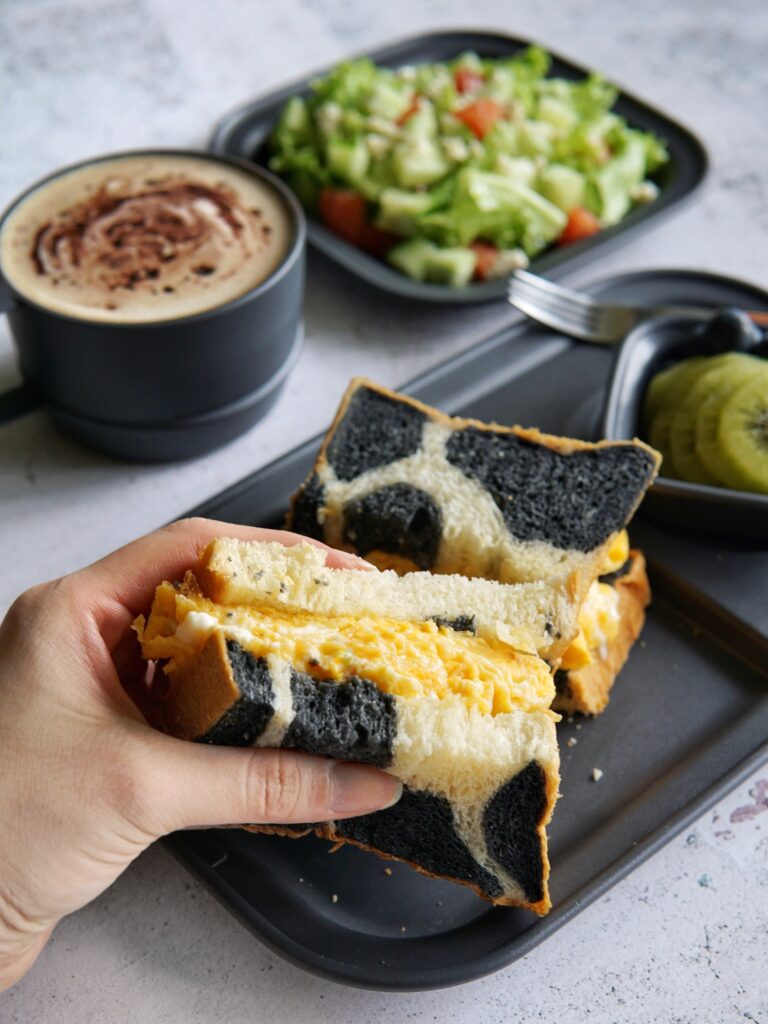
In this video, I share with you how I make this adorable milk bread with cow patches from start to finish.
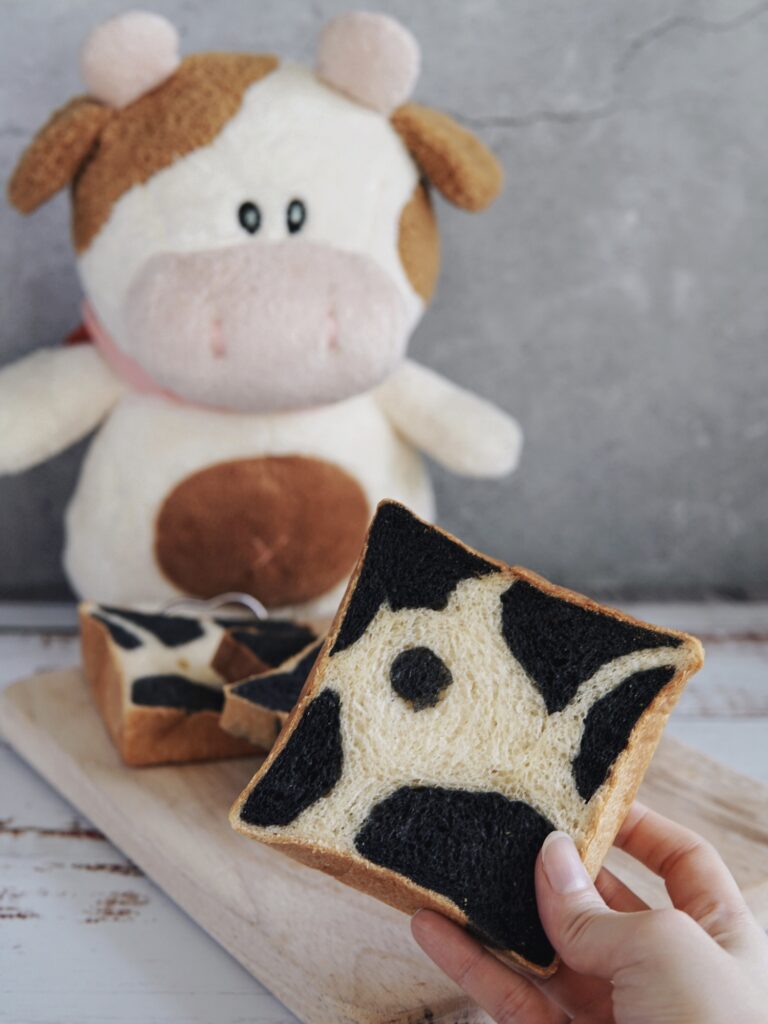
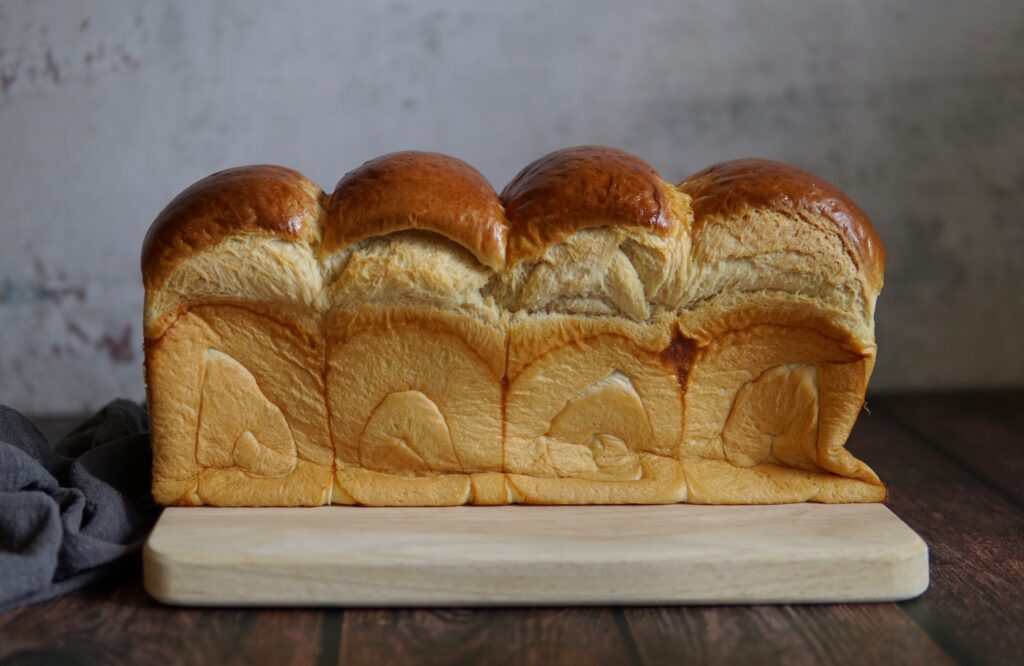
I particularly love how the cow patches vary ever so slightly on each slice – it’s almost like a surprise as you slice through the bread. And the best thing about this recipe is not having to weigh out each portion equally! You have the freedom to shape it to your own preference.
Do try out this recipe and channel your inner Picasso. I can’t wait to see what masterpieces you produce, so do tag me on Instagram @thebakeanista or let me know in the comment section below. Happy baking and a Happy Chinese Niu (牛) Year!
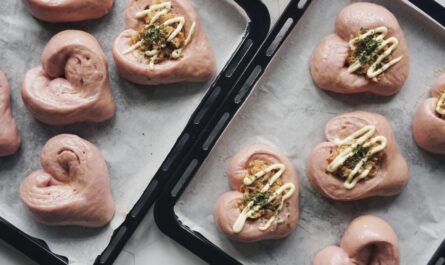
For other fun bread ideas, you may also want to check out my apple-shaped bun recipe too!
Cow Patch Milk Bread
Ingredients
Tangzhong
- 20 g high protein bread flour
- 100 g milk or water
Main Dough
- 130 g fresh milk chilled
- 1 egg yolk
- 30 g castor sugar
- ½ tsp salt
- 10 g milk powder
- 270-290 g high protein bread flour* refer to notes
- 1 tsp instant dried yeast
- 25 g unsalted butter at room temperature
Charcoal Dough
- ½ tsp charcoal powder
- ½ tsp milk
- 1 tbsp high protein bread flour
Instructions
- Please note that I have included two methods below for tangzhong making and dough kneading using either (A) CONVENTIONAL bread machine or stand mixer or (B) THERMOMIX so do take note of the sub-headings. If you're new to breadmaking, I also suggest you read through the notes and FAQ below the recipe.
(A) CONVENTIONAL – Tangzhong & Dough Kneading
- Prepare tangzhong by mixing flour in water/milk and whisk together in a pot, ensuring the mixture is well combined with no lumps. Cook over medium-low heat, stirring consistently to prevent burning and sticking while you cook.
- The mixture will gradually become thicker. Once you notice that some “lines” appear in the mixture for when you stir with the spoon, it’s done. Your tangzhong is ready.

- Transfer into a clean bowl. Cover with a cling wrap sticking onto the surface of tangzhong to prevent it from drying up. Let cool for 15-20 minutes. You can pre-make the tangzhong ahead of time and store it chilled in the fridge for a few days. If you've chilled your tangzhong, ensure to return it at room temperature first before using.
- When tangzhong has cooled completely, add all ingredients (except butter) into breadmaker; first the wet ingredients (egg, milk, tangzhong), then followed by the dry ingredients (sugar, salt, flour, milk powder, yeast).
- If using breadmaker, select "dough" mode and let knead until all ingredients come together, usually I let it knead for approximately 8-9 minutes. If using standmixer, use dough hook to knead until ingredients come together.
- Then add in the butter, continue kneading until the dough is smooth and elastic. The time of kneading in the breadmaker should take approximately 20-25 minutes. For those using standmixer, upon 15-20 minutes of knead time, check to see if dough has achieved windowpane stage.
- Remove dough and transfer to pastry mat. Divide dough into two equal portions. Leave one to rise, and place the other back into mixing bowl. Add charcoal dough ingredients (charcoal powder, milk and flour) into mixing bowl and knead for 3-4 minutes until well incorporated.
(B) THERMOMIX – Tangzhong & Dough Kneading
- To make the tangzhong, place 20g high protein flour and 100g milk in mixing bowl, cook for 3min/80°C/spd 3 and let stand for 10-15 minutes until temperature lowers down to 37°C.
- Add 130g milk, egg yolk, sugar, salt, milk powder, remaining 270g high protein flour and yeast then knead 4min.
- Add butter, knead 1min.
- Remove dough and transfer to pastry mat. Divide dough into two equal portions. Leave one to rise, and place the other back into mixing bowl. Add charcoal dough ingredients (charcoal powder, milk and flour) into mixing bowl and knead 30 seconds until well incorporated.
Bulk Fermentation & Dough Shaping
- Transfer charcoal dough to pastry mat and shape both doughs into smooth, round balls. Let proof in a warm place covered loosely with clingwrap/damp towel until doubled in size (approx. 45-60 minutes).
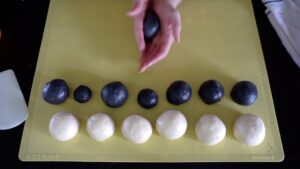
- Grease hands lightly with neutral flavoured oil or butter, then punch down both milk and charcoal dough to deflate. Divide milk dough into 6 equal portions and charcoal dough into an uneven mix of 8-9 big & small portions. To preshape, roll each portion into a round, even ball then let sit on bench to rest for 15 minutes.
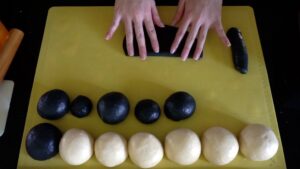
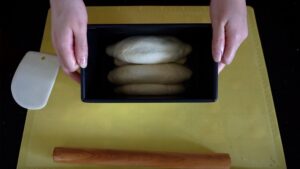
- To shape the cow patches, firstly flatten 1 or 2 charcoal dough with a rolling pin and roll into a log. You'd use 2 charcoal dough logs for bigger patch, and 1 charcoal dough log for smaller patch.
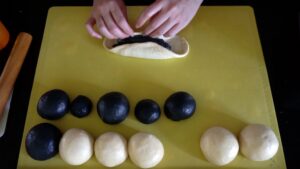
- Roll out a milk dough, and encase charcoal log(s) within. Pinch the seams then roll out to bread tin's length.
- Place seam side down in bread tin. Repeat for remaining dough and arrange evenly in tin. Cover and let rise for 40 minutes or until 80% to the rim. During last 15-20 minutes, preheat oven to 190°C.
- For square-shaped loaf, put the greased lid on and bake on the second rack from bottom at 190°C for 25 minutes, then lower down the temperature to 180°C and bake for a further 10 minutes.
- Remove bread from tin and allow to cool completely on a cooling rack for at least an hour before slicing and serving.
Notes
Few Things to Note
When it comes to bread making, there are many factors that will influence your dough and the end product. Recipes should be used as a guide, as you familiarize yourself with the process and dough.
For instance, your dough may require extra kneading time depending on the flour and its protein content. The method used to knead also needs to be taken into account as some machines work the dough quicker, whilst others may require a bit more kneading time.
Temperature and humidity plays a big part in how your dough rises. The amount of time required to proof your dough also varies depending on where you’re based at. For my second proofing, I usually heat up a cup of water in the microwave for 1 minute, then proceed to leave my dough inside the microwave to rise for 25-30 minutes.
It’s also very important to try to get to know your oven, as every oven is different. My oven heats up quickly so when a recipe calls for 180°C, I sometimes drop it down to 160-170°C. Keep an eye out as the bread is baking. Adjust either the baking temperature or duration according to how your oven behaves. The tip is to have an oven thermometer so you know if your oven is preheated well enough and if it can maintain the heat required to help with the bread’s oven spring.
FAQ
Can I use whole egg instead of just the egg yolk?
By using just egg yolks, we are adding fat, richness and flavour to the bread. The fats from the yolk works to tenderise the crumb and lighten the texture which gives our loaf a rich and soft crumb. You can use the whole egg if you like, but you will have to adjust the recipe accordingly or you’d be adding too much hydration with the addition of the egg whites as well.
Help! My dough is too sticky!
For bread maker users, check the dough 10 minutes into the kneading cycle. It should be smooth and the mixing bowl should be clean by now. If your dough is too sticky to manage, you may add 1 tbsp of flour at a time.
For Thermomix users, if you experience a stickier dough (particularly for TM6 users) you may want to increase to 290g of high protein bread flour in your main dough to be able to better manage the dough. If your dough is still too soft to handle, add 1 tbsp of flour at a time and knead for 15-20 seconds until incorporated.
Lightly oil your hands (and the pastry mat depending on how sticky your dough is) using neutral flavoured oil to shape dough into a ball. Apply the chafing technique by cupping your hands gently around the dough, apply a light, downwards pressure to the sides whilst simultaneously rotating the dough in a circular clockwise motion. Continue doing so until a smooth, even, and round ball is formed. I shared a video of how I perform this technique saved on my Instagram Story highlights.
How do I know if my bread is well proofed and ready to be baked?
You may perform the visual test to check. Lightly press the surface of the proofed dough with the tip of your finger for about 2 seconds and observe how fast the dough bounces back up.
- UNDER-PROOF: If it bounces back up too fast without any indentation, it isn’t ready yet, so give it more time.
- READY TO BAKE: It is supposed to bounce back up slowly, about halfway up and leave a slight indent.
- OVER-PROOFED: If the indent remains without bouncing back up, yes it is over-proofed.
Which oven rack and what oven setting should I use?
I suggest the second rack from bottom. I bake using top and bottom heat, with fan.
When to remove bread from tin?
Upon removing from oven, immediately remove it from the bread tin and let cool on a wire rack. This step is crucial in ensuring there is proper air circulation and that condensation does not happen causing your bread to get wet/soggy at the bottom.
Should I cover the bread as it cools?
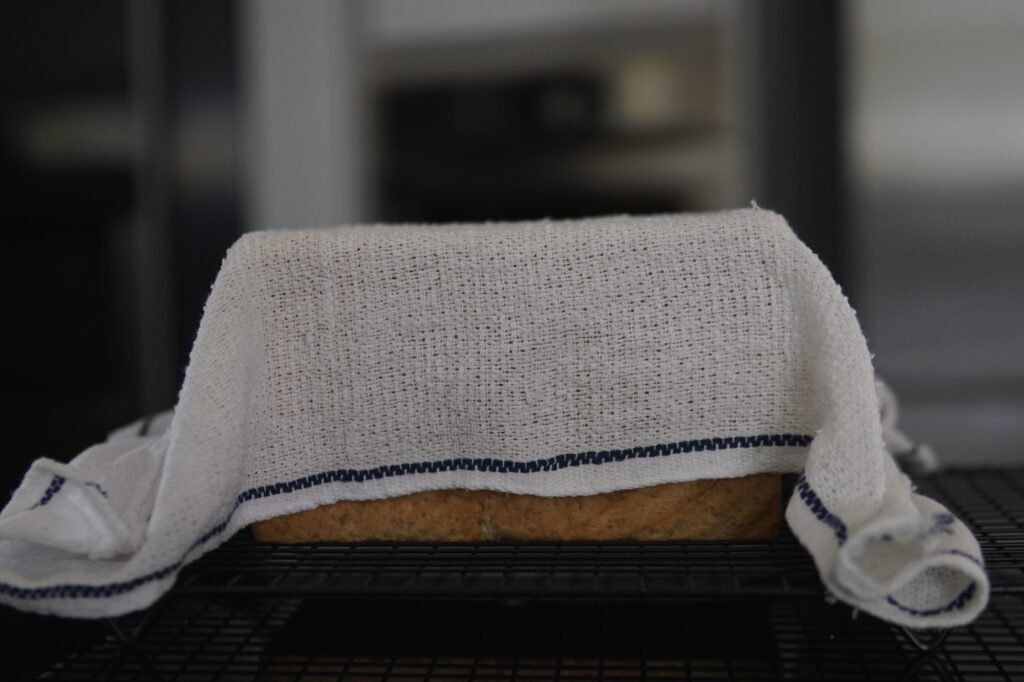
It isn’t necessary to do so. By covering with a cloth, the cloth captures the steam that makes its way outwards and acts to soften the crusts. If you prefer crust with more of a bite, then there’s no need to cover the loaf.
When do I slice the bread?
Of course, I understand how hard it is to resist freshly baked bread. But! Slicing into your loaf of bread before it has cooled down completely may sometimes result in wet gummy crumb texture. Always let your bread rest for at the very minimum 30-60 mins, best for 1.5-2 hours. Just like how you would rest your meat after cooking, the same theory applies for your bread. By allowing your bread to cool completely, it helps stabilise the crumb structure.
Once it has completely cooled down, you may store entire loaf and slice only when you wish to consume. This is because the longer you rest it, the easier it will be to slice the bread. If you’re finding it tricky to slice a loaf of freshly baked bread, check out my video on how I slice soft loaves.
Oh no! My bread caved in at the sides after baking. What should I do?
Unfortunately there is nothing we can do to save a bread that has caved in and collapsed. But you could take note of a couple of things that may have potentially caused this and ensure the same does not happen for your next loaf. The collapsing is a result of the exterior wall being too weak to support the structure. There are two reasons that may have caused this:
1) Your bread may potentially be under-baked. Try baking it a little longer to set the wall but if it is browning too much, you could tent the top with foil or baking paper. Alternatively try baking it at a higher temperature during the first 1/3 of the baking time then drop the temperature to finish cooking for the remaining 2/3 of baking duration.
2) Sometimes the bread would also cave in if the dough was over-proofed during second proofing as the whole structure is too weak to support the entire tall loaf. I suggest setting a timer less than the duration you intend to let it proof so you have time leeway. Perform the visual test if need be.
How to store bread?
Ensure to store bread in airtight container or ziplock bag so the bread can stay soft and last for up to 2-3 days at room temperature.
What do I do with leftovers that I can’t finish in 2-3 days?
If you are unable to finish within the first 2-3 days, it is best to store your bread in the refrigerator since there is no added preservative. Without preservatives, our homemade bread will not stay as soft and fresh as other commercial loaves beyond 3-4 days. Before consuming though, you may want to either toast/steam/microwave.
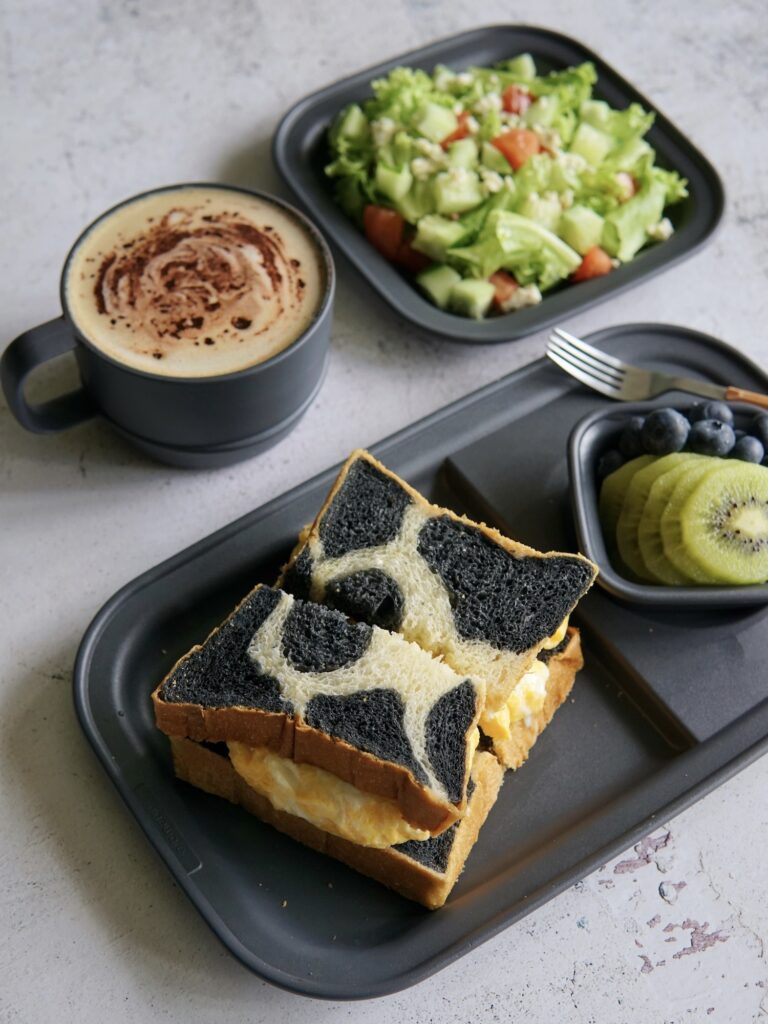
Perhaps if you would like some fun bread ideas using your Tangzhong Milk Bread leftovers, check out thus video below on how to make Monte Cristo Sandwich – complete with mukbang at the end too! 😉
Have you tried this recipe?
IF YOU MADE THIS RECIPE, I’D LOVE TO SEE HOW IT WENT!
TAG ME ON INSTAGRAM @THEBAKEANISTA SO I CAN HAVE A LOOK AND RE-POST ON MY IG STORIES!
IF YOU ENJOYED THIS RECIPE, YOU MAY WANT TO CHECK OUT MY RECIPE INDEX FOR OTHER DELICIOUS RECIPES.
Love the recipe from this website. I’ve tried almost all the bread recipe here. Very good and accurate. Love it when she also have recipe using Thermomix. She is also helpful if you have any question to ask her. Thanks a lot!
Thank you Suyin! It makes me happy to know that I am able to help you successfully bake soft fluffy bread. 😊
Beautifully fluffy and eye-catching :)) Loved the inclusion of standmixer instructions as it’s what I personally use
Made this today and it turned out really really great. I didn’t have charcoal powder so I substituted with cocoa powder and still turned out very cute. The bread is so soft and fluffy. I have tried other tangzhong bread recipes by far this is the best one. Will definitely make this again but i will attempt to make your other recipes first 🙂 thank you michelle you made my day.
Thank you Dewii!! Your lovely feedback made my day. 😊
This was so fun to make! And turned out delicious, too! Was a big hit with the family. Thank you for always sharing your recipes!
One of the things I love hearing most is how the end result is a big hit with your fam! Yay! ☺️
Thank you for the recipe to usher upcoming Lunar New Year. Baked this cow milk bread yesterday. Learning from my first bake is to set my oven temperature to 180c then to 170c so the skin can be softer. Always love your bread recipe which includes Thermomix method.
Yes, we need to adjust to suit our respective ovens. Once you find your sweet spot, you can stick to that. 🙂
Made this for my bread lover toddler and she was over the moon! Thank you for such clear instructions! Looking forward to more recipes from you!
Definitely a bread that would excite the kids! 🙂
It’s so fun! I can never go wrong with your recipe! My bread don’t usually grow with other’s recipe but always grow for your recipe! Hahahah! Amazing! It’s so soft even we eat it on the day 4!
Am going to try the earl grey bread tomorrow!😁
Thank you for your feedback! Loaves in my house don’t last beyond 2 days – they’re gone so quickly! But I’m glad to hear they’re still soft on day 4. And without preservatives! Can’t wait to see your Earl Grey bread next!
Finally make this cow’s bread today and it turns out sooooo good!!! It’s also very fun shaping between the charcoal and milk dough! I think I’m addicted to it and gonna make it all year round? 😛
Thank you so much for the recipe and step by step guide. So much easier to follow ❤️
Thanks for sharing this recipe Michelle!
It turns out very soft and fragrant, the steps in creating the moo moo patches are easy to follow. It works well with hand knead without TM or bread maker too 🥰🥰
Wow hand knead! You’re amazing! I’m glad the recipe worked out well for you ☺️
Thanks for this great recipe. It’s nice and fluffy loaf we got!!
Thank you for the lovely feedback!
Sorry I haven’t stopped by sooner. Your instructions were great! Thanks for helping me to make my purple cow bread (at uglyducklingbakery.com)
Your purple cow bread is cute! 🙂
Made this with my TM so easy and turns out very fluffy, Michelle is a sweetheart too she helped me with the proofing steps! Can’t wait for the kids to come home and see the moo moo toast 😊
Wish I could see your kids’ reaction too! I bet they’d be excited. 🤗
Really enjoyed making this recipe. Instructions were easy to follow and made especially effortless with Thermomix! The beautiful spots creating the Moo Moo effect is amazing!
Great recipe and very helpful video to guide for newbie like me. Will definitely try the rest of the recipes. Thank you very much Michelle
Tried this recipe today and it turned out really nice even though mine is overproof Thanks for sharing the recipe Michelle. Will try your other recipes.