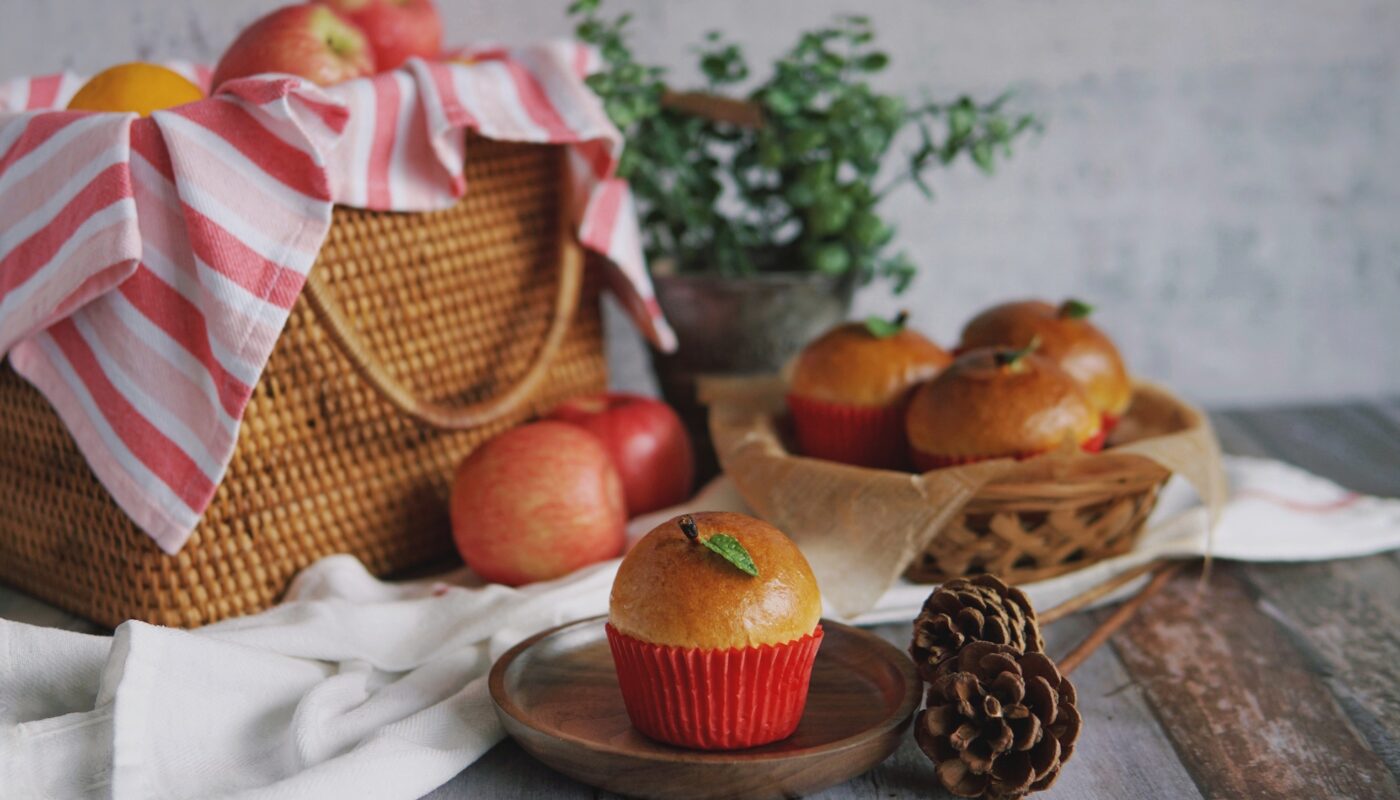
If you love apples and want to find new ways of incorporating them into your bakes other than the usual apple pies and apple crumble, then this recipe might just be for you. I chanced upon these in an Asian bakery store once. The description of apple and cinnamon was already enough for me to pick up one piece. The adorable aesthetics made me pick up the second. I mean, look, they are just too adorable.

Get your an-apple-a-day dose in the form of this cute bun. It might not be what your doctor actually ordered, but I guarantee you would not stop at one!
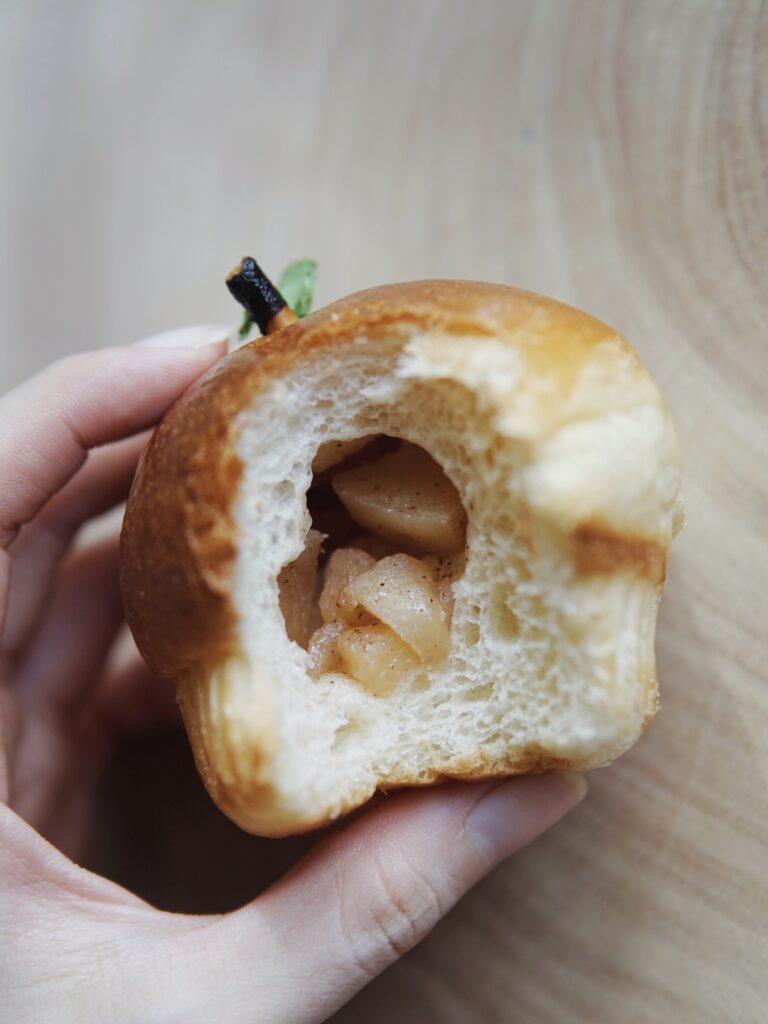
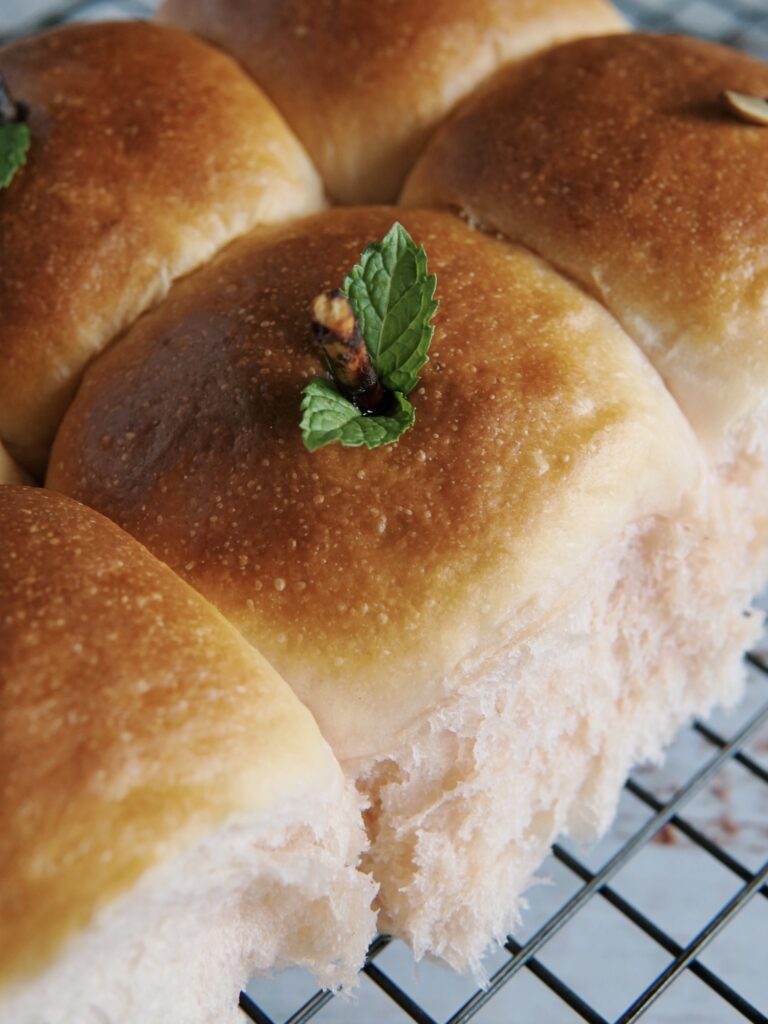
Resembling an apple from the stems and leaves all the way down to its’ shape, nothing gets more adorable than this apple bun. Also, check out how airy the texture is – soft to the bite with a balanced sweet and tart filling!
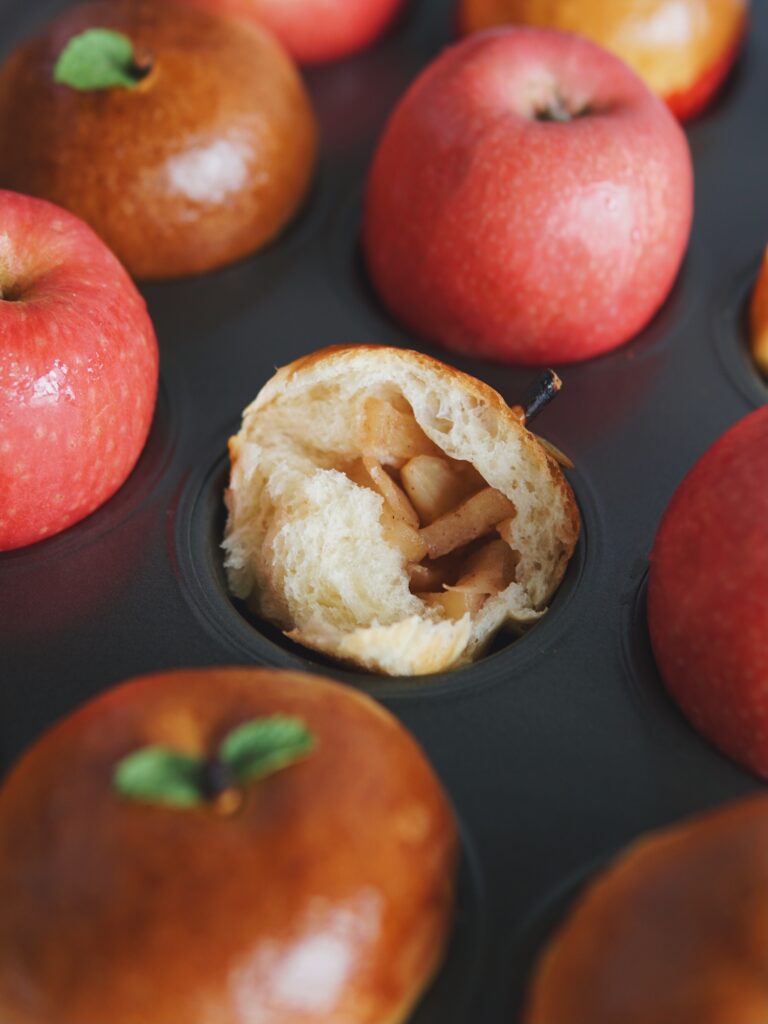
As I will be cooking the apples with sugar, any cooking apple cultivar would work well. As opposed to dessert apples which are usually eaten raw, cooking apples tend to be more tart and firm so they don’t break down much when cooked. I used pink lady apples for this recipe; they are one of the many cooking apple cultivars which can also be consumed as an eating apple.
For how frequent I bake regular buns and bread, it can turn mundane. But every once in a while, a little twist injects fun and motivation to the process. Like in this case, with the apple theme, the little added details add a ton of fun, and twice as rewarding when it turns out actually resembling an apple. The best part, I get to nibble on the surplus of Pocky sticks as I bake!
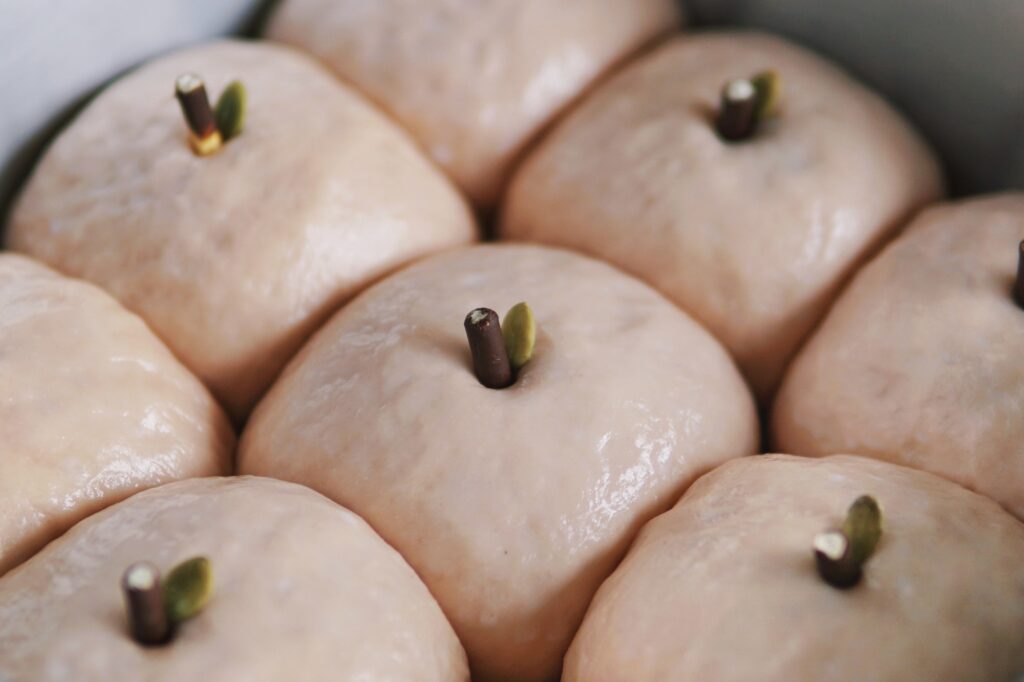
Of course, you don’t have to shape and bake them in the cupcake tins if you do not have any handy. For convenience, I sometimes opt to bake them in square baking trays and they turn out equally cute anyway. For the “leaves”, you can use either pumpkin seeds (garnish before baking) or mint leaves (garnish after baking).
As for the dough, I’ve included both the conventional and Thermomix methods down below. You may also notice that these buns have a slight tinge of baby pink to them! Adding ½ to 1 tsp of either purple sweet potato powder or beetroot powder to the dough would give the dough a slight tinge of colour, making them even cuter than they already are!
Here’s a step-by-step video guide to show you how I make these cute apple-shaped buns from start to finish:
Hope you have fun baking these delicious apple buns. Do try them out and let me know how it went in the comment section below! If buns aren’t your thing, maybe you may want to check out my moist apple cinnamon cupcakes instead.
Apple Bun りんごパン
Ingredients
Tangzhong
- 20 g high protein bread flour
- 100 g water/milk
Main Dough
- 30 g milk chilled
- 30 g whipping cream chilled
- 40 g castor sugar
- 1 large egg
- 1 tsp yeast
- ½ tsp purple sweet potato powder optional
- 270 g high protein bread flour
- 20 g milk powder
- ¼ tsp salt
- 30 g butter softened at room temp
Apple Filling
- 2 apples
- 40 g brown sugar
- ½ tsp cinnamon powder
Topping
- Pocky sticks as stem
- 12 pieces pumpkin seeds or fresh mint leaves as leaves
Instructions
- Please note that I have included two methods below for tangzhong making and dough kneading using either Thermomix or conventional bread machine so do take note of the sub-headings.
[THERMOMIX] Tangzhong & Dough Kneading
- To make tangzhong, place 20g high protein flour and 100g water/milk in mixing bowl, cook for 1min/75°C/spd 2 and let stand for 10-15 minutes until temperature lowers down to 37°C.
- Once temperature hits 37°C, add milk, whipping cream, sugar, egg and yeast, then mix 30 sec/spd 2.
- If you want your dough to turn out pink, this is when you'd add in the purple sweet potato powder. Followed by high protein flour, milk powder, salt and butter then mix 30secs/spd 6. Proceed to knead 4 min.
- Transfer dough to pastry mat, shape into ball and let rise, covered loosely with clingwrap/damp towel until doubled in size (approx. 45-60 minutes).
[CONVENTIONAL] Tangzhong & Dough Kneading
- Prepare tangzhong by mixing flour in water and whisk together in a pot, ensuring the mixture is well combined with no lumps. Cook over medium-low heat, stirring consistently to prevent burning and sticking while you cook.
- The mixture will gradually become thicker. Once you notice that some “lines” appear in the mixture for when you stir with the spoon, it’s done. Your tangzhong is ready.

- Transfer into a clean bowl. Cover with a cling wrap sticking onto the surface of tangzhong to prevent it from drying up. Let cool. You can pre-make the tangzhong ahead of time and store it chilled in the fridge for a few days. If you've chilled your tangzhong, ensure to return it at room temperature first before using.
- Add all ingredients into breadmaker; first the wet ingredients (tangzhong, egg, milk, cream), then followed by the dry ingredients (in order of sugar, salt, flour, milk powder, yeast). If you want your dough to turn out pink, you'd add in the purple sweet potato powder along with the bread flour.
- Select "dough" mode and let knead until all ingredients come together, usually I let it knead for approximately 8-9 minutes.
- Then add in the butter, continue kneading until the dough is smooth and elastic. My breadmaker's dough kneading cycle is 23 minutes.
- Transfer dough to pastry mat, shape into ball and let rise, covered loosely with clingwrap/damp towel until doubled in size (approx. 45-60 minutes).
Apple Filling
- Whilst dough is proofing, prepare apple filling. Peel, core and cut each apple into small cubes.
- CONVENTIONAL: Place apples in microwavable bowl, add sugar and cinnamon then stir to coat. Cover bowl with clingwrap and poke holes over the top. Microwave on high for 4 minutes until apple is tender. Stir and then drain apple over a sieve. If you do not have a microwave, you may cook apples over stove. Place apples, sugar and cinnamon powder in a pan and cook over medium heat until apple becomes almost tender. This should take approximately 6-7 minutes. Stir and then drain apple over a sieve, then set aside to let cool.
- THERMOMIX: Place apple pieces, sugar and cinnamon powder into TM mixing bowl. Cook at 100°C/Reverse/Soft Spd for 10 minutes. Stir and then drain apple over simmering basket then set aside to let cool.
Dough Shaping
- When dough has doubled in size approximately 45-60 minutes later, punch down dough to deflate.
- Divide dough into 12 equal portions weighing approx 50g each and pre-shape by rolling into a round ball. Leave the dough to bench rest for 15-20 minutes, covered so the dough will be easier to handle.
- Grease or line a regular cupcake tin. Break pocky stick into 1-inch pieces.
- To fill buns, flatten dough with greased rolling pin – like a pancake. Spoon a heaping tbsp of apple filling in the center. To encase filling, gather up the sides to the center and pinch to seal.
- Placing seam side down, perform the chafing action by applying a light, downwards pressure to the sides, whilst you simultaneously rotate the dough in a steady circular motion. Continue until dough is formed into a smooth, even round ball. Place dough seam side down in tin. Repeat for all dough.
- Let proof for approximately 25-40mins. I usually heat up a cup of water in the microwave for 60 seconds then proceed to leave dough inside the microwave to rise. During last 15 minutes, preheat oven to 180°C.
- After dough has doubled in size, brush egg wash on the dough surface. Gently stick a piece of broken Pocky stick on top of each bun. If using pumpkin seeds as "leaf", gently place it next to Pocky stick.
- Bake at 180°C for 15-20mins until golden brown. Remove from oven, and transfer each bun onto a wire rack to let cool completely. If using fresh mint leaves, you may garnish once buns have cooled down.
- These buns are best served fresh on the same day! If you wish to store bread, ensure to allow buns to completely cool down before storing in air tight container for up to 2-3 days.
Notes
I do not have whipping cream handy – what can I subtitute with?
Do not substitute the 30g of cream with another portion of 30g of milk. Both these ingredients have different % of fats etc. Instead, what you can do is to use my regular Tangzhong Milk bread here that calls for no cream, but follow the same portions and bun shaping steps in this recipe.What type of apples should I use?
I would use apples that are more on the tart side such as Granny Smith or Pink Lady apples. But any type of apples would work fine!I do not have a cupcake tin.
Baking the buns in a cupcake tin is purely for aesthetic purposes. You could either opt to bake them in individual muffin liners, or if you like, in a rectangular/square/round baking tin.Have you tried this recipe?
IF YOU MADE THIS RECIPE, I’D LOVE TO SEE HOW IT WENT!
TAG ME ON INSTAGRAM @THEBAKEANISTA SO I CAN HAVE A LOOK AND RE-POST ON MY IG STORIES.
IF YOU ENJOYED THIS RECIPE, YOU MAY ALSO WANT TO CHECK OUT OTHER DELICIOUS RECIPES HERE.
The apple cinnamon bun in cupcake liner is adorable.
Decided to give a try. With an added organic/natural pink colour, the bun looks so sweet.
Thumb up 👍 for your easy to follow recipe.
Thank you.
Thank you for your kind words! I’m glad this recipe worked out well for you too. 🍎
Very creative and cute buns, brilliant idea to bake in a muffin tin, love the many alternatives offered. Look forward to trying out other recipes!