
This Hokkaido Milk Bread recipe always yields beautiful loaves that are pillowy soft and tender, with a springy texture. The bread tastes delicious and exceptionally milky.
This Japanese milk loaf is slightly sweetened, therefore can be eaten plain on its own, or with a spread of butter for breakfast. It’s a recipe that both the kids and elderly will enjoy!
So, what is the secret to making this soft, springy, deliciously milky bread?
Tangzhong, or also known as the water roux method.
What exactly is this tangzhong method that is now famous worldwide?
The tangzhong method (湯種法) is an Asian technique widely known for making super soft and sweet bread! This technique calls for a ratio of 1:5 flour with liquid to be cooked into a gelatinous looking paste. This paste is then left to cool before adding to the rest of the ingredients.
In a nutshell, this enables the dough to retain more water during baking, keeping the dough moist, thus enabling the bread to stay soft and fresh for longer.
If you’re keen to learn more about how this technique affects your dough, King Arthur Flour provided a more detailed explanation here.
It is not difficult to bake a fresh loaf of Hokkaido Milk Bread at home. In fact it would be the most rewarding bread making experience when the smell of the bread baking in the oven emanates the kitchen.
I have two different recipes for this Japanese milk bread that uses the tangzhong method. One using conventional methods (breadmaker or standmixer) below, and the other using Thermomix (TM) here.
This recipe below was my go-to recipe for Hokkaido Milk Bread before I got my hands on the Thermomix. Soft, tasty and milky in taste; let me warn you, it may be addictive and your family may ask that you make this repeatedly.
Hokkaido Milk Bread
Ingredients
Tangzhong
- 25 g high protein bread flour
- 125 g milk/water or 50/50 of milk & water
Milk Loaf
- 270 g high protein bread flour
- 43 g castor sugar
- 1 tsp salt
- 5 g milk powder
- 6 g instant dried yeast (approx 2 tsp)
- 43 g whisked egg (save remaining for egg wash)
- 30 g whipping cream
- 27 g fresh milk
- 92 g tangzhong at room temperature
- 25 g unsalted butter melted
Instructions
How to prepare Tangzhong?
- Mix flour in water and whisk together in a pot, ensuring the mixture is well combined with no lumps. Cook over medium-low heat, stirring consistently to prevent burning and sticking while you cook.
- The mixture will gradually become thicker. Once you notice that some “lines” appear in the mixture for when you stir with the spoon, it’s done. Your tangzhong is ready.
- Transfer into a clean bowl. Cover with a cling wrap sticking onto the surface of tangzhong to prevent it from drying up. Let cool (I always let it chill in the refrigerator because I am impatient).
- The tangzhong can be used straight away once it cools down to room temperature. If you're an avid baker, you can make double the amount and then once prepared, just measure out the amount you need. The leftover tangzhong can be stored in fridge up to a few days as long as it doesn't turn grey. If so, you will need to discard.
Method using Breadmaker
- If you've chilled your tangzhong, ensure to return it at room temperature first before using.
- Add all ingredients (except butter) into breadmaker; first the wet ingredients (egg, milk, cream, tangzhong), then followed by the dry ingredients (sugar, salt, flour, milk powder, yeast).
- Select "dough" mode and let knead until all ingredients come together, add in the butter, continue kneading until the dough is smooth and elastic. The time of kneading in the breadmaker should take approximately 30 minutes.
- Let the dough complete the 1st round of proofing, about 40-60 minutes, best temperature for proofing is 28°C, until double in size, either in the breadmaker or you may remove it onto your pastry mat, shape into a ball and cover loosely with cling wrap/damp towel.
- Punch and deflate dough, then if you haven't already removed dough from bowl, you may do so now and divide into 3 equal portions. Knead into balls and let rest for 15 minutes at room temperature.
- To shape each mini loaf, flatten a ball into a long oval shape. Fold 1/3 from right edge to the middle and press. Fold 1/3 from left edge to the middle and press lightly. Roll it out slightly and roll into a cylinder.
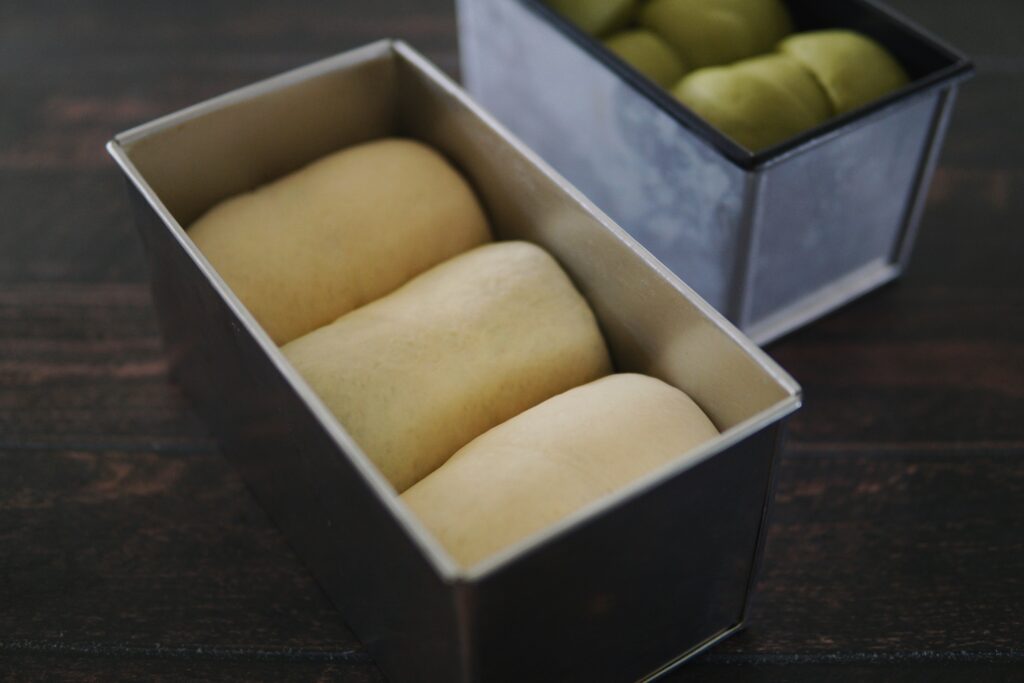
- Arrange dough logs, seam side down in a bread loaf tin (I am using a 450g Pullman Loaf Tin 8x4x4") and let proof for approx 40 minutes until dough fills up 80% of the tin. Ideally, the best temperature for 2nd round proofing is at least 30°C to 38°C. On days when it's cold, you can heat up a cup of water in the microwave for 40-60 seconds then proceed to leave your dough inside the microwave to rise. During last 15 minutes, preheat oven to 180°C.
- Brush the remaining whisked egg on the surface of the bread and bake for 25-30 minutes at 180°C until golden brown. Remove milk bread from tin and allow to cool completely on a cooling rack for at least an hour before slicing and serving.
Notes
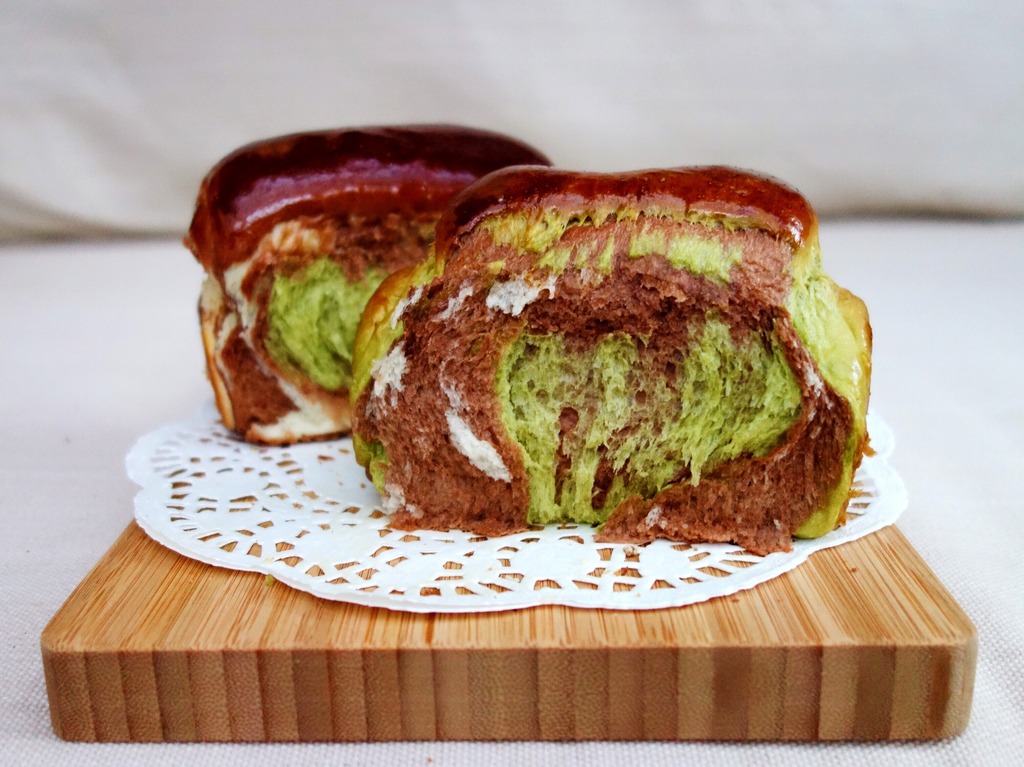
There’s so much you can do with this Hokkaido Milk Bread recipe. It is so versatile that you can adapt to either fill it, top it, or even flavour it! I’ve made a matcha and chocolate version, just by adding some matcha powder or cocoa powder.
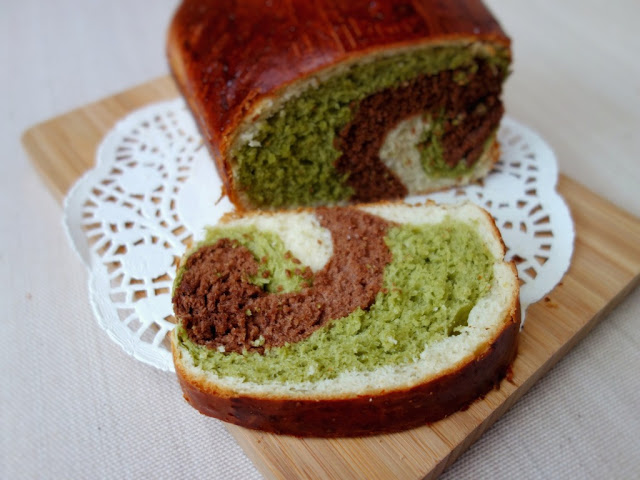
I’ve even attempted a tricolour Hokkaido Milk Bread loaf. Not only were the swirls beautiful, the milky matcha and chocolate flavours also went exceptionally well together. I am working on more recipes to share, so watch this space! Till then, happy baking!
Have you tried this recipe?
IF YOU MADE THIS RECIPE, I’D LOVE TO SEE HOW IT WENT!
TAG ME ON INSTAGRAM @THEBAKEANISTA SO I CAN HAVE A LOOK AND RE-POST ON MY IG STORIES!

This bread and recipe really works. My family lives this above all other. Since the recipe makes 3 little loaves at once. We slice them to make small sandwiches. Tastes amazing with PB&J.
This recipe does make an amazing sandwich bread, doesn’t it! Would like for you to also try the Tangzhong Milk Bread recipe which yields a slightly taller loaf. Give it a try one day. ☺️
My family LOVES this bread! I make this bread at least once a week, sometime twice if it runs out in less than 2 days! Out of 5+ Hokkaido milk bread recipes I have tried, this recipe is my favorite! The taste and texture are on point. We eat it by itself, dip in pandan custard, and sometimes make sandwiches. We even used this bread to make Hong Kong style French toast. I don’t know about you, but this loaf of bread is an essential in our household!
Thank you Salisa for your lovely feedback! So glad to hear that you’ve finally found a recipe that you love. 🙂
Love love this simple yet fluffy and oh so soft milky loaf. So good that you can even eat it on its own. They make the perfect French toast too 🤤
Is it possible to bake this bread in the bread machine?
It is, but you have to ensure your bread machine bowl is big enough for this recipe. But I still find baking it in the tin / oven is nicer than in bread maker.
Curious to know is it possible to omit the milk powder? If so what substitute do I need?
Thank you!
It is possible but I wouldn’t recommend it. You can just omit it, but if your dough is a little stickier, then add a bit of extra flour.