Your ultimate Breakfast Cheat Code: Tuna Bun Recipe
When I know I will be having a busy week ahead, this is what I turn to. The usual plain loafs are all good, but aren’t quite the finished product. I probably still need to toast it, apply some jam perhaps, or at the very least fry an egg. This tuna bun recipe however, is an evergreen pick-me-up to have on the go. A simple, wholesome, savory bun that sorts the whole household’s breakfast needs when you are pressed for time. It is also nutritious and so simple to make.
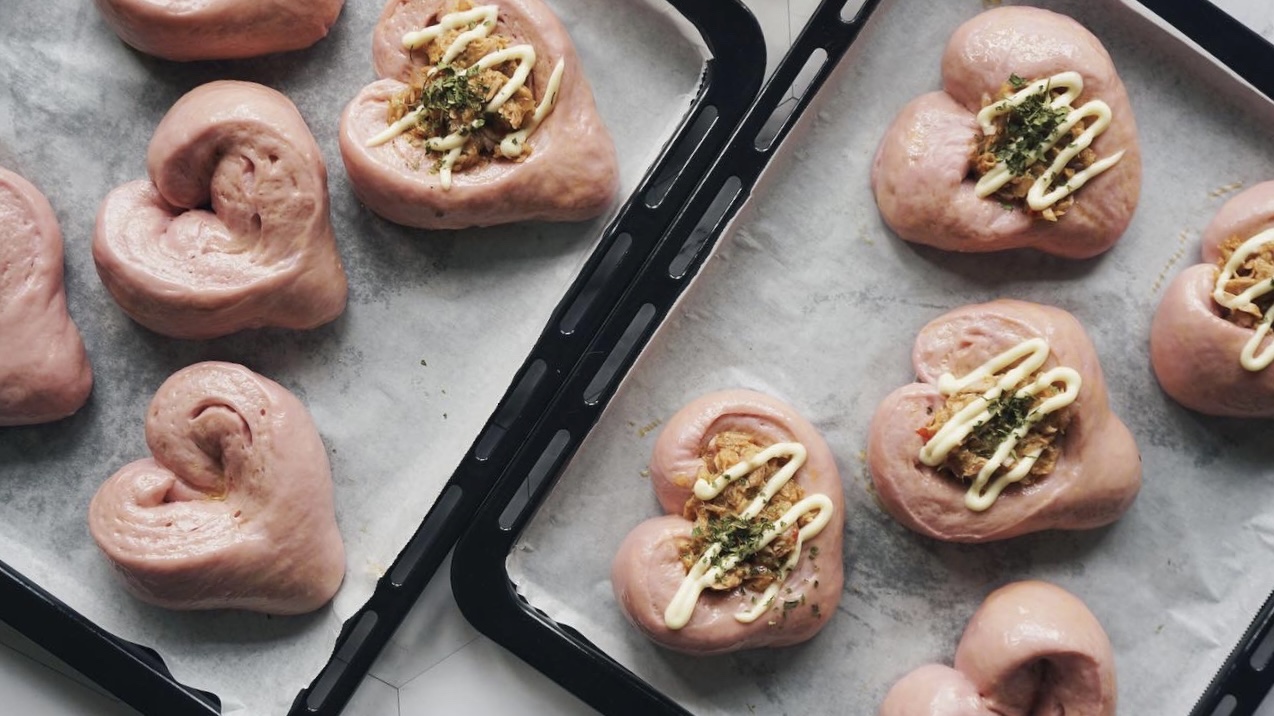
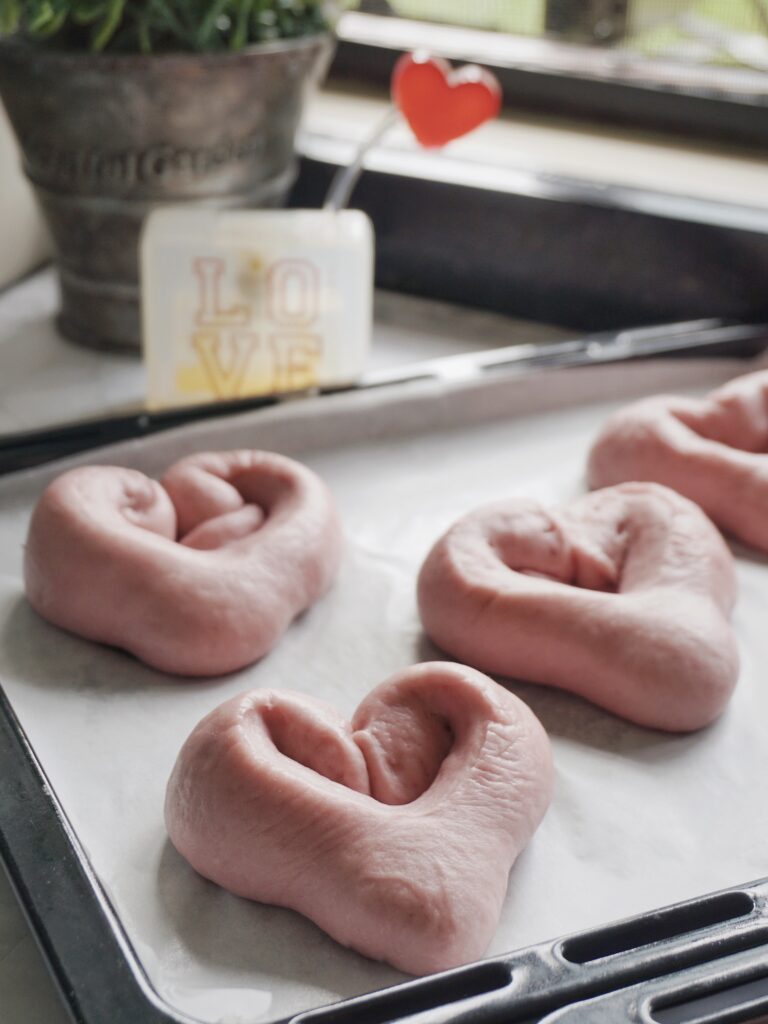
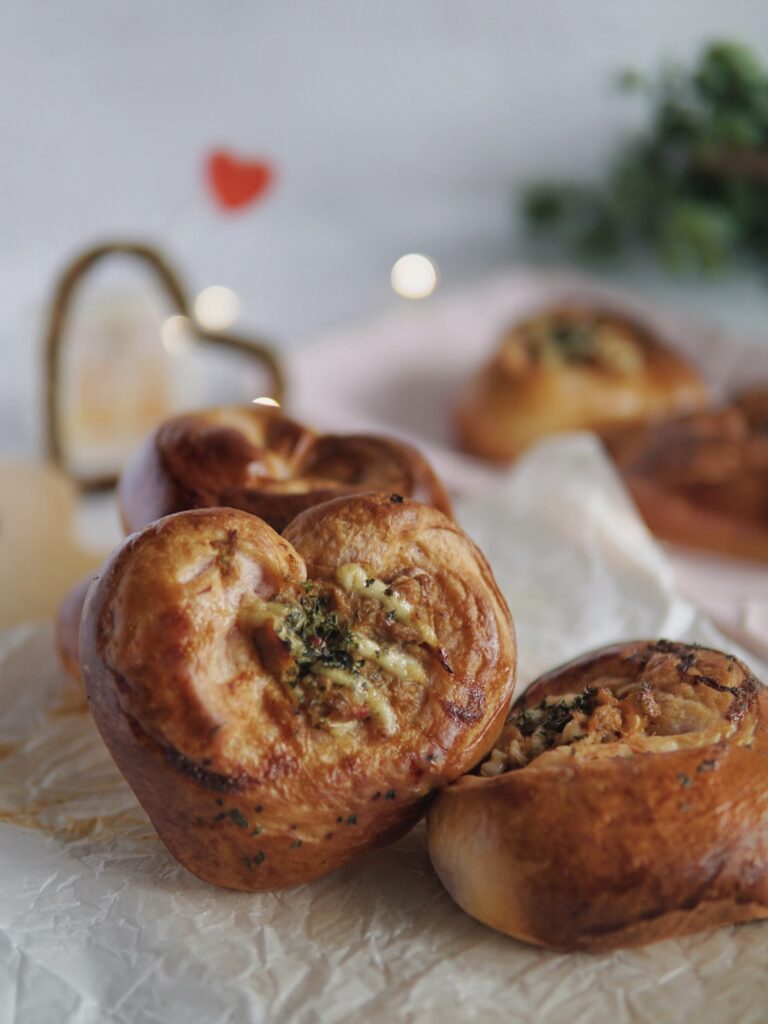
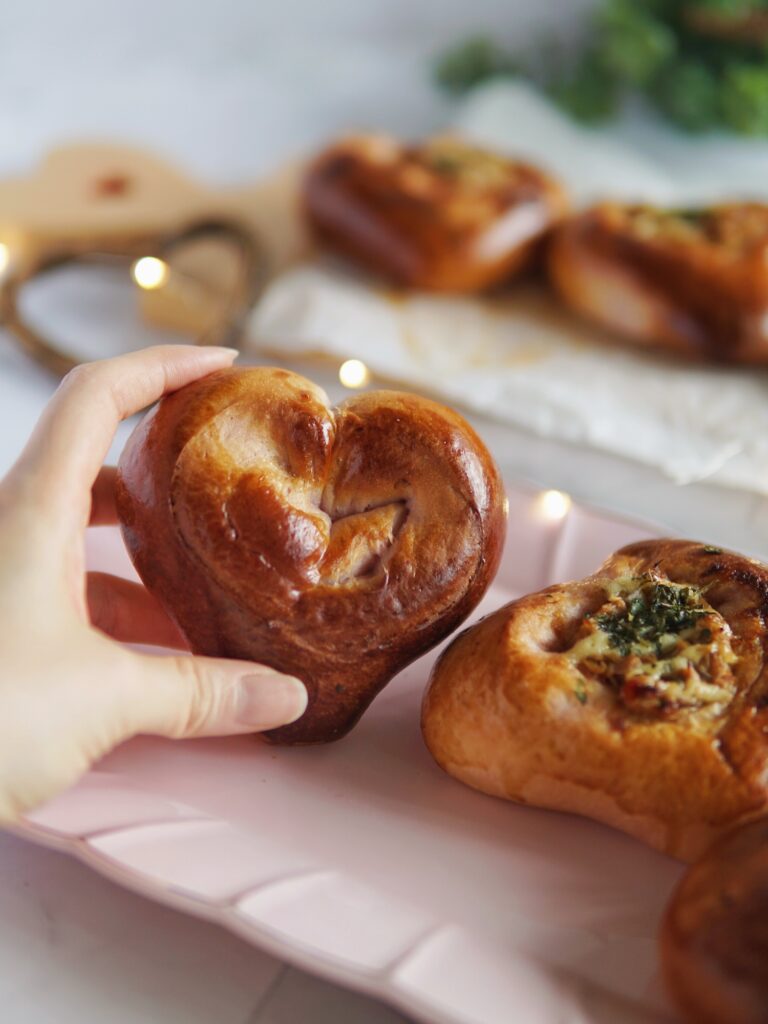
Heart-shaped Pink buns for that extra appeal!
And just for fun, today’s tuna bun recipe will be made into this cute heart. This shaping technique could really come in handy if you are making for your significant other too, especially with Valentine’s Day just around the corner!
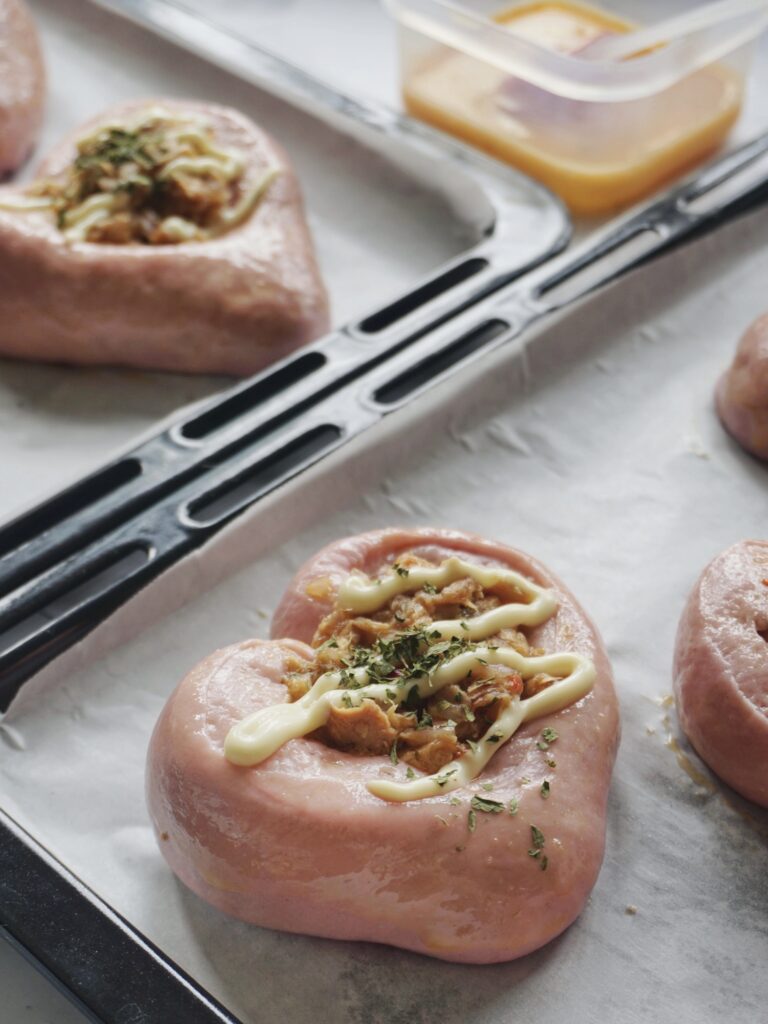
By adding just a teaspoon of sweet potato powder (optional), it gives the dough such a lovely pink tinge, staying true to the “heart” theme. When shaping the dough this way, it will naturally have a crevice in the center, perfect for holding the tuna mixture together. Double win.
What makes a good tuna spread?
You would want to drain all liquid from your tuna. As we will be using canned tuna, whether in oil or water, you would want to add some diced onions for some sweetness and kewpie mayo for some smooth richness. Take note of whether the canned tuna has already been seasoned. If it hasn’t, a light pinch of salt and pepper will do. Essentially, with just these 3 core ingredients (mayo + onion + tuna), you’ll have the perfect tuna paste for any bread.
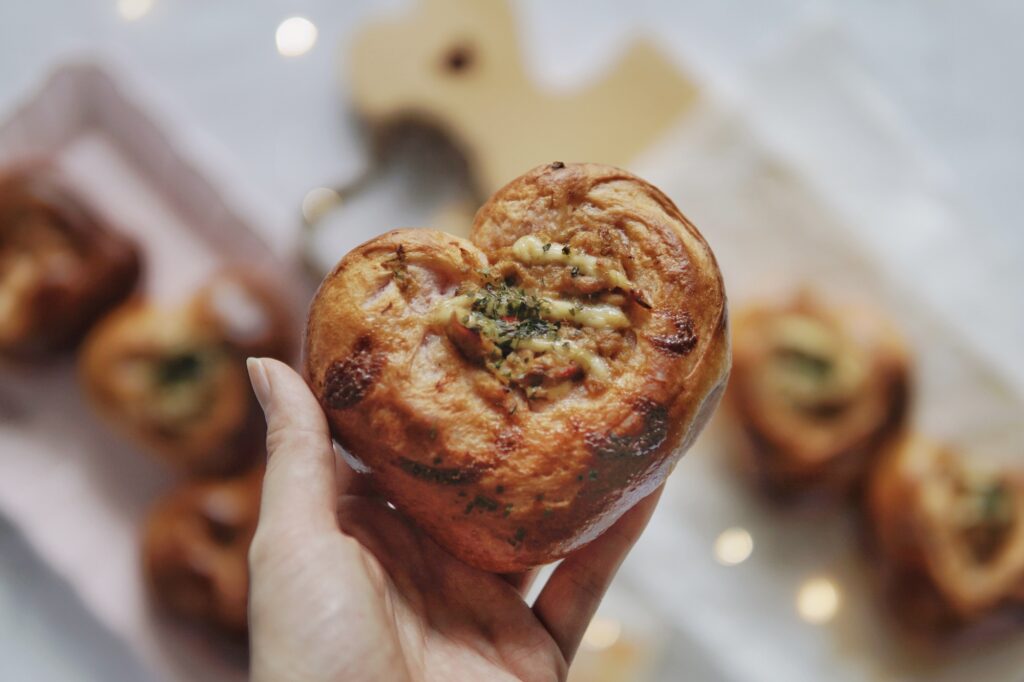
With egg wash 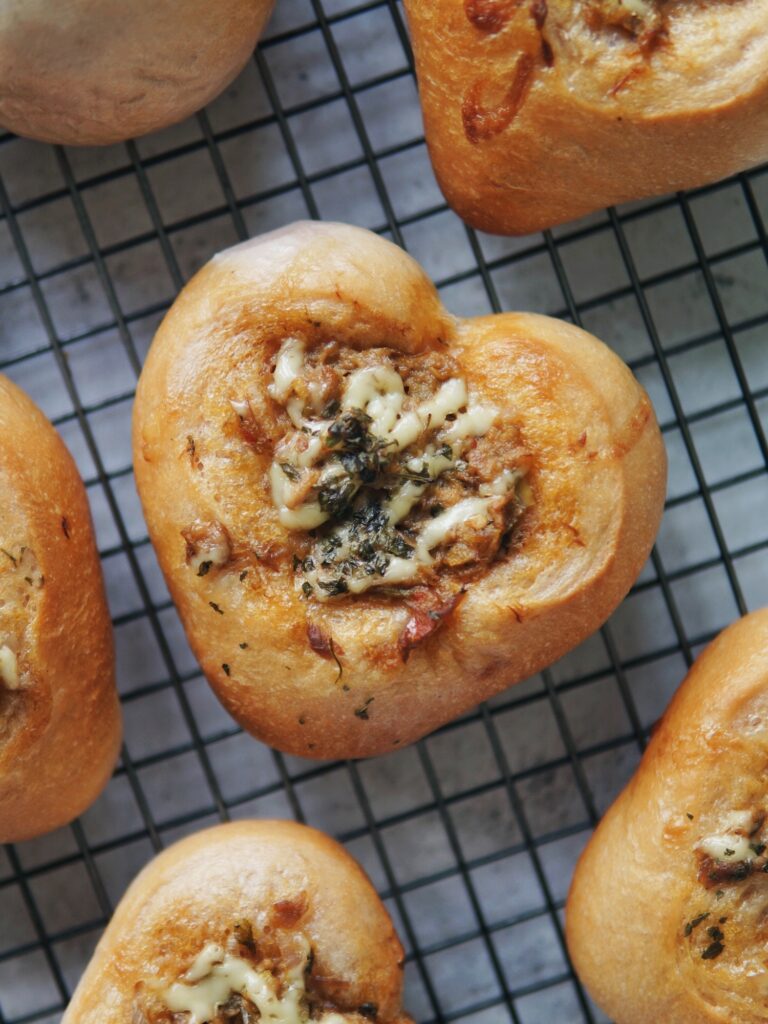
Without egg wash
Egg wash – To brush or not to brush
For this tuna bun recipe, you can opt to finish with or without egg wash. Using egg wash affects the appearance of the dough most, for example if you use a whole beaten egg like I did, the bread crust would turn out darker and shinier. Even if you lose that gorgeous pink surface of the dough after baking, the insides still retains it.
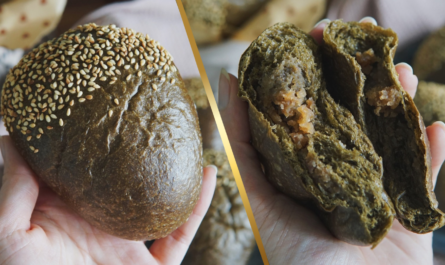
Without egg wash, I would suggest just spraying some water to keep the surface moist. You may also opt to use just egg white wash, which would give the dough some shine without the brown crust. I would usually use egg white wash on my bread when I want to top my buns or loaves with garnish as it would act as a glue that holds whether it be grains, seeds, herbs or whatever I wish to top on my yeasted bread; like the Soboro buns which I topped with peanut streusel.
Step-by-step Video Tutorial
In this video, I share with you how I make this heart-shaped tuna buns from start to finish:
This Valentine’s Day, show your loved one your love through your bread making! Do give them a go, and I would love to see how it went for you. Tag me on Instagram or leave a comment in the section below.
Heart Shaped Tuna Buns
Ingredients
Tangzhong
- 20 g high protein bread flour
- 100 g water/milk
Main Dough
- 30 g milk chilled
- 30 g heavy whipping cream chilled
- 40 g castor sugar
- 1 egg
- 1 tsp yeast
- 270 g high protein bread flour
- 2 tbsp milk powder
- ¼ tsp salt
- 30 g butter softened at room temp
- 1 tsp purple sweet potato powder optional
Tuna Topping
- 1 red onion finely diced
- 1 canned tuna drained
- kewpie mayo
- dried parsley flakes for garnish
- 1 egg for egg wash optional
Instructions
Please note that I have included two methods below for tangzhong making and dough kneading using either conventional or Thermomix method so do take note of the sub-headings.
[CONVENTIONAL] Tangzhong & Dough Kneading
- Prepare tangzhong by mixing flour in water and whisk together in a pot, ensuring the mixture is well combined with no lumps. Cook over medium-low heat, stirring consistently to prevent burning and sticking while you cook.
- The mixture will gradually become thicker. Once you notice that some “lines” appear in the mixture for when you stir with the spoon, it’s done. Your tangzhong is ready.

- Transfer into a clean bowl. Cover with a cling wrap sticking onto the surface of tangzhong to prevent it from drying up. Let cool.
- If using bread machine, add all ingredients into breadmaker except butter; first the wet ingredients (tangzhong, egg, milk, cream), then followed by the dry ingredients (milk powder, sugar, salt, flour, yeast). Select "dough" mode and let knead until all ingredients come together, usually I let it knead for approximately 10-12 minutes. Then add in the butter, continue kneading until the dough is smooth and elastic. My bread machine's dough kneading cycle is 23 minutes. If using stand mixer, add all dry ingredients (flour, sugar, salt, milk powder, yeast) into mixing bowl and whisk to combine. Then add wet ingredients except butter (tangzhong, egg, milk, cream). Knead using dough hook on low speed for 12-15 minutes until well incorporated. Then add butter and continue kneading for another 8-10 minutes until dough is smooth and elastic, and passes the window pane test.
- Transfer dough to pastry mat or a greased bowl, shape into ball by tucking the sides of the dough downwards whilst rotating in one direction until smooth and taut. Let rise, covered loosely with cling wrap/damp towel until doubled in size (approx. 45-60 minutes).
[THERMOMIX] Tangzhong & Dough Kneading
- To make tangzhong, place 20g high protein flour and 100g water/milk in mixing bowl, cook for 1min/75°C/spd 2 and let stand for 10-15 minutes until temperature lowers down to 37°C.
- Once temperature hits 37°C, add milk, whipping cream, sugar, egg and yeast, then mix 30 sec/spd 2.
- Add remaining 270g high protein flour, milk powder, salt and butter then mix 30secs/spd 6. Proceed to knead 4 min.
- Transfer dough to pastry mat or greased bowl, shape into ball then let rise, covered loosely with cling wrap/damp towel until doubled in size (approx. 45-60 minutes).
Dough Shaping
- After dough has doubled in size, punch or press down to deflate. Divide dough into 10 equal portions and roll into a round shape. Let rest, covered for 10-15 minutes – this bench rest will ensure dough is easier to handle.
- To shape buns, roll out each portion into an oval shape then fold ⅓ from each sides to the center. Rotate so that dough is now horizontal then roll and lengthen it slightly.
- Rotate again to place dough vertically, use the corner of your palms to press the sides together on the bottom end to form a V-shape.
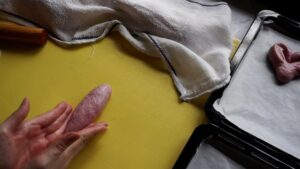
- Use a sharp knife/pastry cutter to slice through the middle up to ¾ long from the top, leaving the bottom ¼ attached.
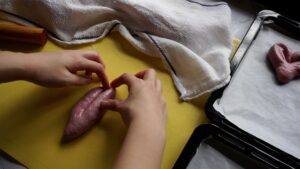
- The dough will now resemble a Y-shape. Fold both ends of the top inwards towards the center, forming a ♡ shape. Transfer to a lined baking sheet. Place each dough 2 inches away from one another.
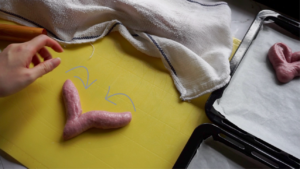
- Let dough rise for its 2nd round of proofing, until double in size. This takes another 35-40 minutes depending on the weather.
- During last 15 minutes, preheat oven to 180°C and prepare tuna topping. Finely dice a small to medium red onion, then mix with drained tuna. I like using spicy tuna. If using tuna in oil/spring water, you would want to add about 2 tbsp mayo and season with some salt and pepper. If you like you may even add some corn kernels.
- Egg wash the buns, then top with one tablespoon of tuna mixture in the center, ensure it is spread evenly. Pipe kewpie mayo in zig-zag motion, then garnish with some dried parsley flake.
- Bake at 180°C for 15-20 mins. Remove from oven, and let cool for 5 minutes then transfer onto a wire rack to let cool completely. Store in air tight container.
Notes
Few Things to Note
When it comes to bread making, there are many factors that will influence your dough and the end product. Use recipes as a guide, as you familiarize yourself with the process and dough.
For instance, your dough may require extra kneading time depending on the flour and its protein content. The method used to knead also needs to be taken into account as some machines work the dough quicker, whilst others may require a bit more kneading time.
Temperature and humidity plays a big part in how your dough rises. The amount of time required to proof your dough also varies depending on where you’re based at. For my second proofing, I usually heat up a cup of water in the microwave for 45 seconds, then proceed to leave my dough inside the microwave to rise for 25-30 minutes.
It’s also very important to try to get to know your oven, as every oven is different. My oven heats up quickly so when a recipe calls for 180-190°C, I sometimes have to drop it down to 160-170°C depending on which rack I use. Keep an eye out as the bread is baking. Adjust either the baking temperature or duration according to how your oven behaves.
FAQ
Can I omit milk powder?
You may opt to omit the milk powder but I wouldn’t recommend it. Milk powder adds fats, protein and flavour to the dough, that not only makes the dough richer and creamier in taste, but also helps dough rise higher. The addition of milk powder will also help yield a more tender crumb texture.
I wouldn’t suggest substituting milk powder with liquid milk as it is adding extra hydration to the dough, which may alter the texture of the finished product. In other words, adding milk powder gives you the same benefits of milk without the extra liquid, with a more concentrated % of milk sugar and protein that will benefit the dough.
Help! My dough is too sticky!
For bread maker users, check the dough 10 minutes into the kneading cycle. It should be smooth and the mixing bowl should be clean by now. If your dough is too sticky to manage, you may add 1 tbsp of flour at a time.
For Thermomix users, if you experience a stickier dough, you may want to add 1 tbsp of high protein bread flour at a time and knead for 15-20 seconds until incorporated.
Lightly oil your hands (and the pastry mat depending on how sticky your dough is) using neutral flavoured oil to shape dough into a ball. Apply the chafing technique by cupping your hands gently around the dough, apply a light, downwards pressure to the sides whilst simultaneously rotating the dough in a circular clockwise motion. Continue doing so until a smooth, even, and round ball is formed. I shared a video of how I perform this technique saved on my Instagram Story highlights.
How do I know if my bread is well proofed and ready to be baked?
You may perform the visual test to check. Lightly press the surface of the proofed dough with the tip of your finger for about 2 seconds and observe how fast the dough bounces back up.
- UNDER-PROOF: If it bounces back up too fast without any indentation, it isn’t ready yet, so give it more time.
- READY TO BAKE: It is supposed to bounce back up slowly, about halfway up and leave a slight indent.
- OVER-PROOFED: If the indent remains without bouncing back up, yes it is over-proofed, for buns you’d want to quickly send them into the oven to bake.
Which oven rack and what oven setting should I use?
I suggest the second rack from bottom. I bake using top and bottom heat, with fan.
How to store bread?
Ensure to store bread in airtight container or ziplock bag so the bread can stay soft and last for up to 2-3 days at room temperature.
Have you tried this recipe?
IF YOU MADE THIS RECIPE, I’D LOVE TO SEE HOW IT WENT!
TAG ME ON INSTAGRAM @THEBAKEANISTA SO I CAN HAVE A LOOK AND RE-POST ON MY IG STORIES!
IF YOU ENJOYED THIS RECIPE, YOU MAY WANT TO CHECK OUT MY RECIPE INDEX FOR OTHER DELICIOUS RECIPES.

This recipe is a fun way to make something adorable without much effort. I didn’t have sweet potato powder, so I just used food coloring mixed into wet ingredients to achieve a light pink dough (25 drops red + 2 drops blue +1 drop yellow). I just ordered some s.p. powder so I can make it the correct way next time. Used a standmixer as directed, and the dough was easy to work with- not too sticky:) Also this was a perfect way to use up my last tin of smoked salmon! Thanks for the great recipe ideas as always. Looking forward to trying this out again, once the powder arrives!
Such a great idea to use smoked salmon! I’ll keep that in mind to try out next.
Thank you for the very detailed recipe, Michelle. I’ve been experimenting with a lot of Asian bread recipes lately and I must say yours is one of the best! Adding a little bit of chilli sauce onto the tuna just before eating made it taste even better. I will definitely try with different toppings next time 😀
Thank you Catherine for the feedback! Tuna with corn would be delicious too. So glad you enjoyed the recipe. 😍
Tried this recipe today, noted fr the video that the dough looked v sticky side, hence I didn’t use all the milk n egg was 53g net. Buns turned out so soft n my kids gave thumbs up! 👍