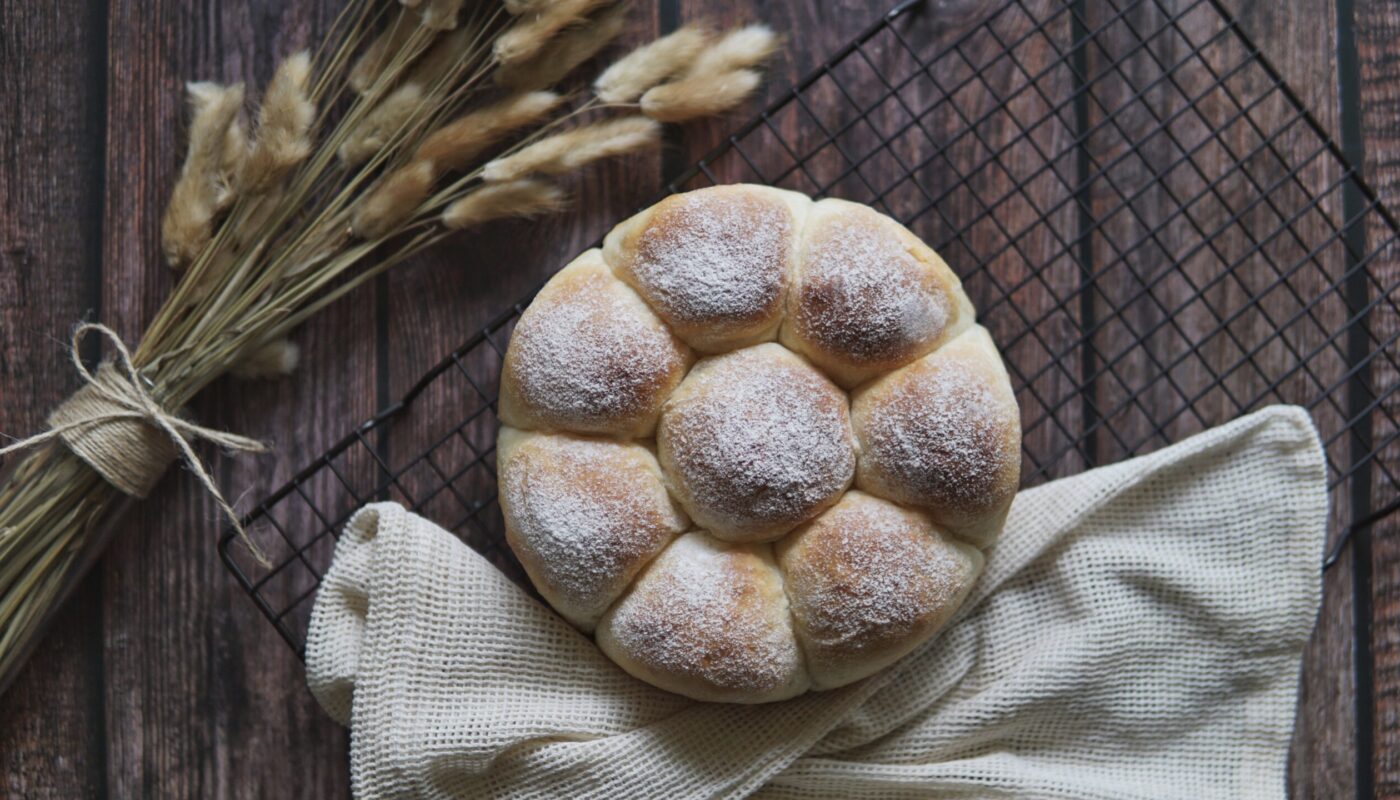
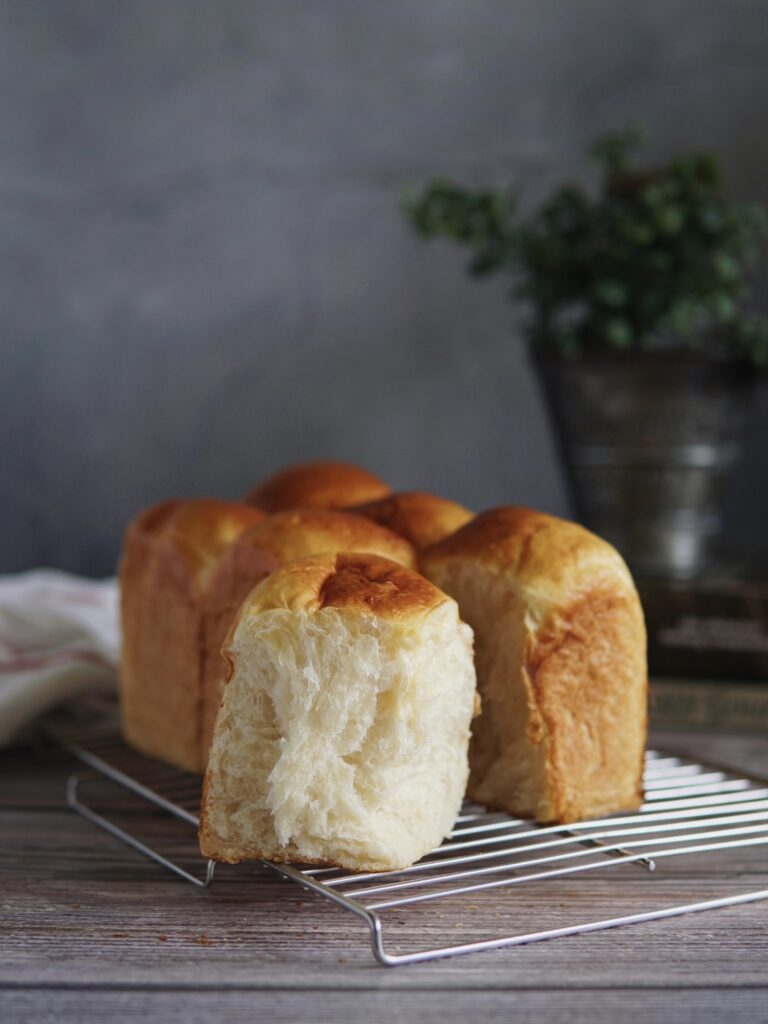
This pillowy soft yogurt bun is fast becoming an absolute favourite in this household. They’re so delicious that I bet your family would be demanding for more.
It was my first time trying a bread recipe that calls for yogurt. I was initially rather skeptical but I had a tub of yogurt sitting in the fridge threatening to expire.
I later learnt that yogurt is indeed a wonder ingredient to incorporate into bread! Not only does yogurt hydrates the dough, but due to its acidity, it will also relax the gluten, and thus yields a nice, tender bread. Check out the crumb check video below:
A friend who has tried this recipe using a hand mixer, said her partner commented that it’s the softest and fluffiest bun he has ever had in their kitchen. That’s one great feedback to receive!
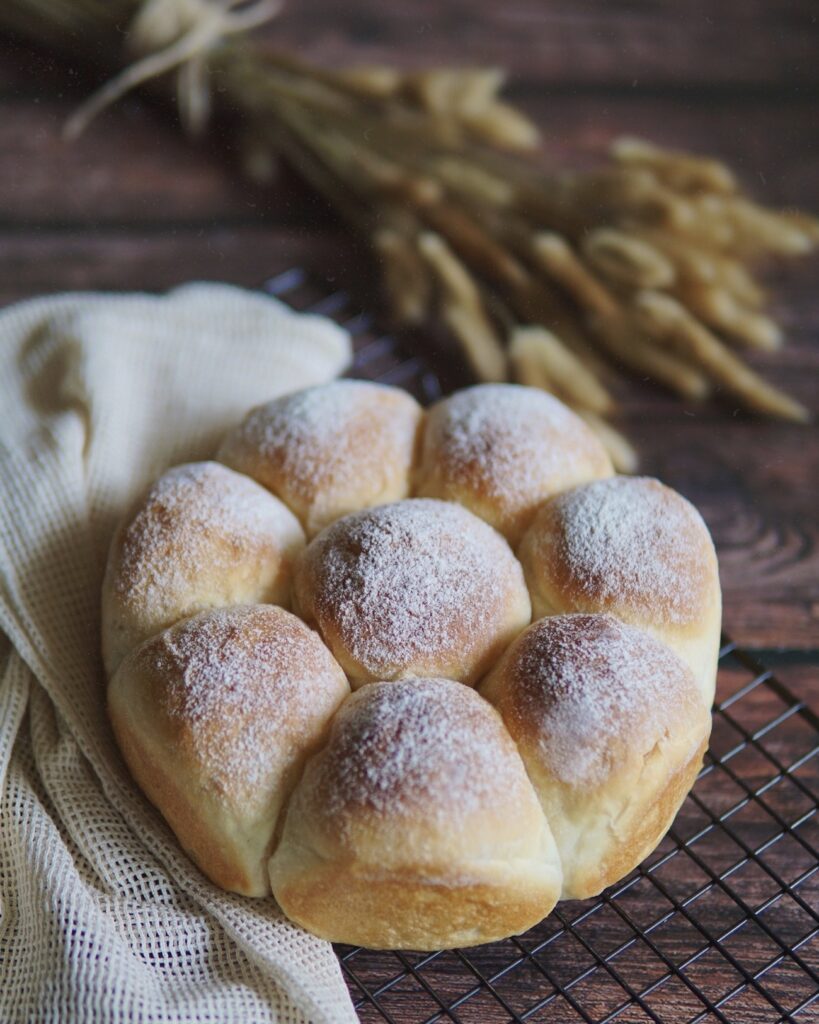
Between three adults in my household, eight buns were definitely not enough. The first time I made these light, airy little buns, they were gobbled up almost instantly. I had to make more the next morning.
From then on, I’ve been doubling the recipe. I suspect this is what you may also end up doing so I’ve left some notes at the bottom of the recipe for your reference.
Click here to check out raving reviews from others who have tried and loved this recipe!

Pillowy Soft Yogurt Buns
Ingredients
(A)
- 200 g high protein bread flour
- 40 g greek or unsweetened plain yogurt chilled
- 120 g cold milk
- 16 g sugar
(B)
- 1 tsp instant dried yeast mix with 1/2 tbsp water
- ½ tsp salt
- 12 g unsalted butter softened at room temp
Instructions
Kneading with Thermomix
- Place all ingredients from (A) into mixing bowl – mix for 30secs/Sp3. Let rest for at least 15-20 minutes to autolyse. Refer to notes regarding autolyse.
- Mix yeast with room temp water, and add into dough mixture then knead for 1 min.
- Add salt – knead 30secs 🌾.
- Add butter and let knead for 4mins. 🌾.
Kneading with Stand Mixer / Bread Machine
- Place all ingredients from (A) into mixing bowl and mix together until well combined. If using a bread machine, select the "dough" mode, let knead for 3-5 minutes, then stop the machine. Let rest for at least 15-20mins to autolyse. Refer to notes regarding autolyse.
- Mix yeast with room temp water, and add into dough mixture and knead using dough hook attachment for 2-3 minutes. If using bread machine, restart the "dough" mode, let knead for 3 minutes.
- Add salt, knead for a further 2 minutes. If you're using bread machine, the dough mode would rest for approximately 5 minutes at this stage.
- Add butter and knead on stand mixer for 12-15 minutes until achieve window pane. For bread machine users, after the first rest, add butter and let kneading cycle is complete.
Proofing & Shaping
- Transfer dough to a pastry mat, shape into ball and let proof in a warm place covered loosely with clingwrap/damp towel until doubled in size (approx 45-60 mins).
- Punch down dough to deflate. Divide dough into 8 equal portions (approx 48g each) and roll into round balls. View video tutorial here for how to shape into round balls.
- Grease an 8” round cake tin, and place the dough balls around the pan in a circular pattern.
- Let proof for approximately 40mins. I usually heat up a cup of water in the microwave for 45 seconds then proceed to leave my dough inside the microwave to rise. During last 15 minutes, preheat oven to 180°C.
- Lightly sift some flour over the dough and bake at 180°C for 15mins until golden brown.
- Remove from tin and allow to cool completely on a cooling rack before serving.
Notes
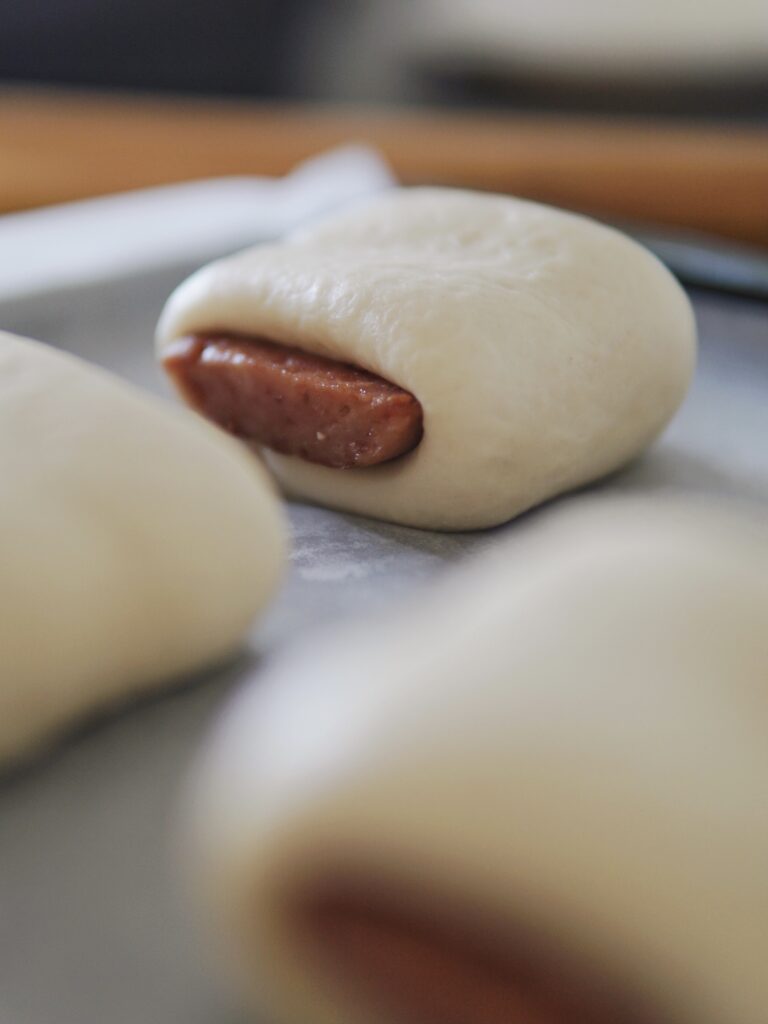
Variation – Savoury Korean Spam / Luncheon Meat Pocket Buns
This dough recipe is very versatile and can be used with any fillings or toppings you desire. One of my personal favourites being Korean spam or luncheon meat. If you don’t have Korean spam handy, you may consider filling with ham and cheese as an alternative.

You would use the above recipe as a base and take into account the following changes for the shaping below:
- Cut luncheon meat into 6 slices about 1cm thick. Pan fry with minimal oil on both sides. Pat dry with kitchen towel and let sit to cool.
- Punch down dough to deflate. Divide dough into 6 equal portions and pre-shape into round balls. Let rest, covered for 10-15 minutes.
- Shape dough following video tutorial here.
- Grease and line a baking pan, then place shaped pocket buns a few centimetres away from one another.
- Let proof for approximately 40mins. During last 15 minutes, preheat oven to 180°C.
- Brush surface of dough with egg wash for a golden brown finish and bake at 180°C for 15-20mins until golden brown.
- Remove from baking pan and allow to cool completely on a cooling rack before serving.
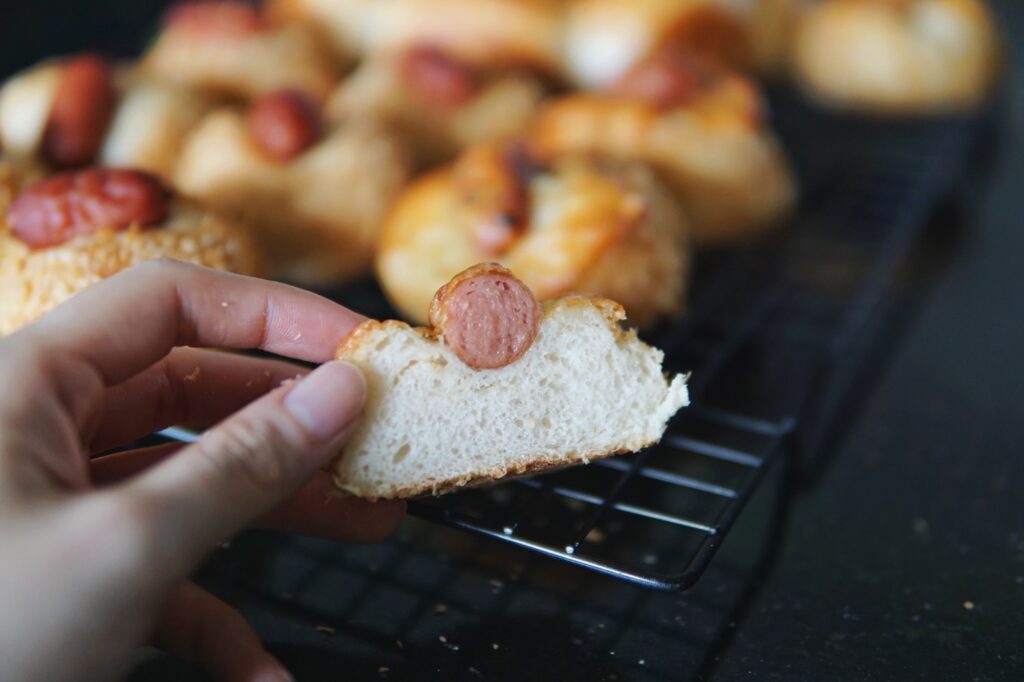
Variation – Pizza Sausage Buns
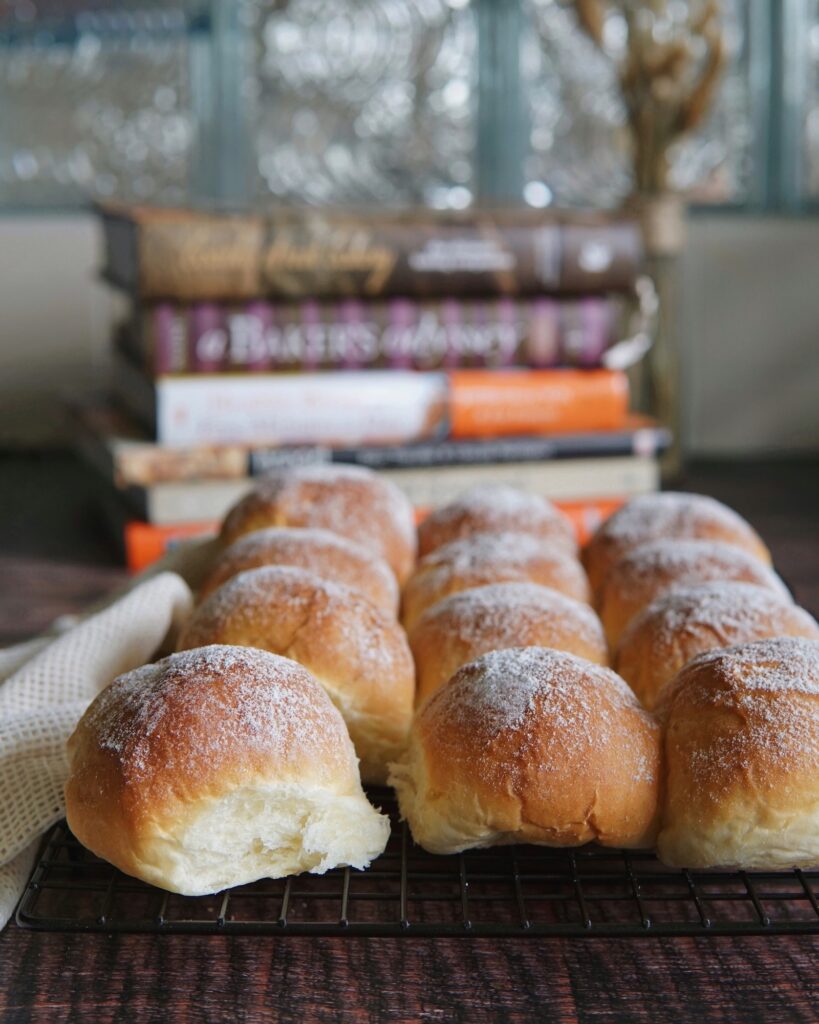
These pizza sausage buns make a great snack and I dare say even, they are WAY better than those store-bought ones! A single batch of this pillowy soft yogurt bun recipe makes 4-5 pizza sausage buns, depending on how big you like your buns to be.


For this recipe, you will need:
- 4-5 sausages
- 1/2 red onion, diced
- Kewpie mayonnaise
- Tomato ketchup
- 1/2 cup shredded mozzarella cheese
- Dried parsley flakes
I used cheesy sausage for the extra cheesy goodness, but any other type of sausages work too. I used 75g dough per bun as I’ve got a big 60g sausage (that’s what he said 😂 lol) but if you’re using a smaller sausage, remember to reduce dough as well. You can also add some corn kernels too if you like.
Video guide on how to shape the pizza sausage buns here:
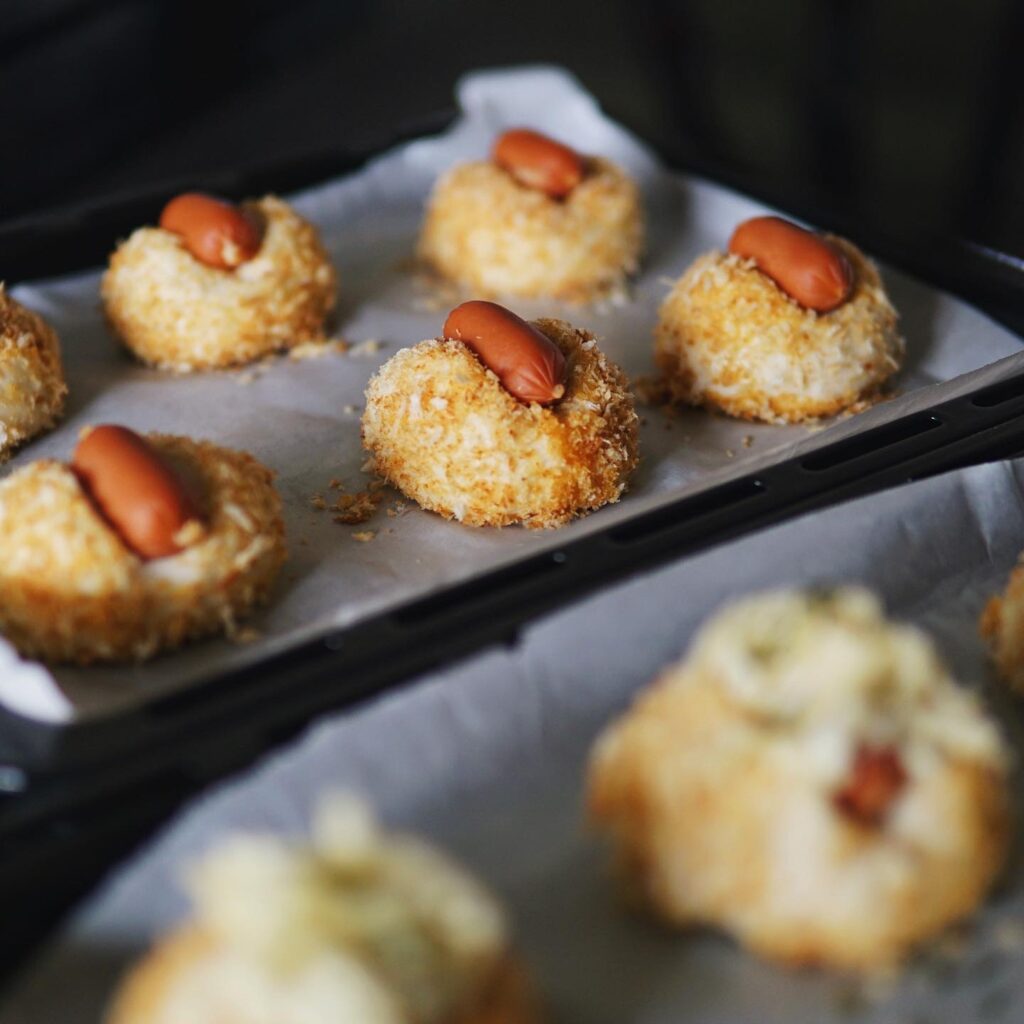
Variation – Baked Panko Buns with Sausage & Cheese
You can also amp these pillowy soft yogurt buns up a notch by breading the buns with panko (Japanese bread crumbs) then top with Korean Vienna sausages, some mozzarella cheese and dried parsley flakes.
These buns are inspired by Japanese korokke, whereby after baking, the perfect golden-brown bread crumbs creates a lovely crunch as you bite into the pillowy soft bun within.

For this recipe, you will require additional ingredients for the topping:
- 1 egg
- 1/2 cup panko
- 8 pieces of Korean Vienna sausages
- Kewpie mayonnaise
- 1/2 cup shredded mozzarella cheese
- Dried parsley flakes
The portion above is suitable for one batch of the pillowy soft yogurt buns.
You can watch a quick video guide on how to shape these here or refer to the written recipe below:
- After the first round of bulk fermentation, punch down dough to deflate. Divide dough into 8 equal portions and roll into round balls.
- For each dough, dip into beaten egg then coat evenly with panko and place on lined baking sheet.
- Important Tip: As we will be baking the buns, and not deep frying them, pre-toast panko with a little olive oil in a pan for several minutes until golden brown. Let cool before using. If you wish to omit this extra step, spray cooking oil on your panko-breaded dough before baking.
- Let proof for approximately 25-30 minutes until doubled in size. During the last 15 minutes, preheat oven to 180°C.
- Use a pair of scissors to cut a slit on the top of each dough where the vienna sausage will fit snugly within. Pipe some kewpie mayo atop sausage.
- Top with shredded mozzarella cheese and garnish with some dried parsley flakes.
- Bake at 180°C for 15-18 minutes until golden brown. Kindly note that if you are not using pre-toasted panko, your buns may require slightly longer baking duration to achieve the golden brown.
- Remove from baking sheet and let cool on a cooling rack before serving. Enjoy them warm!
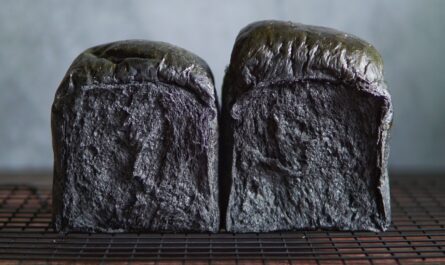
Variation – 450g Loaf
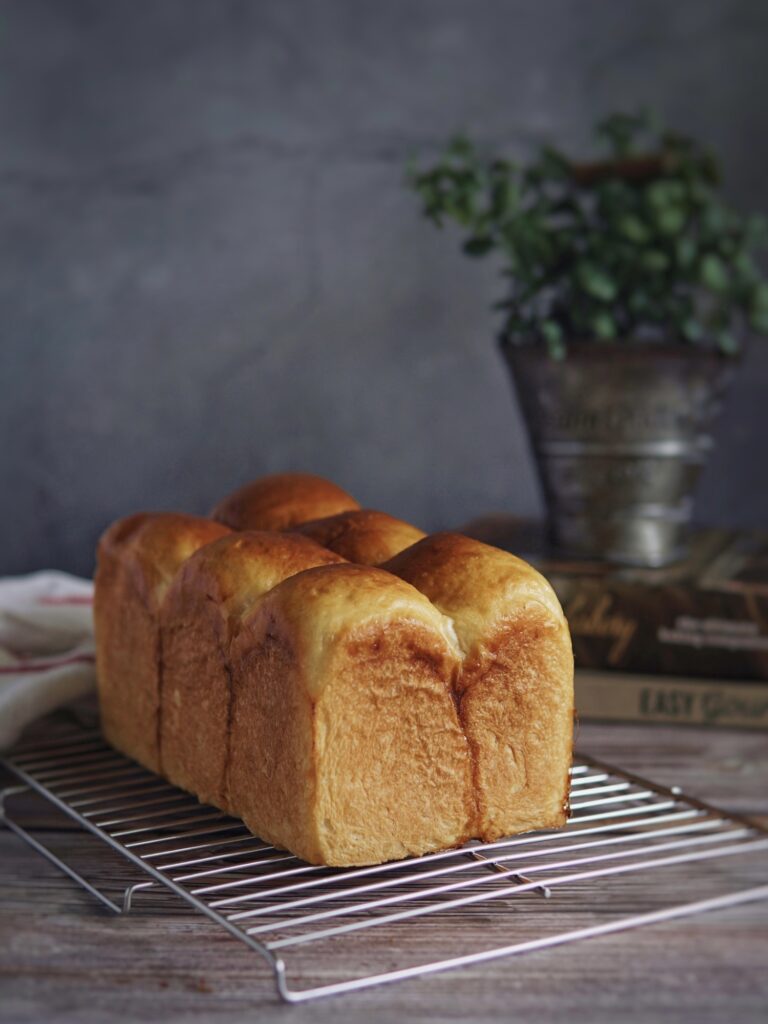
To make a 450g loaf, simply multiply the recipe by 1.5. This is the measurements that I go by:
300g high protein bread flour
60g chilled greek/plain yogurt
175g cold milk
25g sugar
1½ tsp instant yeast mix with 1 tbsp water
¾ tsp salt
20g unsalted butter, room temp
You can then shape into a loaf by following this video guide here – I am using a 8x4x4 inch pullman tin. Let proof for approximately 40mins. During last 15 minutes, preheat oven to 180°C.
Lightly sift some flour over the dough or brush surface with egg wash. Bake at 180°C for 30mins until golden brown. Remove from tin and allow to cool completely on a cooling rack before serving.
Variation – Korean Soboro Buns with Almond Cream Filling
If you prefer sweeter buns, you may want to check out the Korean Soboro Buns with Almond Cream filling recipe instead. The soboro buns are a levelled-up version of this exact same bun recipe as its base. This video will also guide you from start to finish with tips on how best to shape and roll your buns!
Few Things to Note
When it comes to bread making, there are many factors that will influence your dough and the end product. Recipes should be used as a guide, as you familiarize yourself with the process and dough.
For instance, your dough may require extra kneading time depending on the flour and its protein content. The method used to knead also needs to be taken into account as some machines work the dough quicker, whilst others may require a bit more kneading time.
Temperature and humidity plays a big part in how your dough rises. The amount of time required to proof your dough also varies depending on where you’re based at. For my second proofing, I usually heat up a cup of water in the microwave for 1 minute, then proceed to leave my dough inside the microwave to rise for 25-30 minutes.
It’s also very important to try to get to know your oven, as every oven is different. My oven heats up quickly so when a recipe calls for 180°C, I sometimes drop it down to 160-170°C. Keep an eye out as the bread is baking. Adjust either the baking temperature or duration according to how your oven behaves.
Have you tried this recipe?
IF YOU MADE THIS RECIPE, I’D LOVE TO SEE HOW IT WENT!
TAG ME ON INSTAGRAM @THEBAKEANISTA SO I CAN HAVE A LOOK AND RE-POST ON MY IG STORIES!


I made this bread a few times and still love it! I’ll use the dough to make luncheon bread roll the next round, will share with you my experience.
Oh!! I’ve made with cheese, sausage and pork floss but not yet with luncheon meat. That’s a great idea!! Can’t wait to see how it’ll turn out 🙂
Hi, I can use other yogurt instead? Eg. Greek vanilla yogurt? Thanks.
Hi there Catherine, I use unflavored as I want my buns to be plain. But you can most definitely try with vanilla Greek yogurt. Just not those mixed with fruit syrup etc. Hope this helps!
These yogurt buns are the bomb!
Recipe was so clear & easy to follow 🙂
I have made it 3 times since I discovered this website last week.
A big hit with family and friends 🙂
Woohoo! Thank you Juliana! I have been making it 4 days in a row now. We’re all yogurt buns addict haha!
Can share the brand of flour you used?
Perhaps try adding an additional of 1 tbsp at a time to see if you’re able to achieve a smoother less sticky dough. Also ensure to allow your dough to autolyse for 20-60 minutes as well.
May I know what brand of bread flour do you use to achieve such beautiful texture? I used my mix of bread flour, the dough that came out is super sticky and very very difficult to work with. The result is not so nice… I appreciate your advice here.
Hi Jennifer, I purchase my bread flour from a local bakery store that repackages so I’m not aware of the brand nor the protein %. Having said that though, I have also tried several other repackaged high protein bread flour from other bakery stores and all of which gave me the same consistency.
Just tried it. Very soft even on second day. 👍🏼
Very glad to hear that, Doris! 🙂
Hi there, Could I triple the recipe with thermomix? Love the buns and never enough!
Thanks!
Glad to hear you love these yogurt buns! Best to keep at double, as we don’t want to overwork the motor of our TM.
Tried it. Loving this pillowy soft yogurt buns. So fluffy. 😋😋😋
Glad to hear that Ivy! 😊
This recipe is a keeper too. I never imagine the day when I can bake bread to share with friends but it has become a reality. My family and friends have enjoyed the lovely buns made with your recipe. Thank you.
Tried this today.. My first time adding Yogurt in buns! The texture was amazing! 👍
Yay! That’s because adding yogurt into bread dough makes the crumbs more tender and moist! Thank you for trying! 🙂
My family loves these buns. It’s a keeper 😀
1 question I have: why do you dust the dough before baking? Is this purely for aesthetics? Or does this serve some other purpose?
Thanks!
Hi Spring! Glad to hear your family loves it too. Yes haha it’s purely just for aesthetics. If you don’t like the dusting of flour, you could also brush with egg wash/milk. Or glaze with butter after baking.
Love to give this recipe a try. If I do not have a thermomix, stand mixer, bread machine is it possible to just use hands and a scraper to knead. Would I get the same result? Is there any steps that I should take note? Thanks.
Hi Mun, if you’ve always been hand kneading then you can most certainly do the same for this recipe. The only point I would say is to mix all of ingredients A until combined and do ensure to allow autolyse for at least 15-20 minutes. You can follow the steps thereafter adding yeast and water mixture and letting it incorporate well before following through to add salt. Never add salt together with the yeast as it may kill the yeast. Let me know how you go! 😊
Tried the recipe. Love it. For an amateur like me this recipe is easy to follow and the result is amazing. The buns are so soft!! Thanks
I have made these buns almost a dozen times in as many days. They are heavenly and my family devours them! When it came time to make sandwich bread for the week I was curious how this recipe (doubled) would do in my pullman pan. AMAZING! Just a hair shy of filling it as is. Best PB&Js ever!
Great!!! Thank you for sharing. Now many others who are wondering if this would work in a Pullman tin can also try.
Love these! I’ll always make a double batch when I have yoghurt. Thanks so much for the recipe !
Thank you for enjoying the recipe! 🙂
My 1st attempt of making this yogurt bun today, and it’s really pillowy soft i swear!!!
so good, soft just like pillow ❤️
The softest bun i ever made..
Can just eat it on its own…..
Thanks for the wonderful recipe..
Your feedback made me smile!! Thank you ☺️
So soft,simple and quick! Instructions were easy to understand and i had 8 pillow buns in no time :)) Thank you so much! You’re an inspiration to me
Yay, glad to hear it worked out well for you! 😊
Hello,
Do you butter or grease your cake pan, so the bread doesn’t stick to it?
Thanks for sharing!
Yes I do! I grease the bottom and sides.
Easy to make in TM and my boy finished all in a day!
Yeah kneading in under 10 minutes is always a plus!
Tried baking this yogurt bun for the first time last night and it turned out indeed super soft! Compared to the tangzhong method, the texture for this was softer and less chewy. Both methods work great though I tend to prefer the texture of the tangzhong buns. Thanks for always sharing your recipes Michelle! 😊
Thank you for your lovely feedback, June! 🙂
Hi there, I tried the recipe using thermomix twice and each time gave me the same result – the dough was so wet, like lava. Wondered if you know what could have gone wrong?
Appreciate your view. Thanks!
Hi Kim, as we all use different ingredients, this may sometimes happen. Like for example your flour could have different absorbency level to mine etc. If it’s too wet, I suggest adding 1 tbsp of flour at a time and knead for 15-20 seconds until you achieve a consistency that is manageable so you can shape it into a round ball. I also highly suggest you oil your hands to manage dough with more ease. I have saved the step by step on Yogurt Buns making on my Instagram highlight here so you can see the texture to expect: https://bit.ly/2RbsCLd Hope this helps! Do come back to let me know how it works for you.
Tried baking this last night- so happy it turns out really soft and fluffy.
The buns were still soft the next day.
It’s so versatile – that it can be used with diff kind of fillings.
A recipe tht must try and must keep 👍🏻
Thank you for your lovely feedback and for loving this recipe as much as I do! You can keep this as a base dough and top/fill with whatever you want. 😉
Was skeptical about using yogurt as part of bread recipe but decided to give it a try. Was very surprised by the outcome of the bread. Its easy to make, extremely soft and fluffy. Even on the next day.
It’s my to go bun recipe. Separate it into 4 buns for burgers.
Loved it and thanks for the recipe. 😘
My sentiments exactly! Surprised how yogurt works so well. 🙂
Instructions are very clear and detailed in both youtube and blog. The buns turn out to be so soft and bouncy! Thank you for all the effort and encouragement!
I’m glad I was helpful! Thank you for the kind feedback. ❤️
Tried this recipe and it turned out so good and pillowy soft on the next day! 😋 Going to try it with sausage for the next round.
Oh yes 🙌🏼 so good on its own already but with sausages ohh-laa-laaaa!
Made spam buns today using this recipe! Was so so yummy!!! N so soft too!!!! 6 buns were gone too fast!!! Need more next time!
Haha oh yeah 6 buns will probably be gone right away! 😛
Tried this recipe again with raisins. It was so yummmmmy!!! So soft and smells so good! I think i need to double the recipe the next time! 😍😍
I used this recipe and made sausage rolls today. They were divine! They were so soft and pillowy. My only regret is that I didn’t make more! Definitely doubling this recipe next time. My hubby has already given me a list of ingredients to try. Thank you again Michelle!
Woohoo!! The world is your oyster now. Luncheon meat, sausages, meat floss, anything that your family likes. This recipe also works well for sweet fillings!
First time trying out this recipe and it’s a success! Super simple and easy .. soft abs fluffy like pillow.
Great recipe. Will make more:) thanks
Really so pillowy soft and moist bread!!! Our family love it! I retarded the dough in the fridge overnight and bake it this morning for breakfast. We added shredded cheese and sugar as toppings😋😋
Nothing quite like freshly baked bread in the morning!! 😍
Tried the recipe today with advice given by Michelle. Instructions and videos are clear and helpful. Thank you!
Thanks for sharing your recipe. Decided to bake this in the evening for tomorrow’s breakfast. Didn’t expect it to be this fluffy and soft! Love it!
Love this recipe to bake loaf. Easy TM recipe to follow. The texture is indeed soft and fluffy. Thank you for always include TM method.
This recipe is definitely a keeper.. The buns are soft and fluffy even till the next day.. I bake 3 times on the same week after the 1st try 😆 Thanks The Bakeanista!
3 times in the same week!! WOW!! Thank you for loving the recipe. ❤️
Love this. Thanks for showing the double recipe steps as well. Sons love it. My filling is butter and sprinkle w salt on top of it aka pillowy soft yogurt salted bun 😍
The recipe is easy to follow and the bread is soooo soft. Its a MUST TRY for everyone
Tried this recipe and my family loved it very much! Recipe was fairly easy to follow, It was an enjoyable experience for me!! Especially the one with luncheon meat is a must try 👍🏻
Amazing recipe! Thank you.
One question if I may, my dough is not smooth when I shape and proof. Is it because I haven’t knead enough or i have too much oil on my hand that changes the texture of the dough? I am a Thermie user.
Hello! Is your dough too sticky, thus not smooth? I don’t oil my hands too much, just a small amount enough to ensure dough do not stick to your hand.
Easy yet amazing recipe! Works everytime. Perfectly soft & fluffy, can goes well with any filling or just by itself. Love it, thanks very much for sharing!
Hi, can I use wholemeal bread flour instead? Thanks!!
You can use maybe 20-30% of Wholemeal flour but I wouldn’t suggest 100%.
Hi, I made this yesterday night and it’s surprisingly quite a fast buns to make. My kids ate 5 right out of oven after it cooled. One quick question, I noticed that my buns shrink downwards slightly during baking, may I know what it’s happening? I tried to perform a window pane test but the dough it’s not strong, suspecting the gluten not strong. Please advice. I’m using TM to mix it. Thanks.
Hi Sharon, when you tried to perform window pane, did you allow the dough to rest for a minute after kneading?
If the dough tore before you could stretch it, it requires further kneading.
May I know if your dough was extra sticky or was it smooth after kneading was done?
Did you adjust recipe or followed exactly as per my ratio?
Hi, I believe it should enough rest as I was trying to get the remaining dough out from the bowl and blade. It is smooth after kneading and after I add in 2 to 3 tbsp of flour as it was sticky. I tried again yesterday night ( buns gone into stomach after breakfast). This time I added 2 tbsp of flour becoz sticky dough. Knead with TM, transfer out and knead lightly with hands for about 3 minutes. Then proof it. This time the dough is slightly stronger gluten. But it also shrink down a little during baking. Kids ate 5 after it cooled too. I followed exactly the measurements and steps too. Not sure what is the trigger.
Maybe if you could snap a video and share with me on Instagram so I can understand the shrinkage, that might give me a better idea. Next round when you bake, try adding 10-15g additional flour before autolyse. Then see if the dough is more manageable.
Amazing recipe! I was skeptical at first as I don’t even remember how I stumbled onto this site. After making it the first time, I knew this is a winner recipe. I made it again few days later and stuffed the buns with fried spam and it was even better. This is now my weekly go to bread recipe.
Thank you for continuing to share yummy thermomix recipes! Keep them coming pls!
These buns were super duper soft and sooo good and surprisingly super easy to make! My kids couldnt wait for it to cool down. As soon as i took it out, they were gone in seconds! Thank god i doubled the recipe haha i put in nutella for two buns and the kids loved it! Thanks michelle!❤️
oh my. tried it successfully. so soft & fluffy even on the 3rd day! i wonder if i can use this recipe to make baguette cos i hate hard chewy ones. perhaps i need to adopt the steaming (water in tray) method ?
Hi Suzie! Thanks for the lovely feedback. I don’t think this recipe will make a good baguette 🥖 as it has a completely different texture
Thanks Michelle for your kindness in sharing this details lovely recipe… The bun turns out irresistibly fluffy and soft. The best bread made and had ever 😋
It is an everyone must try recipe for the amazing outcome 🌹
Softest bun ever! Thank you, Michelle 😘
Amazing recipe! The buns were soft and fluffy even on the next day and my family and I enjoyed it! 🥰. Thanks Michelle!
This is an awesome sharing ! Thank you so much for your kindness and generosity for sharing . Ur sharing is definitely worth to be shared! This soft yogurt buns all of my family loves so much!
Thanks for sharing your recipes! It is so so so yummy!!!!! Love it 🙂
Thank you Yvonne! Glad to hear that <3
Hi, can I use the tang zhong milk bun as base for the sausage buns ? i simply run out of yoghurt at home.
Yes of course! You can use any bread base you like for the sausage buns. 🙂
Tried this and super like it. The dough was initially too sticky and I followed the guide to add a little flour and knead at a time 😘
Thanks for this great recipe, my MIL is vegan, but now she can enjoy my homemade bread without any hesitation as this recipe is eggless!! The outcome is suprisingly very very soft, and it remains soft for the next day.
Thank you michelle.
I followed the recipe exactly but my dough didn’t double in size. What could be the reason you think? I wrapped my dough in thermo mat and placed it in my Varoma on top of some boiling water in the thermoserver.
Hi Corene, I suggest doing the yeast test with water and sugar to see if your yeast is still alive.
Great buns.. could we triple the recipe with thermomix?
It would be better not to do so.
Thanks for the recipe, great for a TM newbie like me! My family loves it, we finished it within the same night itself! 🙂 Few quick questions,
– can I prepare the dough beforehand, and leave in the fridge to proof overnight instead? Can it be either the first or second proof?
– can I put in fillings into the bun? How much filling would you recommend?
– can I use this to make pandan or chocolate buns? If yes, when should I add them in?
Thanks ahead!! 🙂
Hi Jean, glad to hear that your family enjoyed it!
– can I prepare the dough beforehand, and leave in the fridge to proof overnight instead? Can it be either the first or second proof?
Yes you can retard your dough overnight. Best to do it for second proof.
– can I put in fillings into the bun? How much filling would you recommend?
Yes you can, best around 1 tbsp.
– can I use this to make pandan or chocolate buns? If yes, when should I add them in?
It depends on whether you’re using fresh pandan juice or extract. For extract, 1 tsp should do.
Chocolate also possible, you may refer to this recipe or even give this recipe a try:
https://thebakeanista.com/ultra-soft-tangzhong-milk-chocolate-buns/
I was so amazed by this recipe. The bun was so soft and fluffy. Doesnt even turn hard after a few days. Did not have a bread machine at home, so was kneading the dough with bare hands!
So happy that it turns out great! Cant wait to make it again!
Made these buns today and true to the name of the recipe, they’re absolutely pillowy soft!! Ahhhhh I almost didn’t want to share them with my family hahaha!!! They’re just too good!
Can’t wait to try making the 450g loaf version!
May i know the egg wash for luncheon bread roll, isn’t just egg yolk? it looks so nice in the pic, golden colour seems like deep fried bread 🙂
I use whole egg for egg wash, not just egg yolk. But you can definitely use egg yolk only if you want.
Oh ya, one more question, the white cloth that always shown in your video, i wonder should it be wet or dry?
It should be damp cloth. Or can use cling wrap.
Used this recipe yesterday using thermomix and it was such a joy throughout the process. The bread turned out as described. Thank you for sharing your recipe!
That’s music to my ears, Lynn! Thermomix does ease the breadmaking process, doesn’t it ☺️
Thank you for the excellent recipe and clear instructions. My kids loved it! Can I check if it is possible to omit the sugar? What’s the purpose of the sugar? Thanks!
Hi Michelle, glad to hear your kids enjoyed the recipe! I wouldn’t suggest omitting sugar as it supplies the yeast with “food”. Yeast + sugar work together to release CO2 to help bread rise. This recipe has minimal sugar compared to other recipes, but if you’d like to omit sugar altogether, maybe consider the Eggless Sugar Free Wholemeal bread recipe that uses honey instead.
Baking as I’m typing this at 12.20am cause my dad’s craving for the soft yoghurt buns and wants to have it for pre-dawn meal later. No other recipes I’d go to for this! ♡
Tried so many times with different variations! My kids, who are picky eaters, love them too!
Do you think if the plain yogurt has turned sour, it affects the dough rising? Mine didn’t rise even after few hrs, yeast was a new pack, the only thing was that my yogurt was sour, not outdated but definitely sour. I’ve used this recipe plenty of times and just love it. This is a great recipe.
Hi Rose, glad to hear that you usually enjoy this recipe. Hmm strange theoretically it shouldn’t affect but then again, I’ve never tried with sour yogurt so I can’t be too sure
Just made this and it is soooo soft and yummy! Thanks so much, Michelle for sharing this recipe. I used salted butter and added half the salt in the recipe. It turned out well. This one is a definite keeper!
Oops! Forgot to rate it. 5 stars for sure 🙂