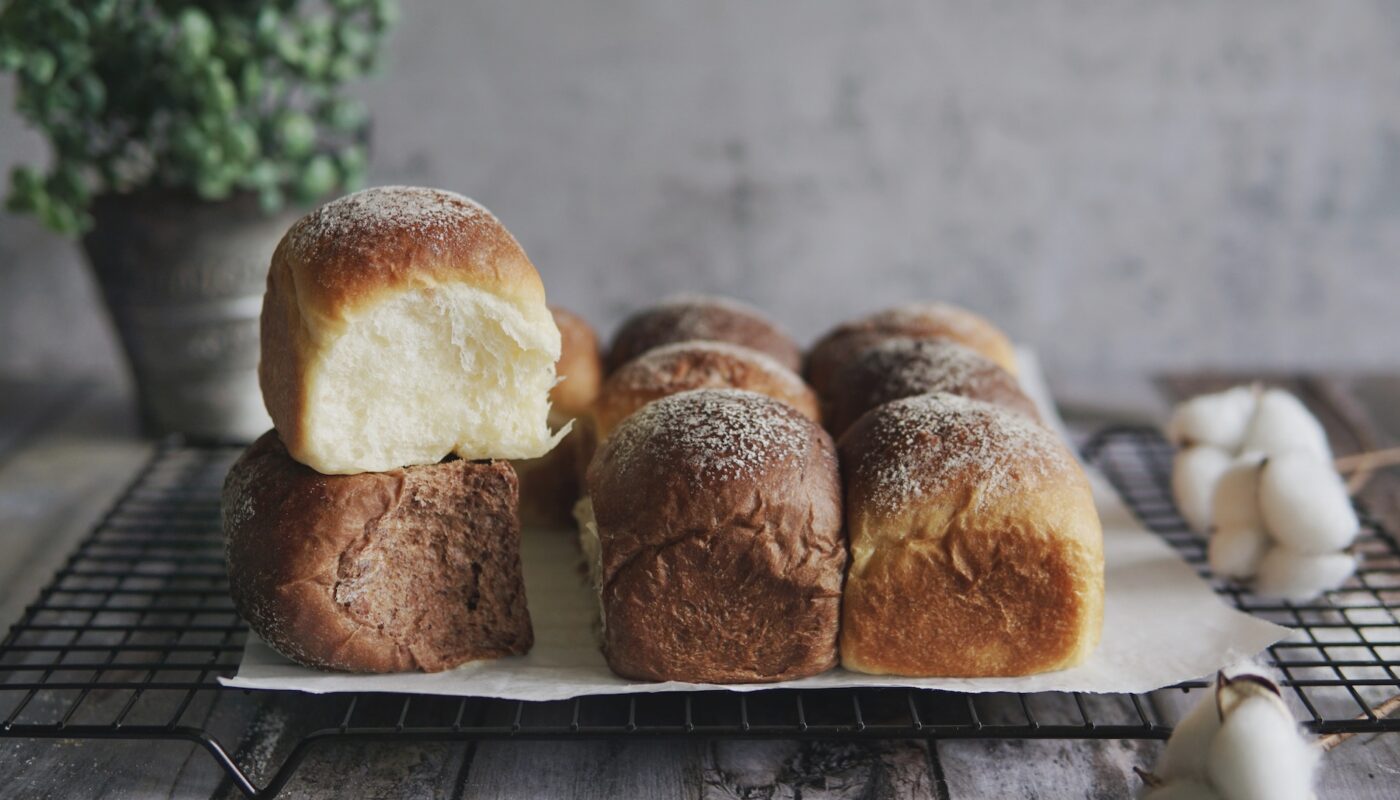
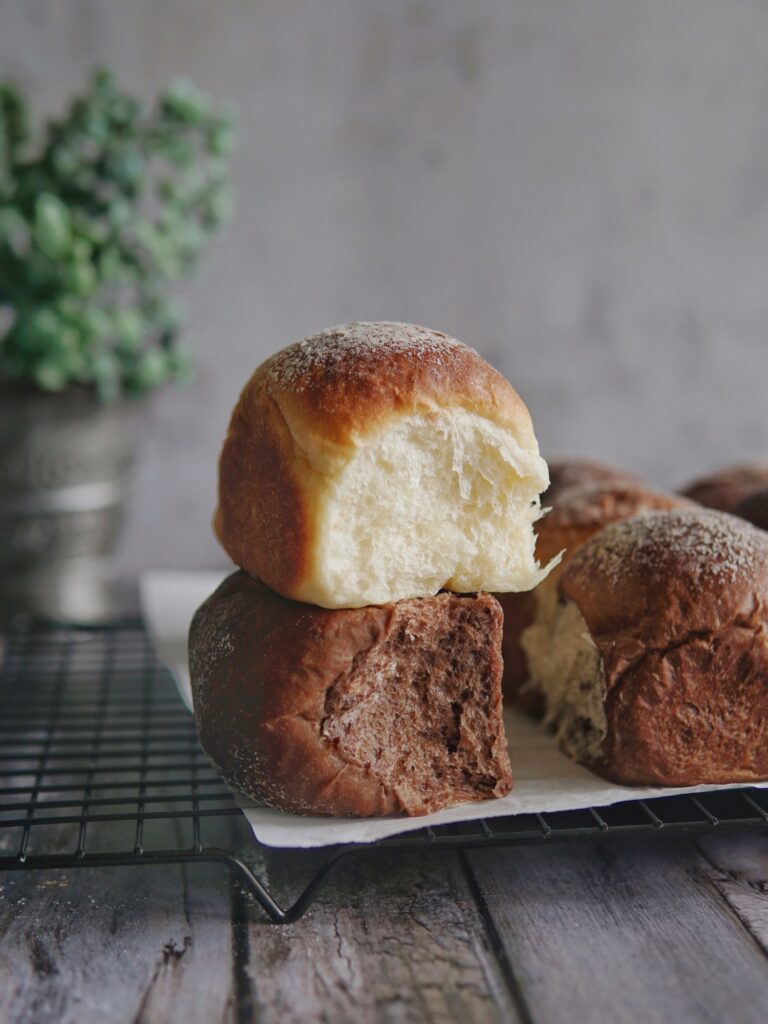
I wanted the usual Tangzhong milk buns, but I also wanted chocolate for a change, since I have cocoa powder that has been untouched for awhile now. This chequered buns was a result of the indecisiveness in me. Now I get the best of both worlds – using just the one base dough.
A sweet, fluffy bun that is slightly richer due to the cream that was added to give the buns some volume. If you do not have whipping cream handy, you may want to check out my regular Tangzhong Milk bread here instead. You may also use that recipe following the same portions and bun shaping steps in this recipe.
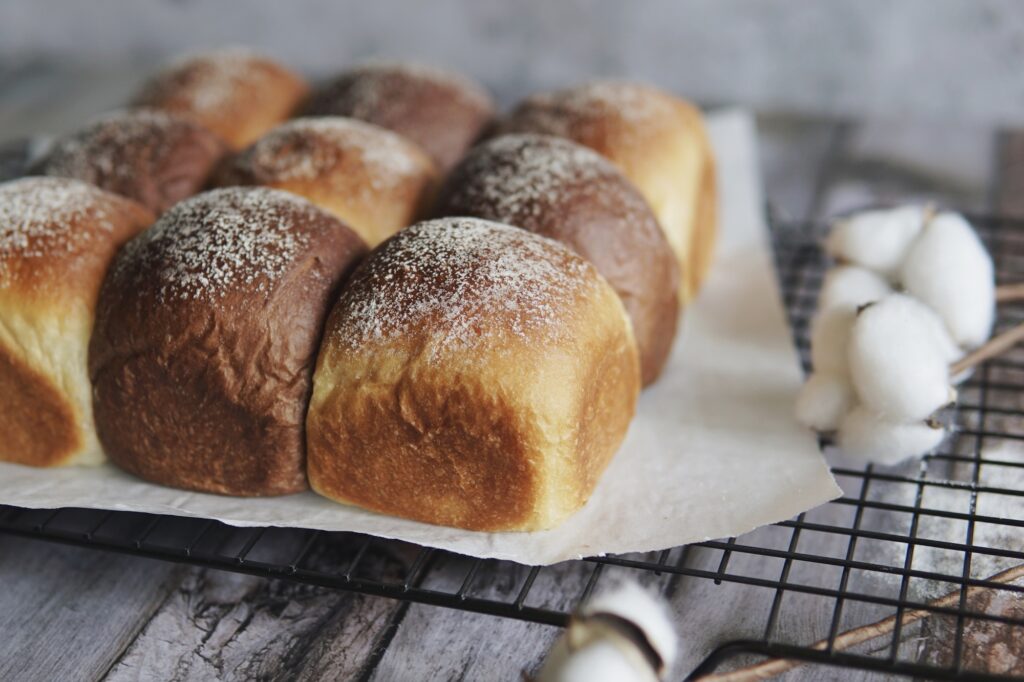
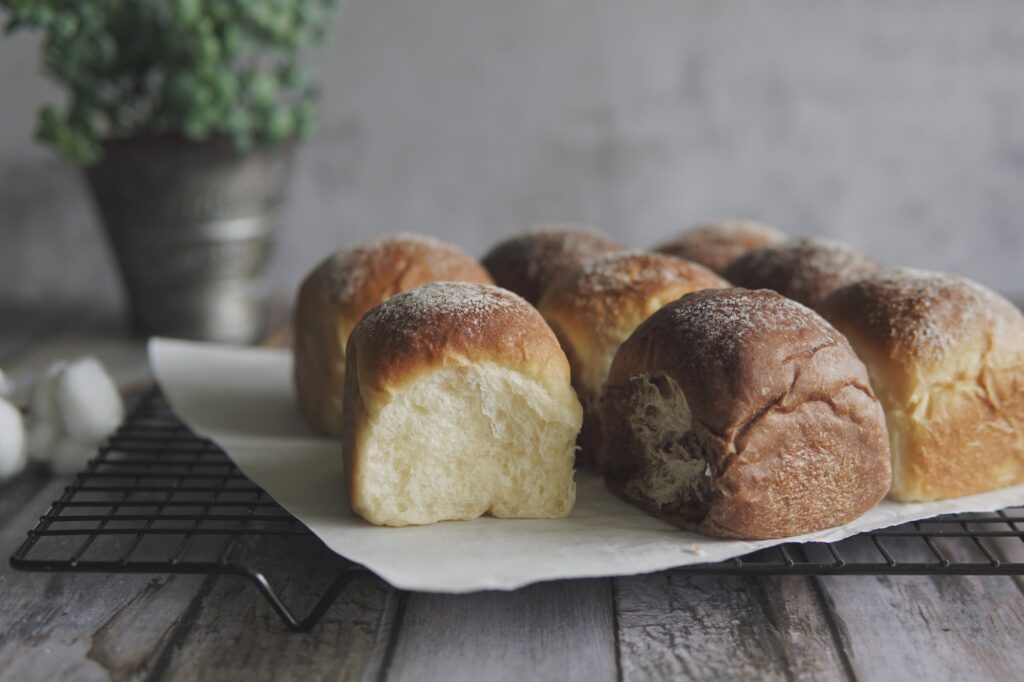
As always, for every bread using Tangzhong/water roux, it turned out ultra soft and airy. The pillowy texture makes me want to fall asleep on them. I like the visuals of alternating dark and light shades too!
Sometimes there are simply just not enough words to describe, so perhaps this crumb check video below may give you a visual understanding of its ultra soft texture:
For the chocolate portion, I simply added a paste made of cocoa powder and milk that gives it a subtle but noticeable chocolate flavor.
If you do not have cocoa or simply prefer plain milk buns, you can omit the chocolate paste. You can experiment with all sorts of flavours for multi-coloured buns to always keep things fun and exciting when baking. Whether plain or chocolate, they are delicious either way!
Trust me, they taste so good you just got to try it for yourself. I dare say even, they are WAY better than those store-bought ones!
If you try this recipe, tag me on Instagram @thebakeanista or comment below. I’d love to know how it turned out for you.
Ultra Soft Tangzhong Milk & Chocolate Buns
Ingredients
Tangzhong
- 20 g high protein bread flour
- 100 g water/milk
Chocolate Paste
- 1 tbsp cocoa powder
- 1.5 tbsp milk
Main Dough
- 30 g milk chilled
- 30 g whipping cream chilled
- 40 g castor sugar
- 1 large egg chilled
- 1 tsp yeast
- 270 g high protein bread flour
- 20 g milk powder
- ¼ tsp salt
- 30 g butter softened at room temp
Instructions
- Please note that I have included two methods below for tangzhong making and dough kneading using either Thermomix or conventional bread machine so do take note of the sub-headings.
[THERMOMIX] Tangzhong & Dough Kneading
- To make tangzhong, place 20g high protein flour and 100g water/milk in mixing bowl, cook for 1min/75°C/spd 2 and let stand for 10-15 minutes until temperature lowers down to 37°C.
- Whilst your tangzhong is cooling down, prepare Chocolate Paste by mixing cocoa powder and milk in a separate small bowl. Set aside.
- Moving back to your mixing bowl, once temperature hits 37°C, add milk, whipping cream, sugar, egg and yeast, then mix 30 sec/spd 2.
- Add remaining 270g high protein flour, milk powder, salt and butter then mix 30secs/spd 6. Proceed to knead 4 min.
- Weigh out 330g of dough to pastry mat or greased bowl, shape into ball then let rise, covered loosely with clingwrap/damp towel until doubled in size (approx. 45-60 minutes).
- Add chocolate paste into remaining dough. Mix 15 secs/spd 6, then knead for 30 secs. Transfer chocolate dough to pastry mat or another greased bowl, shape into ball and let rise, covered loosely with clingwrap/damp towel until doubled in size (approx. 45-60 minutes).
[CONVENTIONAL] Tangzhong & Dough Kneading
- Prepare tangzhong by mixing flour in water and whisk together in a pot, ensuring the mixture is well combined with no lumps. Cook over medium-low heat, stirring consistently to prevent burning and sticking while you cook.
- The mixture will gradually become thicker. Once you notice that some “lines” appear in the mixture for when you stir with the spoon, it’s done. Your tangzhong is ready.

- Transfer into a clean bowl. Cover with a cling wrap sticking onto the surface of tangzhong to prevent it from drying up. Let cool.
- You can pre-make the tangzhong ahead of time and store it chilled in the fridge for a few days. If you've chilled your tangzhong, ensure to return it at room temperature first before using.
- Whilst your tangzhong is cooling down, prepare Chocolate Paste by mixing cocoa powder and milk in a separate small bowl. Set aside.
- Add all ingredients into breadmaker; first the wet ingredients (tangzhong, egg, milk, cream), then followed by the dry ingredients (in order of sugar, salt, flour, milk powder, yeast).
- Select "dough" mode and let knead until all ingredients come together, usually I let it knead for approximately 8-9 minutes.
- Then add in the butter, continue kneading until the dough is smooth and elastic. My breadmaker's dough kneading cycle is 23 minutes. During the last 4-5 minutes, pause the machine, weigh out 330g of dough to pastry mat or greased bowl.
- Add chocolate paste into the remaining half of dough in the mixing bowl and continue to knead until the cycle is complete.
- Whilst your chocolate dough is kneading during this 5 minutes, shape your milk dough into a ball then let rise covered loosely with clingwrap/damp towel until doubled in size (approx. 45-60 minutes).
- Repeat the same steps with your chocolate dough – transfer chocolate dough to pastry mat or another greased bowl, shape into ball and let rise, covered loosely with clingwrap/damp towel until doubled in size (approx. 45-60 minutes).
Dough Shaping
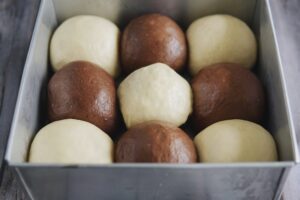
- After both doughs have doubled in size, punch down to deflate. Divide milk dough into 5 equal portions weighing approx 65-67g each and roughly roll into a round shape. As for chocolate dough, divide into 4 equal portions also weighing approx 65-67g each and roll into round shape. Let rest, covered for 10-15 minutes so the dough will be easier to handle.
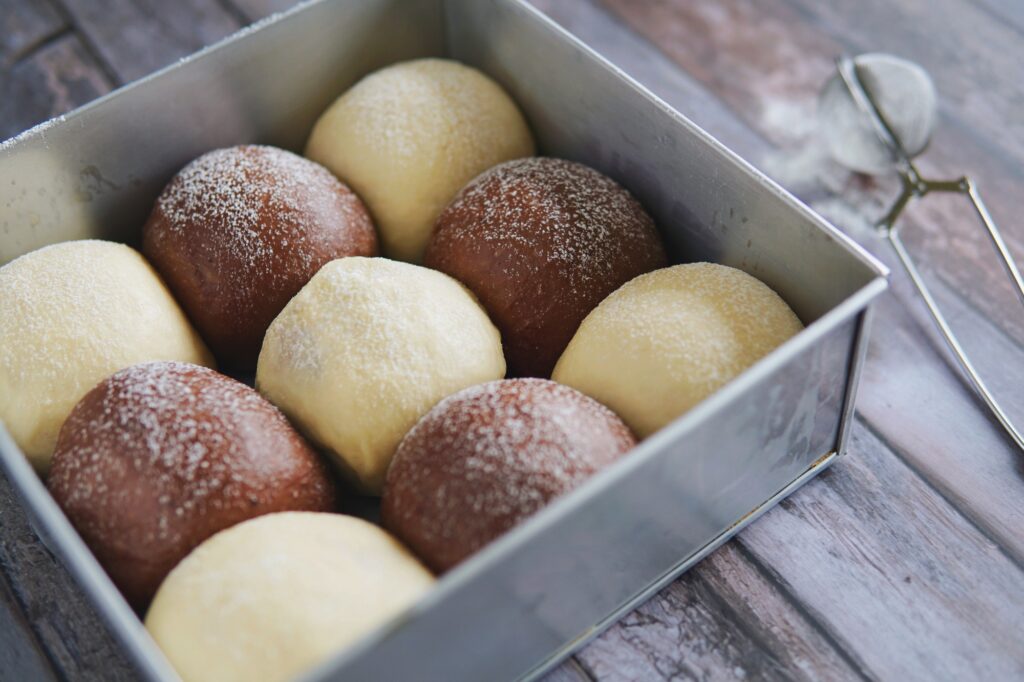
- Shape each portion into tight round balls and place in a greased/lined 8" square pan alternately such as the below picture:
- Let dough rise for its 2nd round of proofing, until double in size. This takes another 35-40 minutes depending on the weather. The best temperature for 2nd round proofing is 38C, humidity 85%. I usually heat up a cup of water in the microwave for 60 seconds then proceed to leave my dough, covered with a cloth/cling wrap, inside the microwave to rise.
- During last 15 minutes, preheat oven to 180°C.
- Lightly sift some flour over dough and bake at 180°C for 15 mins until golden brown.
- Remove from oven, and let cool for 5 minutes. Remove bread from pan (handle with care as bread will be very soft) and transfer onto a wire rack to let cool completely.
Notes
I do not have whipping cream handy – what can I subtitute with?
Do not substitute the 30g of cream with another portion of 30g of milk. Both these ingredients have different % of fats etc. Instead, what you can do is to use my regular Tangzhong Milk bread here that calls for no cream, but follow the same portions and bun shaping steps in this recipe.I do not have cocoa powder in my pantry.
Then you can simply omit the chocolate paste to make just milk buns – which honestly are also delicious plain!I do not have an 8″ square tin.
You may use a 26cm/10″ round baking tin instead and alternate the buns as you like. This recipe was adapted from Cookidoo and modified by The Bakeanista.Few Things to Note
When it comes to bread making, there are many factors that will influence your dough and the end product. Recipes should be used as a guide, as you familiarize yourself with the process and dough.
For instance, your dough may require extra kneading time depending on the flour and its protein content. The method used to knead also needs to be taken into account as some machines work the dough quicker, whilst others may require a bit more kneading time.
Temperature and humidity plays a big part in how your dough rises. The amount of time required to proof your dough also varies depending on where you’re based at. For my second proofing, I usually heat up a cup of water in the microwave for 45 seconds, then proceed to leave my dough inside the microwave to rise for 25-30 minutes.
It’s also very important to try to get to know your oven, as every oven is different. My oven heats up quickly so when a recipe calls for 180-190°C, I sometimes have to drop it down to 160-170°C depending on which rack I use. Keep an eye out as the bread is baking. Adjust either the baking temperature or duration according to how your oven behaves.
FAQ
Can I omit milk powder?
You may opt to omit the milk powder but I wouldn’t recommend it. Milk powder adds fats, protein and flavour to the dough, that not only makes the dough richer and creamier in taste, but also helps dough rise higher. The addition of milk powder will also help yield a more tender crumb texture.
I wouldn’t suggest substituting milk powder with liquid milk as it is adding extra hydration to the dough, which may alter the texture of the finished product. In other words, adding milk powder gives you the same benefits of milk without the extra liquid, with a more concentrated % of milk sugar and protein that will benefit the dough.
Help! My dough is too sticky!
For bread maker users, check the dough 10 minutes into the kneading cycle. It should be smooth and the mixing bowl should be clean by now. If your dough is too sticky to manage, you may add 1 tbsp of flour at a time.
For Thermomix users, if you experience a stickier dough, you may want to add 1 tbsp of high protein bread flour at a time and knead for 15-20 seconds until incorporated.
Lightly oil your hands (and the pastry mat depending on how sticky your dough is) using neutral flavoured oil to shape dough into a ball. Apply the chafing technique by cupping your hands gently around the dough, apply a light, downwards pressure to the sides whilst simultaneously rotating the dough in a circular clockwise motion. Continue doing so until a smooth, even, and round ball is formed. I shared a video of how I perform this technique saved on my Instagram Story highlights.
How do I know if my bread is well proofed and ready to be baked?
You may perform the visual test to check. Lightly press the surface of the proofed dough with the tip of your finger for about 2 seconds and observe how fast the dough bounces back up.
- UNDER-PROOF: If it bounces back up too fast without any indentation, it isn’t ready yet, so give it more time.
- READY TO BAKE: It is supposed to bounce back up slowly, about halfway up and leave a slight indent.
- OVER-PROOFED: If the indent remains without bouncing back up, yes it is over-proofed, but don’t worry! You can still save it.
How to save an overproofed bread dough?
If the dough is overproofed, the gluten is being over-stretched and it will be unable to hold up the internal structure of the bread. The wall will highly likely fall after baking and the loaf would then collapse. If it isn’t severely over-risen, you have the option to quickly pop it into the oven to bake it right away. Otherwise what you can do to save it is by deflating your overproofed dough and reshape, then repeat the second proofing again.
Which oven rack and what oven setting should I use?
I suggest the second rack from bottom. I bake using top and bottom heat, with fan.
When to remove bread from tin?
Upon removing from oven, immediately remove it from the bread tin and let cool on a wire rack. This step is crucial in ensuring there is proper air circulation and that condensation does not happen causing your bread to get wet/soggy at the bottom.
How to store bread?
Ensure to store bread in airtight container or ziplock bag so the bread can stay soft and last for up to 2-3 days at room temperature.
Have you tried this recipe?
If you enjoyed this recipe, you may also want to check out other delicious recipes HERE.


Love this recipe. Buns are so soft and I added some chocolate chips as filling as my kids love it hehe!
Yums!!! Adding chocolate chips is definitely a great idea! 😊
It’s stays soft on the third day! And my kids love it so much! Thank you for the easy recipe and method for TM. I have more reason to bake bread now 😍
My absolute pleasure, Janice!! Keep baking on. ☺️
Love this recipe so much! The buns are very soft and and taste so good! Didn’t have chance to keep it till the next day!! All gone within a short time! Thanks for sharing good recipes!
Thank you Cynthia! Next time maybe you might need to double the recipe hehe.
Tried this recipe.. Added chocolate chips and cheese in it! It’s so soft and tasty! Thanks for sharing! ❤️👍
Yum! Sounds so amazing with choc chips and cheese. Thank you for your feedback! 🙂
Hello! Thanks for the recipe! I’m wondering which high protein bread flour are you using and what settings do you set for your oven? Was it 180 degrees using fan-forced convection? Thanks in advance!
Hi Lene, I purchase high protein bread flour from local bakery stores that have already been rebranded to their own packaging without details. As for the oven, I use fan forced with top and bottom heat, with the rack on second from bottom.
This recipe is truly loved and definitely a keeper. I doesn’t have many successful bun making experience in the past, but with this recipe, i nailed it for my very 1st attempt, even for a baking noob like me. The bun still stays soft the next day and my family love it so much. Thanks for sharing this wonderful recipe. ❤
Thank you for trying this recipe! I’m so happy to hear that it turned out well for you so you get to enjoy soft fluffy buns whenever you want. ☺️
Hello! I’m interested to try this recipe but can I check if I were to make this at night, can I leave it overnight for second proofing and bake on the next morning?
Yes you can, you can place it in the fridge overnight for 12-18 hours then remove following day to bring back to room temp for approx 20 mins whilst you preheat your oven.
Great recipe. Thank you so much for sharing. I made a batch with home made red bean paste filling.
Yums! That sounds delicious. Glad to hear you enjoy them. 🙂
Thanks for sharing us so many awesome recipes!! I had tried few of ur recipe and it turn out really soft and fluffy!! Please keep sharing us new and creative recipe ❤️
Hihi, thank you for this wonderful recipe but may I know if I can omit the milk powder? Thank you
Hello! You can omit the milk powder but I wouldn’t recommend it. Milk powder adds fats/protein/flavour to the dough that not only makes the dough richer and creamier in taste, but also helps dough rise higher. The addition of milk powder is said to yield a more tender crumb texture.
Thanks for ur wonderful recipe that explain in very details, i’d bake tangzhong milk & choc bun for 4 times and my family just love it..
They ask for more!!!
Can’t wait to try other recipe..
Yay! What I love hearing most is how much your loved ones enjoy the recipe as much as I do. ☺️
Thank you for your recipe.
Everybody loved it!
May I know if I can double the recipe?
Thank you.
Glad to hear that! Yes you can easily double the recipe. But you’ll have to increase dough kneading time slightly. What method do you use for kneading?
I’m using Thermomix method.
Do you think that I can add strawberry powder instead of cocoa? 🙂
Thank you.
Yes of course you can! Substitute the cocoa powder with any other flavoring option of your choice ☺️
Hi Michelle
If I were to double the recipe, what would be the recommended kneading time on the TM? About 6 mins?
Hi Fay, would you like to double both flavours? These are the changes I would make:
* Moving back to your mixing bowl, once temperature hits 37°C, add milk, whipping cream, sugar, egg and yeast, then mix 45 sec/spd 2.
* Add remaining 270g high protein flour, milk powder, salt and butter then mix 45secs/spd 6. Proceed to knead 5-6 min.
* Add chocolate paste into remaining dough. Mix 15 secs/spd 6, then knead for 45 secs. Transfer chocolate dough to pastry mat or another greased bowl, shape into ball and let rise, covered loosely with clingwrap/damp towel until doubled in size (approx. 45-60 minutes).
Yes I would like to double both flavours!
Always thankful for your detailed instructions. I’ll give it a go!
Love this recipe. Thx for sharing !
I turn it into wool roll bread instead of bun and it still came out yummy 😋 👍
Oh yes this would make a good base for the wool bread!
Many thanks, Michelle for your help and input regarding this recipe. Love it…the title to this recipe says it all 😉❤️
Pleasure is mine! ☺️
Really fall in love with this recipe. 😍 The recipe is so detailed and never turn me down with all of the recipes here. So grateful to have you in my baking life, such a wonderful and helpful lady! Thanks a lot! ❤️
Thank you for making my day with such a lovely comment! 😍
Many thanks for sharing this recipe. I tried yesterday and everyone in the family like the soft texture of this bread when they ate this morning. The only feedback from my gal was the milk bun tasted like flour and suggested adding more salt and sugar. What do you think went wrong with my baking? If adding salt/sugar helps, may I know how much can I adjust to? Thanks for your help!
Hmm the recipe already has 40g of sugar which I think is enough. Even if you wanna add more salt, perhaps 1/2 tsp will do. I’m not sure why yours would taste like flour… perhaps it could be due to dusting of flour on surface or hands when shaping?
Thank you Michelle for the reply and advice. I shall try again and watch out the dusting of the buns. Overall, this is still the softest bun recipe and I will definitely bake again and again. Looking forward to trying your other recipes and more new recipes from you!
Hi, is Japanese bread flour consider high protein flour?
Yup it is!
Just finished baking this!
Awesome recipe and easy enough to follow! Added chocolate chips to the chocolate flavoured ones and the kids love it!
Hi dear.. the recipe is indeed a winner… can I ask whether I can double the recipe with just plain flavor using thermomix? I have read somewhere that maximum for flour inside thermomix is 500gms only but if I were to double the recipe it will be over 500 plus the roux. Appreciate yr kind advise on this. Thanks much
Hi Dorothy, I have personally doubled the recipe multiple times. I find that when I double though, I have to increase kneading time to 6.5mins before butter and 1.5 mins to knead in butter.
Thanks heaps… love all yr recipes… look forward to them all the time.. hugs
Love this recipe so much. The bread turn out to be so soft and even after 2-3days. I don’t have a thermomix but stand mixer works well too. I’m so satisfied!
Love this recipe. I changed water to milk in the tangzhong step. Turns out super fluffy. Delighted on the outcome!
Hi Dear. Thanks for sharing the recipe. First time trying tangzhong bread recipe. I’m using TM recipe but find that the dough is very sticky and hard to work with. Following your tips, I added bread flour a little by little. I added 4-5 tbsp but the dough still very sticky. I followed the ingredients and steps to the dot, wondering where could go wrong?
Hi Sue, this is strange as this isn’t supposed to be a very sticky dough. One thing is to ensure measurements for other ingredients are accurate, but certain bread flour also requires more amount so sometimes gotta add like 20-30g more.
Hi. For Thermomix method, should I avoid kneading butter together with all the flour? Most of the time other recipe calls for butter to be added in as the very last step.
Also, can I substitute heavy cream with yogurt?
Hi Connie, usually other recipe calls for butter to be added at the last step after gluten formation, but this recipe method is a tad different. Still turns out soft and fluffy.
If you substitute heavy cream with yogurt, results won’t be the same as yogurt does not have the same fat % content.
Hi! This looks really good! I’m a vegetarian so can this be made without eggs? How should I adjust the recipe? Thanks!
Hi AJK, thank you for your comment. Maybe you can try my other egg free recipes instead. You can find them here: https://thebakeanista.com/category/baking/egg-free/
Hi
May I know what brand of cocoa powder did U use ?
The one I am using is a very pale chocolate colour as compared to yours
Thanks
I usually get those repackaged ones from bakery supply store so there’s no brand per se.
Hi will I be able to do crescent shape for this recipe?
Yes of course!
Hi! Can I ask if I can use this to make all chocolate buns rather than checkered? Do I double the chocolate paste amount to the dough and mix as per recipe?
You can replace 15-20g of the high protein bread flour with cocoa powder instead.
Really a good recipe. I use to make tearing toast which I thought was soft,but this takes the cake (baos!) almost effortless. No excuse to buy from bakery now.