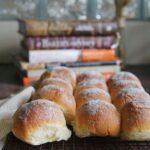
Pillowy Soft Yogurt Buns
These buns are so pillowy soft and delicious, your family will be demanding for more!
Servings: 8 buns in 8” round cake tin
Ingredients
(A)
- 200 g high protein bread flour
- 40 g greek or unsweetened plain yogurt chilled
- 120 g cold milk
- 16 g sugar
(B)
- 1 tsp instant dried yeast mix with 1/2 tbsp water
- ½ tsp salt
- 12 g unsalted butter softened at room temp
Instructions
Kneading with Thermomix
- Place all ingredients from (A) into mixing bowl - mix for 30secs/Sp3. Let rest for at least 15-20 minutes to autolyse. Refer to notes regarding autolyse.
- Mix yeast with room temp water, and add into dough mixture then knead for 1 min.
- Add salt - knead 30secs 🌾.
- Add butter and let knead for 4mins. 🌾.
Kneading with Stand Mixer / Bread Machine
- Place all ingredients from (A) into mixing bowl and mix together until well combined. If using a bread machine, select the "dough" mode, let knead for 3-5 minutes, then stop the machine. Let rest for at least 15-20mins to autolyse. Refer to notes regarding autolyse.
- Mix yeast with room temp water, and add into dough mixture and knead using dough hook attachment for 2-3 minutes. If using bread machine, restart the "dough" mode, let knead for 3 minutes.
- Add salt, knead for a further 2 minutes. If you're using bread machine, the dough mode would rest for approximately 5 minutes at this stage.
- Add butter and knead on stand mixer for 12-15 minutes until achieve window pane. For bread machine users, after the first rest, add butter and let kneading cycle is complete.
Proofing & Shaping
- Transfer dough to a pastry mat, shape into ball and let proof in a warm place covered loosely with clingwrap/damp towel until doubled in size (approx 45-60 mins).
- Punch down dough to deflate. Divide dough into 8 equal portions (approx 48g each) and roll into round balls. View video tutorial here for how to shape into round balls.
- Grease an 8” round cake tin, and place the dough balls around the pan in a circular pattern.
- Let proof for approximately 40mins. I usually heat up a cup of water in the microwave for 45 seconds then proceed to leave my dough inside the microwave to rise. During last 15 minutes, preheat oven to 180°C.
- Lightly sift some flour over the dough and bake at 180°C for 15mins until golden brown.
- Remove from tin and allow to cool completely on a cooling rack before serving.
Notes
Help! My dough is too sticky!
Your dough should be smooth and the mixing bowl should be clean by the end of kneading cycle. If your dough is too sticky to manage, I suggest adding 1 tbsp of flour at a time, and knead to incorporate the flour in.
For bread machine/stand mixer users, for every 1 tbsp of flour added, you will knead for 2-3 minutes to incorporate flour.
For TM users, for every add 1 tbsp of flour at a time, knead for 15-20 seconds until incorporated.
Repeat until dough is manageable. Then lightly oil your hands (and the pastry mat depending on how sticky your dough is) using neutral flavoured oil or butter to shape dough into a ball. Apply the chafing technique by cupping your hands gently around the dough, apply a light, downwards pressure to the sides whilst simultaneously rotating the dough in a circular clockwise motion. Continue doing so until a smooth, even, and round ball is formed. I shared a video of how I perform this technique here.
Alternatively, sticky dough could also be a result of the difference in ingredients, such as flour absorbency for example. If you experienced extremely sticky dough in your first attempt, and adding additional flour did not help, what you can do is to give the recipe another try but add 10-20g of additional bread flour to (A).
Can I double the recipe?
If you wish to double the recipe, make 16 equal portions and divide them equally into 2 x 8" round pans. Alternatively, you could divide the dough into 12 equal portions (weighing 64g each) and bake in a 9x13" oblong glass baking dish such as Pyrex.
For those using conventional methods, you may need to increase the kneading duration by 5-10 minutes.
For those using the Thermomix, increase the kneading time to 4.5 minutes at step 4.
Can I skip the autolysing step?
Even if you are pressed for time, I would recommend to at least allow the mixture to rest for at least 15-20 minutes at minimum. This rest period will assist in making your dough become smoother and more elastic.
Oh no, I left the dough to autolyse for too long!
No worries at all, you don't have to necessary stick to 15-20 minutes for the autolyse step. Letting the dough autolyse for 20-60 minutes is fine. In fact, it helps the dough.
The Thermomix method was converted and written by The Bakeanista. The ingredients for this recipe is identical to a recipe I found on a Facebook group written by a user called Cynderella Bakes.