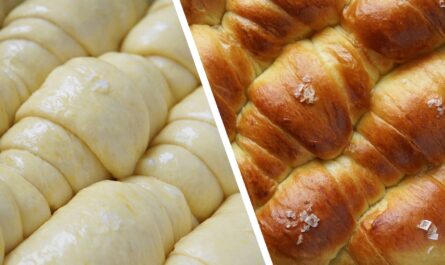
This Traditional Hailam Bread has a very, very special place in my heart. I believe many of you will share this sentiment, particularly if you are from Gen-Y, and even more so if you are from Gen-X. It is what we grew up with, ingrained into our DNA.
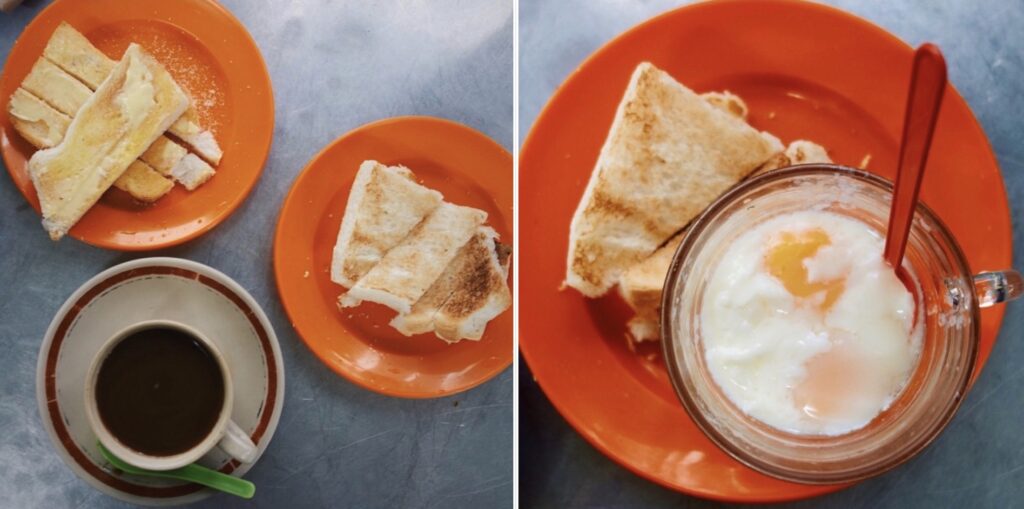
Quintessential to every kopitiam (local coffee shop) out there, I could never resist that scent of it toasted over charcoal accompanied with a piping hot cup of Kopi-O. Served with either kaya (coconut jam) and butter or half-boiled eggs, it doesn’t get any better.
Before the turn of the millennium, this was pretty much the only bread we ever knew. As globalization introduce us to new baked goodies, I find it sad that we are seeing less and less of these nowadays. So guys, let’s preserve our roots in the form of Hailam kopitiam bread, it is after all, part of our heritage as a people.
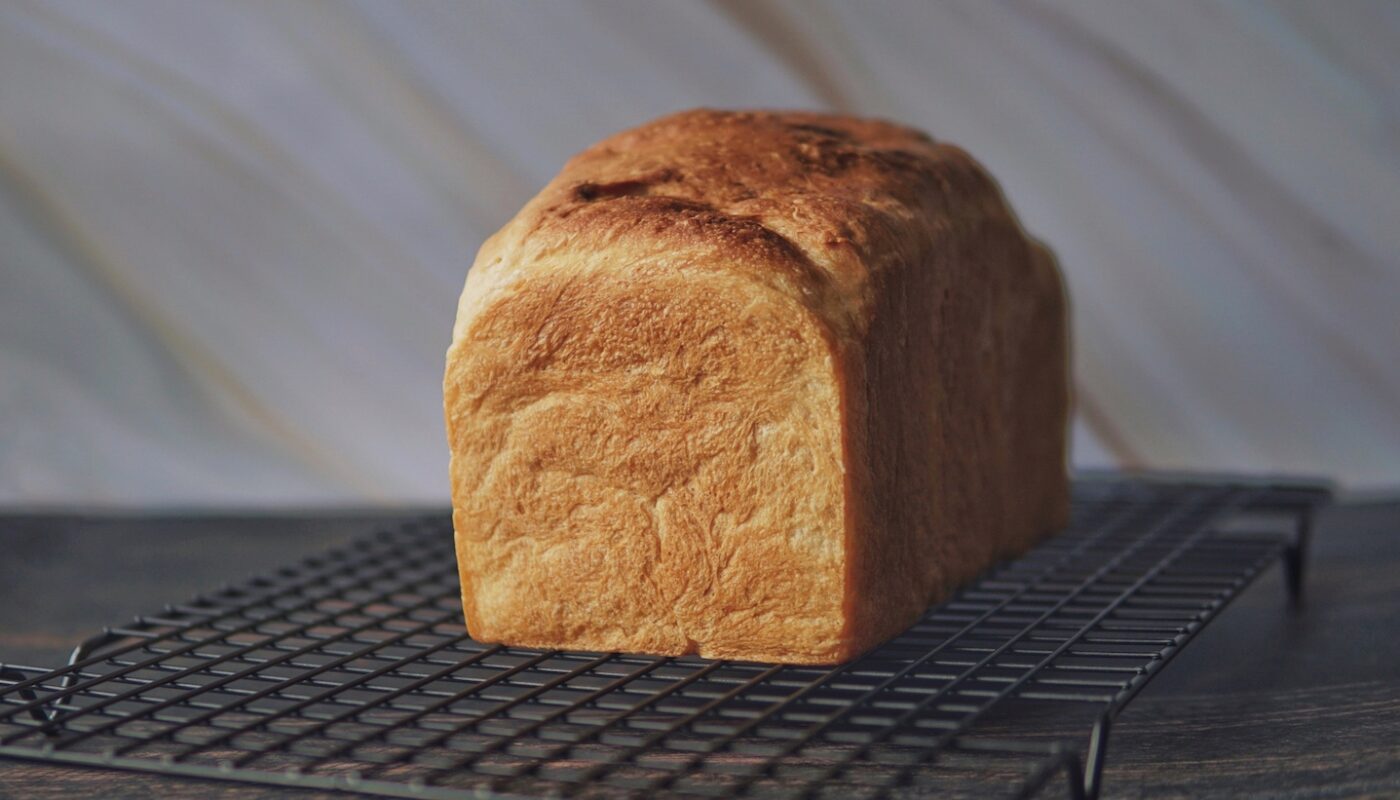
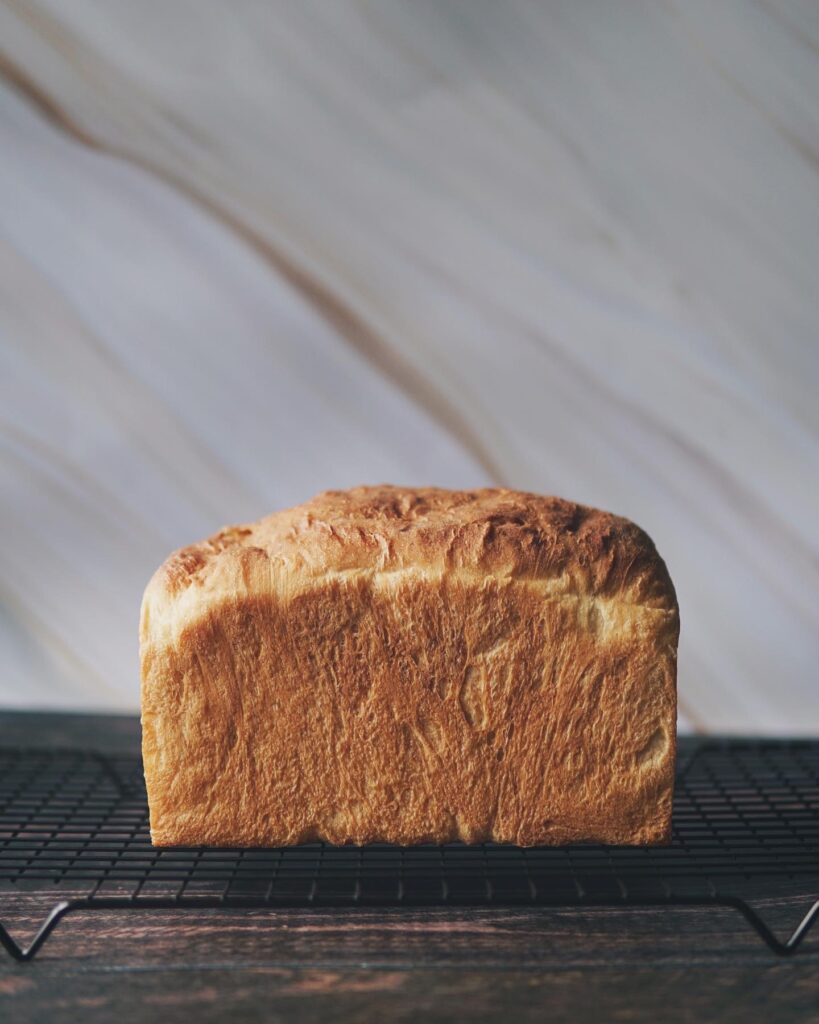
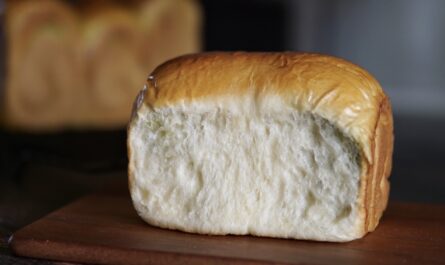
It is similar to Roti Benggali. This loaf has a crispy crust on the top yet gentle and soft on the inside.
The Covid-19 induced lock-down was hard on everyone. Many flocked to the markets to stock up on food. Loafs of bread, tray of eggs and cartons of milk were hard to come by.
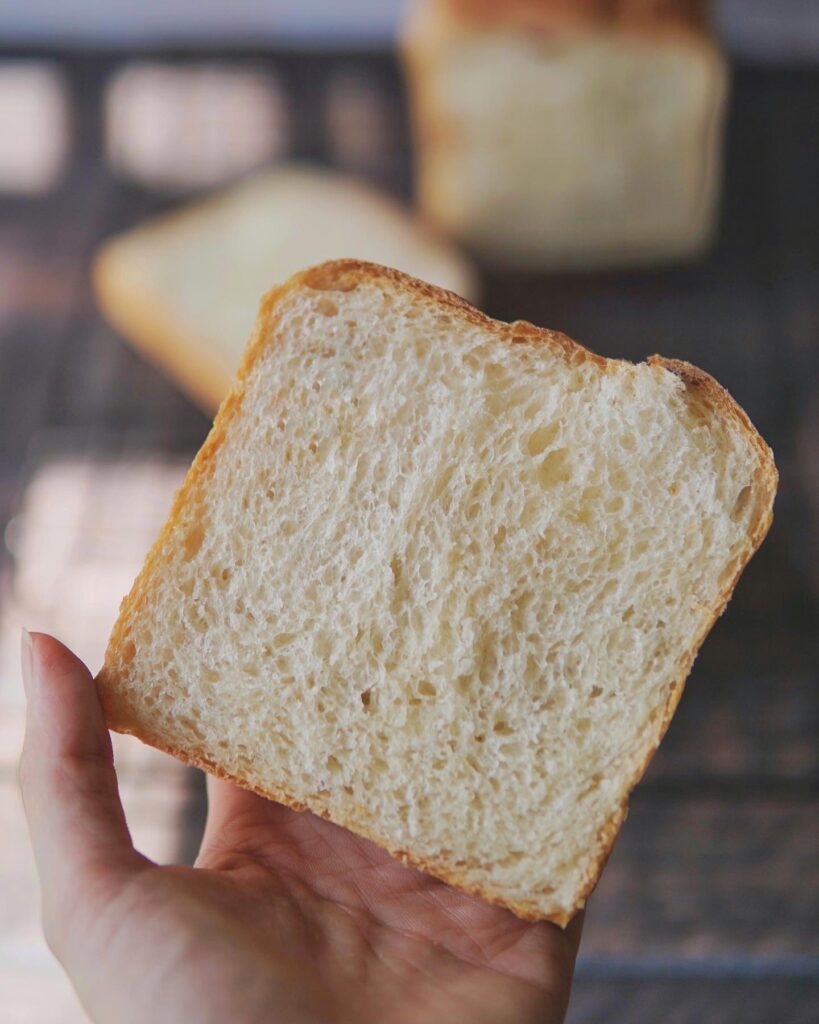
This is when Hailam bread takes over the stage. It requires neither eggs nor milk and is really simple to make. Using only staple ingredients, it yields a beautifully golden brown loaf without any wash. The inside all soft and fluffy yet firm enough to make a great sandwich loaf! Having this recipe up your sleeve might just be your saving grace!
Traditional Hailam Kopitiam Roti
Ingredients
- 200 g water
- 25 g sugar
- 1 tsp salt
- 325 g high protein bread flour
- 1½ tsp yeast
- 20 g butter
Instructions
- If using bread maker, put in all ingredients, with wet ingredients at the bottom followed by dry ingredients. Select the dough mode then knead until dough is smooth and elastic. The time of kneading should be about 23 mins. Alternatively, if using stand mixer, put all ingredients into mixing bowl, then using hook attachment, start kneading until dough comes together. Using window pane test, check if dough is well-kneaded.For those using Thermomix, put all ingredients in mixing bowl starting with wet ingredients, and followed by dry ingredients then knead for 4 minutes.
- Remove dough and shape into ball, place in a lightly-greased bowl then let proof until double in size. This usually takes an hour or so.
- Flour your work bench then punch out gas from dough and remove from bowl. Using a rolling pin, flatten out dough to a rough rectangle. Fold in both ends of the vertical side to meet in the middle. Gently flatten dough with rolling pin, then swiss roll it to form a log. Seal the edges then gently place it in a 8x4x4” bread loaf pan or equivalent.
- Use cling wrap or damp towel to cover the pan. Proof until dough touches the film/towel, then it’s ready to bake.
- Bake at 180°C for 40 mins – the first 20 mins on the 2nd rack from bottom, and final 20 mins on the bottom rack. Cover pan during last 10 minutes, unless you prefer a darker loaf.
- Remove from oven, and let cool in pan for 10 minutes. Remove loaf from pan and let cool on rack for at least 30 mins to an hour before slicing.
Looking for other egg free recipes?
Check out my Pillow Soft Yogurt Buns recipe here!
Few Things to Note
When it comes to bread making, there are many factors that will influence your dough and the end product. Recipes should be used as a guide, as you familiarize yourself with the process and dough.
For instance, your dough may require extra kneading time depending on the flour and its protein content. The method used to knead also needs to be taken into account as some machines work the dough quicker, whilst others may require a bit more kneading time.
Temperature and humidity plays a big part in how your dough rises. The amount of time required to proof your dough also varies depending on where you’re based at. For my second proofing, I usually heat up a cup of water in the microwave for 45 seconds, then proceed to leave my dough inside the microwave to rise for 25-30 minutes.
It’s also very important to try to get to know your oven, as every oven is different. My oven heats up quickly so when a recipe calls for 180°C, I sometimes drop it down to 160-170°C. Keep an eye out as the bread is baking. Adjust either the baking temperature or duration according to how your oven behaves.
Have you tried this recipe?
IF YOU MADE THIS RECIPE, I’D LOVE TO SEE HOW IT WENT!
TAG ME ON INSTAGRAM @THEBAKEANISTA SO I CAN HAVE A LOOK
AND RE-POST ON MY IG STORIES!

This recipe is good! Goes well with ice cream just like those good old days where u enjoy ice cream in a soft pillow felt bread. I am blown off my its simplicity bread making! Thanks for sharing this gem recipe.
Ice cream and bread sounds like a perfect combination! Glad you enjoy this recipe. 🙂
This recipe is so simple and so are the ingredients. One of my go-to bread recipe if I’m too lazy to wait for the tangzhong to cool down. Tried most of the bread recipes found here because it’s so fool-proof 😄
Happy New year to you and your family.
Here’s to more awesome recipes in the future🥂
Thank you for loving the recipes on The Bakeanista! Glad to hear you find them fool-proof. Makes the effort put into the blog so worth while! Happy New Year to you too, Fatin! ❤️
I’m so thankful for this recipe. The steps and instructions are so clear to follow.
I shout for joy when I see my bread standing tall in the oven. And it’s real yum!
Thank you for your time and efforts you put in this blog. Keep up the good work 👍
I’m so happy to hear that! It’s these feedback that keeps me going.
This recipe is good for those who cannot have too much protein in their diet because there is no egg nor milk. However, even without these two ingredients, this hailam roti turned out very well. My husband said this is the best bread and he enjoyed it so much because it is chewy yet soft. This is the highest compliment! I have made so many loaves and this is the first time he said it was very good! Many thanks, Michelle, for sharing this recipe which comes with properly written instructions. 😊
Your highest compliment is mine too! Very glad that this eggless recipe is a hit with your hubby. I know exactly how euphoric it feels when those we love enjoy our bakes. Thank you for your lovely feedback! ❤️
love this recipe and will definitely be on my favorite recipe list👍👍👍 thank you for your sharing Michelle🙏
So glad to hear that! ☺️
Hi, is it normal for the side of the loaf to sink in?
No it isn’t, it could potentially be overproof.
Hi Michelle tqvm for sharing the Hailam Kopitam Roti. I bake it using the Bread Machine all the way & it turn out beautifully. Love the recipe. Maybe next time I shape & bake in the oven to get crispy crust like yours
I am glad it worked well for you too! If you adjust to have a darker crust on your BM, you may be able to get a crispy crust as well. 🙂
Thanks for the detailed recipe! It helped a lot for newbie like me 🙂 this roti is handy especially when I don’t have eggs or milk in the house. It turned out as good as other bread recipe.
Thanks Michelle for sharing this recipe! I can bake my own Hailam bread at home now. Was craving for it since it’s kinda difficult to find in Sarawak here. Love it so much! 😋😋
Plus point it only calls for staple ingredients so you can bake at anytime! ☺️
Love this recipe. Easy to follow and most importantly makes me feel closer to home. Thanks for sharing and Im just so bless to chance upon your Insta and now can have heaps of recipe to try.
The easiest bread recipe to date. So light and fluffy. I slathered on some homemade pandan Kaya and enjoyed the bread till the last drop. So delish!
This recipe is extremely simple. I hand knead without any machine and turns out to be perfectly fine too, we all love it so much!
Highly recommend for anyone craving for a traditional loaf and this can be made with very simple ingredients. Even beginners is able to follow.
Thanks Michelle for sharing these recipes with us. I have a couple of questions:
1. Is 180C convection or normal temp?
2. If I would like to bake with lid, when do I put the lid on and do I bake it for the same time?
Much thanks in advance for taking the time to answer my questions.
Hi Patricia! I use 180’C with top and bottom heat, with fan. If you would like to bake with lid, put it on after second proofing before it goes into the oven and increase temp to 190’C for the initial 25 mins and reducing back to 180’C for the remaining time.
Thanks so much for your prompt response, Michelle!!
Hi,
Thank you for the recipe. I’ve been making this bread using your recipe every odd days. It’s a win for me and my family loved it so much. Now I wonder if I can add in cocoa powder to imitate the old town white coffee bread toast.
Hi Nini, thank you for your feedback. It is possible to add flavoring however if you add cocoa powder though, it will be a chocolate loaf. I haven’t tried the one at old town white coffee shop, but if you want a coffee loaf, you may want to consider adding coffee paste instead.
Hi Michelle, as usual your recipes are spot on. I’ve always been skeptical how a bread recipe with so simple ingredients can turn out soft like I like them to be. But because it’s you, I gave it a shot and loved the outcome! Thanks for sharing all the great recipes!
Thank you for the trust you have in the recipes that I share! <3
Have you tried doubling the recipe for a bigger loaf and using a bread machine all the way?
No I have not doubled the recipe before, but I have tried baking it all the way in the bread machine. Turned out alright, but I still prefer to remove to shape and baked in the oven.
Hi Michelle, what kind of sugar should we use? Can it be brown sugar or light brown sugar?
Hi Theresa, preferably castor sugar. If you wish to use brown sugar, use finer ones would be better.
Hi, may I know how long this bread can stay soft for please? Thank you!
Hi Joanna, I would say up to 2 days only. If you’re looking for a bread that would stay fresher for longer, try the Tangzhong Milk Bread or pillowy soft yogurt bread.
Hi Michelle, thank you for the recipe. It was really a keeper. I have tried baking it and my daughter really like the soft texture however, noted the middle section of the load was a little dense was ot due to the way i rolled the dough? Also after cooling and slicing the bread the skin was relu tough. Anyway to make the skin ‘softer’ ?
Thanks
Hi Jenny, dense in the middle could be a few things – over proof or under baked are some of the common causes. For softer skin, try covering the bread with a clean cloth after it’s removed from oven – the condensation will help retain the moisture and create a softer skin compared to bread just left to cool openly on wire rack.
Thanks Michelle… will try the tips given..👍🏻👍🏻
Hi Michelle – thanks for this hailam bread recipe! I have recently tried this recipe to go with some kaya that I made, and it’s the perfect bread for kaya + butter toast. It was such a simple recipe and the result was great. Definitely a keeper 🙂
Hi, LOVE this recipe and my bread comes out perfect each time! Wondering if can add wholemeal flour and in what percentage to make it into a wholemeal loaf?
We can substitute about 20% wholemeal flour, however the hydration may need to be tweaked. How about try the other wholemeal bread recipes I have?
Tangzhong Wholemeal Bread: https://thebakeanista.com/tangzhong-wholemeal-bread/
Eggless and Sugar Free Wholemeal Bread: https://thebakeanista.com/eggless-sugar-free-wholemeal-bread/
Can I substitute butter with oil?
Can definitely try, but it would be much richer.
Hey
Are you using instant dried yeast. ?
Yes I use instant dried yeast