Eggless and Sugar Free Wholemeal Bread
I am always on the hunt for better, healthier bread recipes for my family. For some time, my Tangzhong Wholemeal Bread recipe has been my favourite go-to recipe. However, there are days when I don’t want the hassle of preparing the tangzhong. So while we are excluding tangzhong, let’s also go without the usual suspects – eggs and refined sugar. Looking for a healthier bread, this is probably it. For those that have egg intolerance, this is definitely it!
Now I know you are probably doubting by omitting refined sugar, eggs and even tangzhong, will the bread still be soft and tasty? Truth be told, it is not far off at all. I noticed that this bread is probably just as soft as its tangzhong counterpart, the only issue is that it doesn’t STAY soft as long. So if you are going to consume it within 24 hours, there really isn’t much of a difference. The key here is to autolyse your dough, which I will explain below.
A Tried and True Healthy Bread
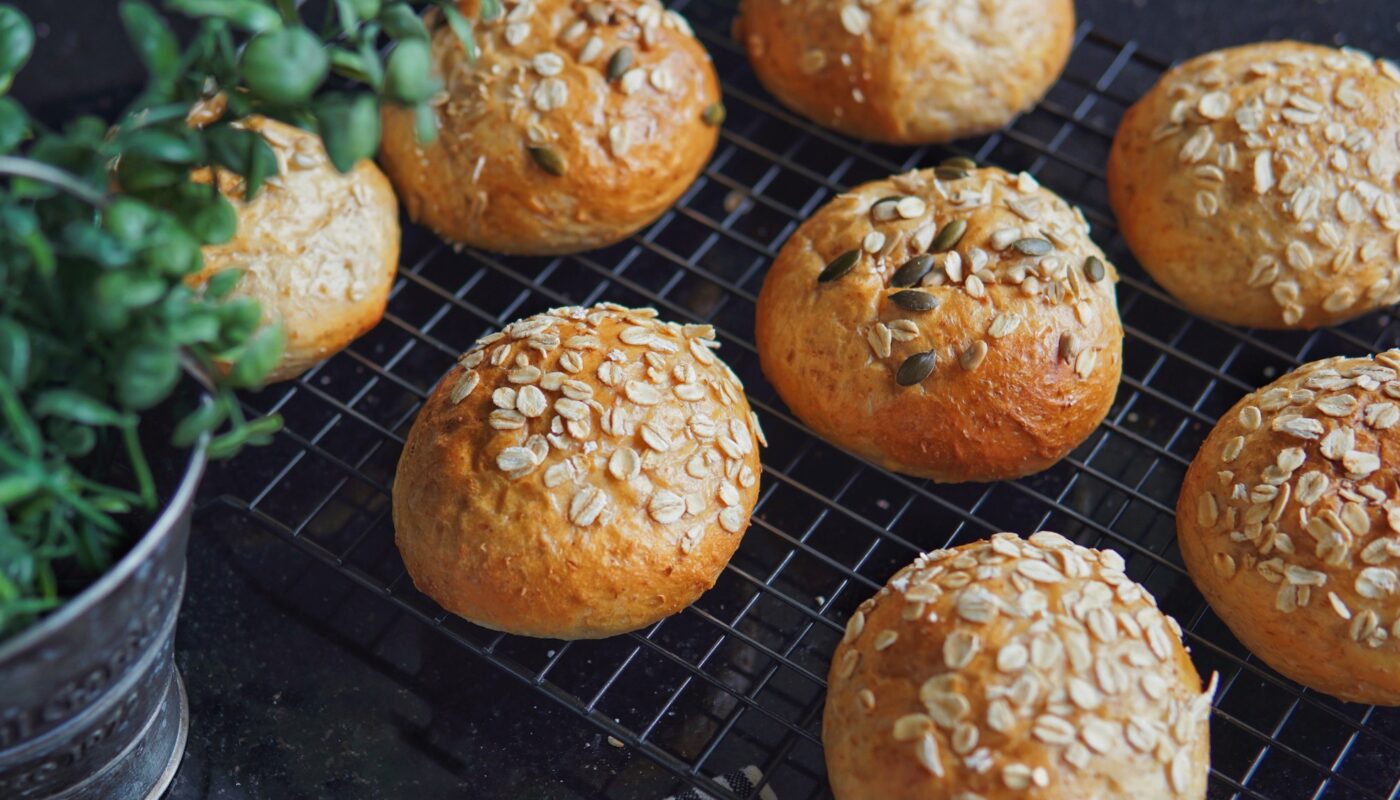
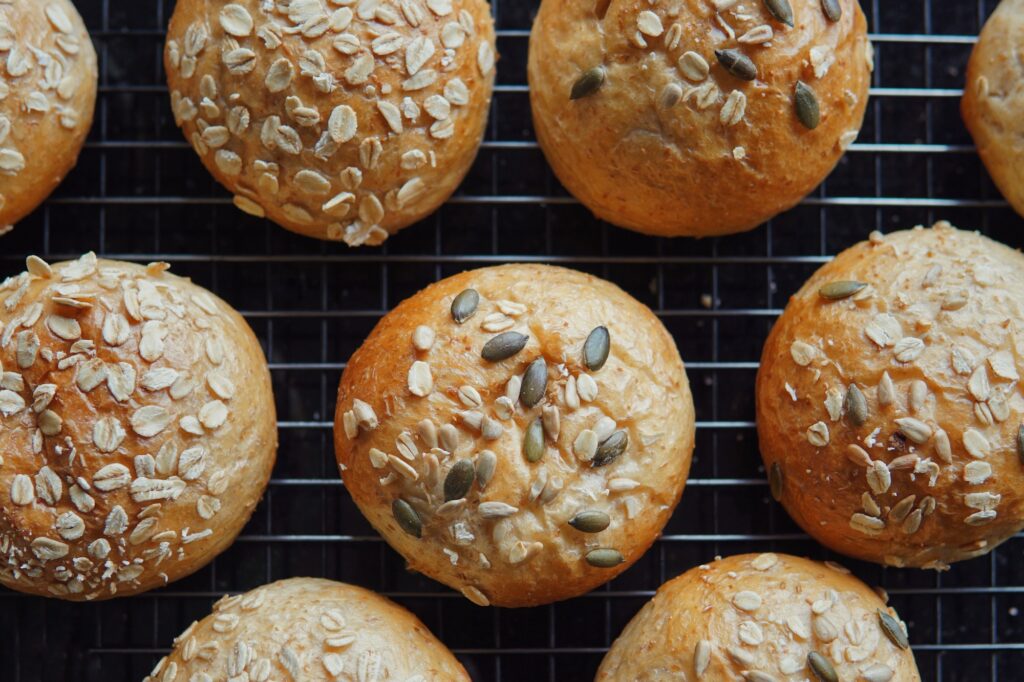
By incorporating some wholemeal into the mix, you’d get a good dose of dietary fiber. People tend to feel wholemeal bread is rougher and not as delicious as white bread. I do agree to a certain extent, so what I love to do to make up for taste is to sprinkle on some nutritious rolled oats, seeds or nuts. It adds more character and crunch while still adhering to the “healthy” theme. I personally prefer pumpkin and sunflower seeds as they add a nice fragrance to the buns once toasted, but it’s really up to you.
For those looking to cut down on refined sugar intake, this sugar free wholemeal bread uses honey as a healthier substitute. Honey is “natural”, plus it has a lower glycemic index value than refined sugar, meaning it doesn’t raise your blood sugar levels as much as sugar.
What is autolyse?
Autolyse is a pre-soak technique that requires no skills whatsoever, but makes a world of magical difference to the texture of your bread when applied. It is as simple as roughly mixing the flour in liquid, then letting it rest for a minimum of 15-20 minutes.
As you allow the mixture to rest, the liquid is being absorbed by the flour, activating the enzymes and gluten strands is developed, leading to better gluten structure and gas retention. Starch is broken down into simple sugars that the yeast feeds on. This takes place too when making bread the normal way, but the autolyse method ensures this process is done even before we start kneading. When we restart the kneading process, the dough attains a smooth texture much quicker.
You may opt to autolyse with or without yeast already included, but not with salt; as it is a stabilising agent that would slow down the enzyme activity.
Can I skip the autolysing step?
Even if you are pressed for time, I would recommend to at least allow the mixture to rest for at least 15-20 minutes at minimum. This rest period will assist in making your dough become smoother and more elastic. Autolysis in some cases, will also help better the flavour and aroma of the finished product, so don’t skip it if you can!
What happens if I leave the dough to autolyse for too long?
No worries at all, letting the dough autolyse for 20-60 minutes is fine. In fact, to a certain extent, the longer the autolysis, the better as this helps create a more extensible and stretchy dough. This equates to faster dough expansion during oven spring = better volume! I don’t suggest leaving the dough to autolyse for anything beyond 3 hours though.
Step-by-Step Video Guide
I’ve put together a step-by-step video guiding you from start to finish. Similar to my written recipe below, in this video, I have also included two shaping methods – for buns and loaf.
If you find the video helpful, please do like and subscribe to my Youtube channel for more videos. If you do try this recipe, do tag me @thebakeanista on Instagram or leave a comment below to let me know how you went.
Refined Sugar Free & Eggless Wholemeal Bread
Ingredients
(A)
- 235 g high protein bread flour
- 60 g wholemeal flour
- 25 g honey
- 60 g whipping cream substitute option in notes
- 180 g milk
- 1 tbsp milk powder optional
(B)
- 1 tsp yeast
- ½ tsp salt
- 24 g unsalted butter room temperature
- egg wash optional
Instructions
Please note that I have included two methods below for dough kneading using either conventional or Thermomix method so do take note of the sub-headings. There are also two variations of shaping – either into buns or loaf.
Kneading – Conventional Method
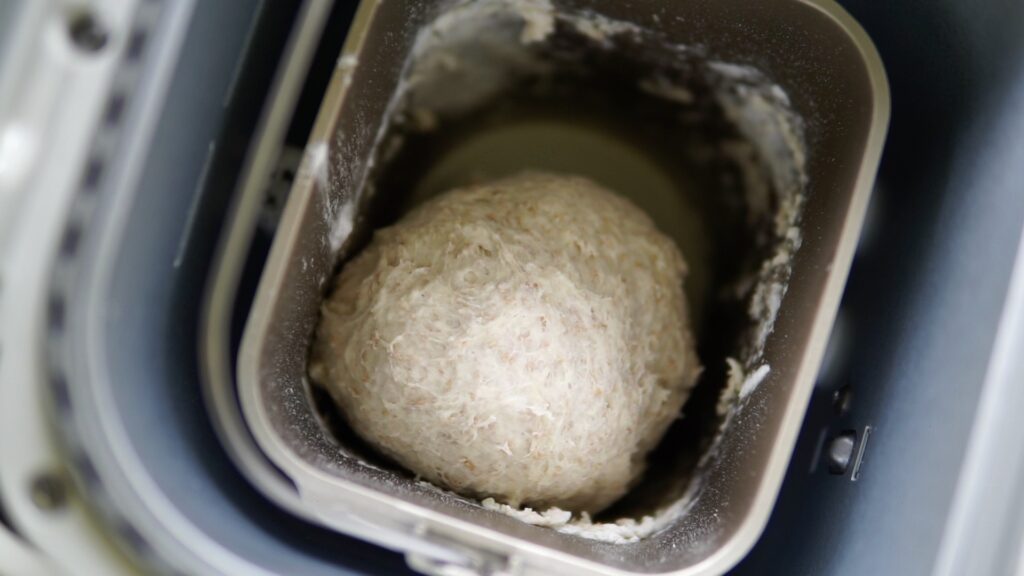
- Place all ingredients from (A) into mixing bowl and mix together until well combined. If using a bread machine, select "dough" mode, let knead for 3-5 minutes until mixture comes together, then stop the machine. Let rest covered for at least 20mins to autolyse (refer to notes in post above about autolyse).
- You may opt to add yeast directly in, or mix yeast with ½ tbsp water (at room temperature) then add into dough mixture and knead using dough hook attachment for 2-3 minutes. If using bread machine, restart "dough" mode, let knead for 3 minutes.
- Add salt, knead for a further 2-3 minutes. If you're using bread machine, the dough mode might rest at some point, so do ensure yeast is well combined before adding salt.
- Add butter and knead on stand mixer for 12-15 minutes until achieve window pane. For bread machine users, add butter and let kneading cycle is complete.
Kneading – Thermomix Method
- Place all ingredients from (A) into mixing bowl – mix for 1 min/Sp3. Let rest covered for at least 20 minutes to autolyse (refer to notes in post above about autolyse).
- You may opt to add yeast directly in, or mix yeast with ½ tbsp water (at room temperature) then add into dough mixture. Knead for 1.5 mins.
- Add salt – knead 40 seconds.
- Add butter and let knead for 4 mins.
Bulk Fermentation
- Transfer dough to a pastry mat, shape into ball and let proof in a warm place covered loosely with clingwrap/damp towel until doubled in size (approx 45-60 mins).
Shaping & Proofing
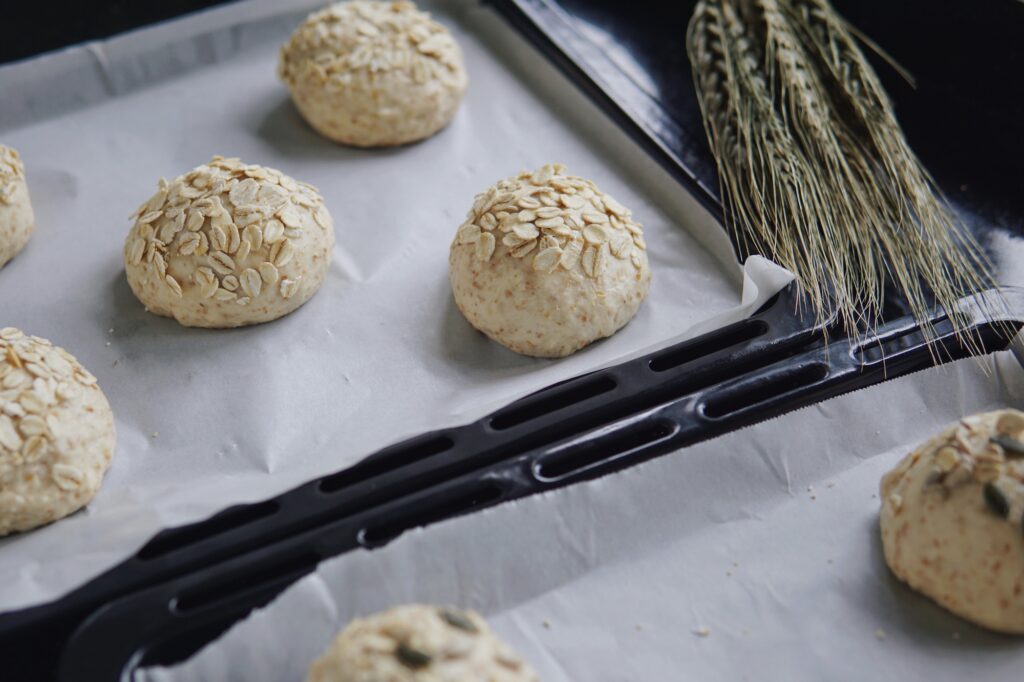
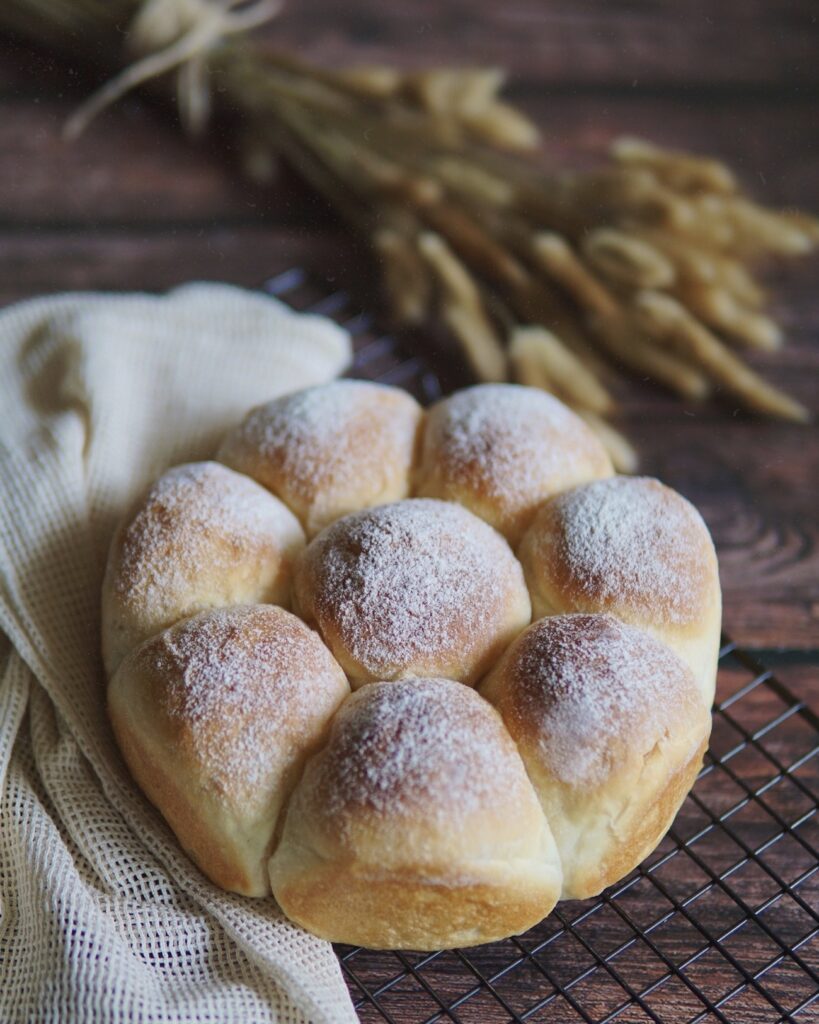
- If shaping into buns:Punch down dough to deflate. Divide dough into 10 equal portions (approx 60g each) and roll into round balls. View video tutorial here from 5:16 onwards for how to shape into round balls. Line and grease baking sheet and place dough balls 1.5 inches apart. You can also divide dough into 9 equal portions – they will fit snugly into an 8-inch square baking pan.[Optional] If you would like to top buns with seeds and nuts, brush dough balls with just egg white or egg wash and roll on inclusions before second proofing. If you opt to do this, there's no need for egg wash before baking.Let proof for approximately 40mins until doubled in size. During last 15 minutes, preheat oven to 180°C. (TIP: Setting your timer to go off after 25 minutes works best for me!)Spray dough with icy cold water (or egg wash) and bake at 180°C for 15-20 minutes until golden brown.Remove buns from oven and allow to cool on a cooling rack. You may enjoy them warm if you like – they go well with a spread of butter! 😉
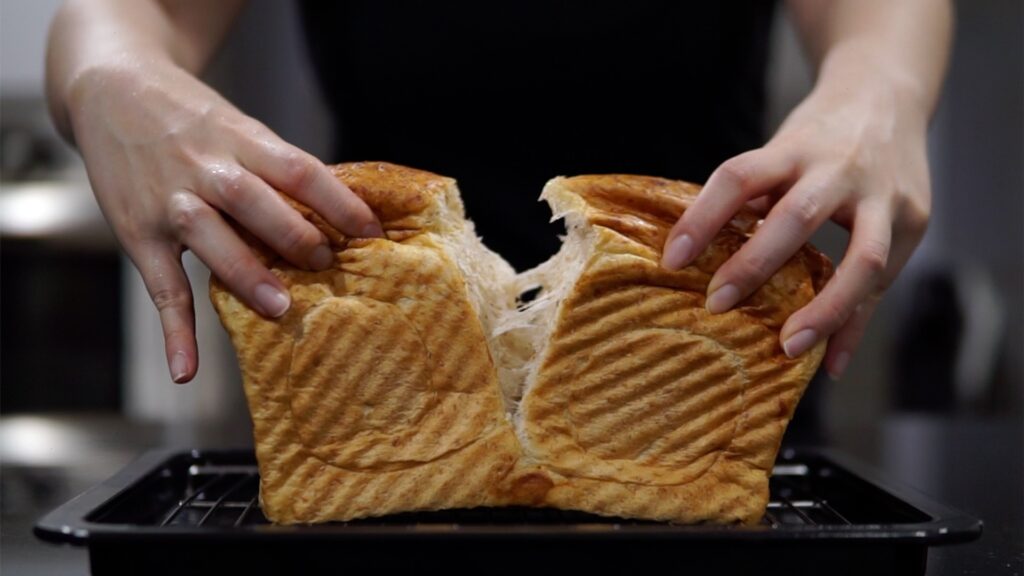
- If shaping into loaf:Punch down dough to deflate. Divide dough into 2 or 3 equal portions and roll into a round shaped balls – let rest for 10-15 minutes for gluten to relax so the dough will be easier to handle.To shape each mini loaf, flatten a ball into a long oval shape. Fold 1/3 from right edge to the middle and press. Fold 1/3 from left edge to the middle and press lightly. Roll it out slightly and roll into a cylinder.Arrange dough logs, seam side down in a 450g Pullman Loaf Tin (8x4x4") and let proof for approximately 40mins until dough fills up 80% of the tin. During last 15 minutes, preheat oven to 180°C. (TIP: Setting your timer to go off after 25 minutes works best for me!)Spray dough with icy cold water (or egg wash) and bake at 180°C for 30-35 minutes until golden brown. Remove bread from tin and allow to cool completely on a cooling rack for at least an hour before slicing and serving.
Notes
Can I omit milk powder?
Yes, you may opt to omit the milk powder. But here’s why I’d recommend adding it in: Milk powder adds fats, protein and flavour to the dough, that not only makes the dough richer and creamier in taste, but also helps dough rise higher. The addition of milk powder will also help yield a more tender crumb texture. Do not substitute milk powder with liquid milk as it is adding extra hydration to the dough, which may alter the texture of the finished product. In other words, adding milk powder gives you the same benefits of milk without the extra liquid, with a more concentrated % of milk sugar and protein that will benefit the dough.Can I substitute whipping cream with milk?
No, both whipping cream and milk have different % of fats etc. Instead, what you can do for a lighter, and healthier option is to substitute whipping cream with evaporated milk using a 1:1 ratio.
Help! My dough is too sticky!
For bread maker / stand mixer users, dough should be smooth 8-10 minutes after you add butter. If your dough is too sticky to manage, you may add 1 tbsp of flour at a time. For Thermomix users, if you experience a stickier dough, add 1 tbsp of flour at a time and knead for 15-20 seconds until incorporated. Lightly oil your hands (and the pastry mat depending on how sticky your dough is) using neutral flavoured oil or butter to shape dough into a ball. Apply the chafing technique by cupping your hands gently around the dough, apply a light, downwards pressure to the sides whilst simultaneously rotating the dough in a circular clockwise motion. Continue doing so until a smooth, even, and round ball is formed.Which oven rack and what oven setting should I use?
I suggest the second rack from bottom. I bake using top and bottom heat, with fan.How do I know if my bread is well proofed and ready to be baked?
You may perform the visual test to check. Lightly press the surface of the proofed dough with the tip of your finger for about 2 seconds and observe how fast the dough bounces back up.- UNDER-PROOF: If it bounces back up too fast without any indentation, it isn’t ready yet, so give it more time.
- READY TO BAKE: It is supposed to bounce back up slowly, about halfway up and leave a slight indent.
- OVER-PROOFED: If the indent remains without bouncing back up, yes it is over-proofed, but don’t worry! You can still save it.
How to store bread?
Ensure to store bread in airtight container or ziplock bag so the bread can stay soft and last for up to 2-3 days at room temperature.Looking for other egg free bread recipes?
Check out my Pillowy Soft Yogurt Buns recipe here or my Hailam Kopitiam Bread recipe here which is not only egg free but also milk free.
Soft Yogurt Buns 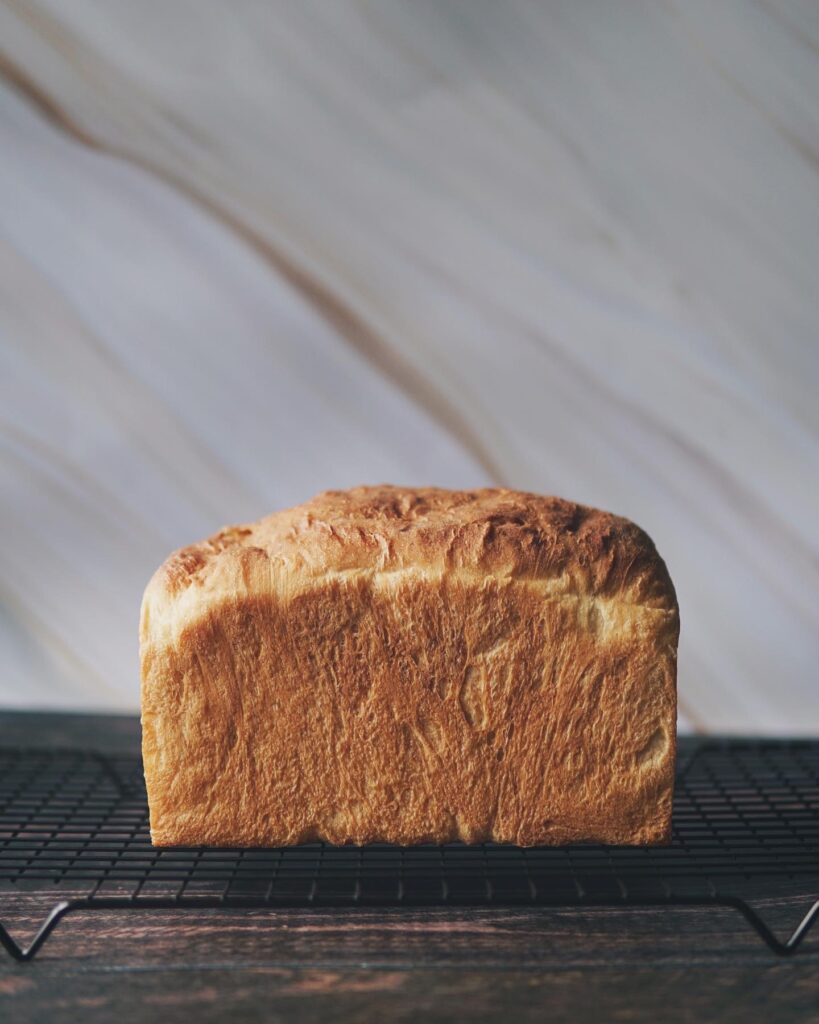
Hailam Benggali Bread
Have you tried this recipe?
IF YOU MADE THIS RECIPE, I’D LOVE TO SEE HOW IT WENT!
TAG ME ON INSTAGRAM @THEBAKEANISTA SO I CAN HAVE A LOOK AND RE-POST ON MY IG STORIES!
IF YOU ENJOYED THIS RECIPE, YOU MAY WANT TO CHECK OUT MY RECIPE INDEX FOR OTHER DELICIOUS RECIPES.


Hi can I just use whole wheat flour instead of the two flour mentioned and can I just use the bread machine to rise and bake if yes then what setting should I be using. I have cuisinart compact automatic bread maker cbk 110c thanks
If your whole wheat flour’s protein content is as high as the generic bread flour, you can consider doing so. But you may need to also adjust the other ingredients as all flour have different absorbency level etc. I won’t be able to advise you the ratio as I’ve never personally tried a 100% Wholemeal bread.
As for the bread machine, I am using a different brand so I’m not sure what mode you should use. Perhaps dough mode for the very first step before autolyse as you only need to roughly mix for 2-3 mins, then I would use soft dough mode if it’s my machine.
Tried making this and turns out as good! Always love healthier version recipe and never goes wrong with Michelle’s recipe🥰
Thank you Joeey for the kind words! ❤️ if I could, I would double tap your feedback. ☺️
Love this recipe. The outcome is exactly same as the one I bought from “Lavender”. Thank you michelle for the great recipe. All my family members love it 🙂
Love this recipe!The outcome is exactly the same as my favourite bun from “Lavender”. Thank you michelle for this great recipe. All my family members love it so much 🙂
So happy to hear that you find it on par to Lavender’s bread! 😍
This recipe is a keeper. The buns turn out soft and yummy! I have learnt a lot from the explanation given too. Thanks so much for sharing. My family loves the buns very much.
Thank you Jaclyn for your lovely feedback! I am glad you have found a go-to for your family. 🙂